How To Use Facebook Live: Tips & Best Practices
Want to start streaming on Facebook? Don’t start until you’ve read these essential Facebook Live tips!
Facebook Live is Facebook’s answer to Twitch and YouTube Live. It lets creators live broadcast videos directly to the social media platform and interact with their audience in real-time.
In this post, we’ll be showing you how to leverage the full potential of Facebook Live.
First, we’ll start with the basics of how to use it. Then, we’ll look at some Facebook Live tips and best practices that will help you to grow your audience and make sure your streams are a success.
Now, let’s get started.
How to use Facebook Live: the basics
With Facebook Live, you can live stream to Pages, groups, profiles, or events. There are two main ways to start a live stream:
- Through the Facebook app on your mobile device
- Through Live Producer on your desktop computer or laptop
The process and available features vary depending on where you’re live streaming to and the device you use. Some advanced features are only available when using Live Producer on a desktop web browser.
You’ll also need to use Live Producer if you want to broadcast using high-end production equipment and streaming software like OBS. So if you’re serious about streaming professionally, this is probably the route you’ll want to go down.
That said, we’ll quickly cover the basic process of how to go live on both types of devices.
How to use Facebook Live on mobile
You can go live on mobile through the Facebook app or the Creator Studio app. Both of these are available on Android and iOS devices.
To live stream through the Facebook app:
- Go to the profile, group, Page, or event where you want to go live
- From the post composer, click the Live button

- Add a video description and change the settings as required (e.g. you might want to tag friends or check in to a location)
- Click Start Live Video when you’re ready to go.
- Click Finish to end the broadcast
Starting a Live video through the Creator Studio app is very similar:
- Open the app and navigate to either the Home or Posts tab
- Click the pen and paper icon in the top right of the screen
- Choose the Live post option
- Add your video description and change any settings as required.
- Click Start Live Video to begin
- Click Finish to end the broadcast
How to use Facebook Live on a computer
If you want to go live on your laptop or desktop computer, you’ll need to use Live Producer. Here’s how to do it:
- Open your web browser and log in to Facebook
- Under the What’s on your mind? box, click Live video and you’ll be redirected to Live Producer.
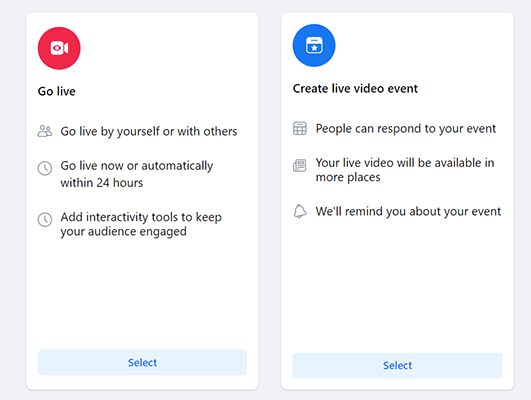
- Choose whether you want to Go live or Create a live video event.
- Connect a video source, choose where you want to post it, add a description, and change any other settings as necessary.
- Click Go Live from the bottom of the left-hand sidebar when you’re ready
Creating a great Facebook Live stream
Now that’s covered, let’s look at some best practices that can help to make your streams as good as possible and maximize your reach and engagement.
Let’s start with some tips to help with the hosting side of things.
1. Invest in the right equipment
While it’s true that you can live stream with nothing more than your smartphone camera, it’s a much better idea to invest in your success and purchase some professional recording equipment before you get started.
Having the right equipment and a professional setup beforehand will make you seem less amateurish and lead to higher-quality broadcasts—something viewers will appreciate.
Some products you might want to buy include:
- A decent camera or webcam
- Tripod
- Microphone
- Pop filter
- Green screen
- Ring lights (or other lighting solutions)
- Encoder/streaming program (e.g. OBS)
If you’re streaming indoors, it might also be worth decorating your set. Alternatively, you can just use a green screen and add a custom background.
2. Have a plan
Spontaneity is good when it comes to streaming, but you’ll still want to do at least some planning.
Don’t bother writing a word-for-word script (that will just make you seem robotic), but note down a general structure and some key talking points to help guide the conversation. This will make your live streams run smoothly.
3. Run a test before you go live
If I had a dollar for every time I’ve seen a streamer go live with malfunctioning equipment, I’d be a rich man.
The last thing you want is to start broadcasting only to realize your mic isn’t working, or your webcam isn’t recording properly so it’s always worth testing everything out before you start streaming. And an easy way to do that is by turning on the Only me privacy setting.
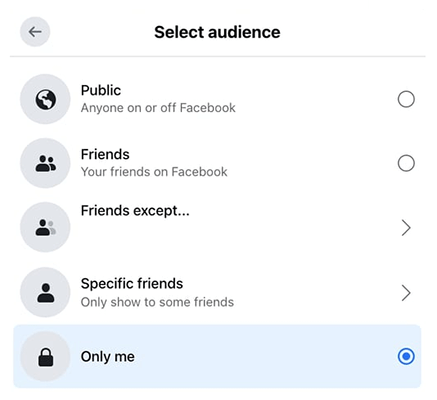
Once you’ve toggled that on, you can play around with live broadcasting without anyone else being able to see it. This is especially useful if it’s your first ever time using Facebook Live and lets you test out how everything works in complete privacy.
4. Start with a hook
Watch time is all-important when it comes to Facebook Live.
Facebook’s algorithm looks at lots of signals to evaluate your stream, and one of those signals is the length of time your viewers watch before clicking away. If you can show the algorithm that viewers are sticking around for a long time on your video, it’ll improve your visibility and reach.
To boost watch time, you have to give your viewers a reason to keep watching. And the best way to do that is with a hook. At the start of your stream, hit them with an attention-grabbing message that draws them in and gets them invested.
For example, you could hint at something exciting to come up, let them know you’re going to be revealing something crazy later on, or promise to give away a prize at the end of the video.
5. Finish with a CTA
The end of your live stream is just as important as the start. And the best way to wrap things up is with a strong call-to-action (CTA).
Your CTA tells your viewers what they should do next. It can be anything that makes sense for your goals. If you’re trying to grow your audience, your CTA could be to ask viewers to like your Facebook page, share your broadcast with their friends, or subscribe for notifications.
6. Reintroduce yourself to new viewers
Unlike on-demand videos, viewers don’t necessarily watch live broadcasts from the beginning to the end. Different viewers tune in at different times, so you can bet a good chunk of your audience will miss the start.
You might only have 10 viewers when you first go live, then 50 five minutes later, and 100 ten minutes later, etc. That’s why it’s a good idea to reintroduce yourself to new viewers periodically.
7. Add interactivity to your streams
Interactivity is incredibly important on Facebook Live. That one-to-one audience interaction is the reason many people choose to watch live broadcasts over on-demand videos, so you should try to make your streams as interactive as possible.
That means engaging with your audience directly. React to comments, ask questions, and pin comments to make the viewers feel like you’re talking with them, not at them. You might also want to use the Front Row feature to highlight your top fans and give them a shout-out.
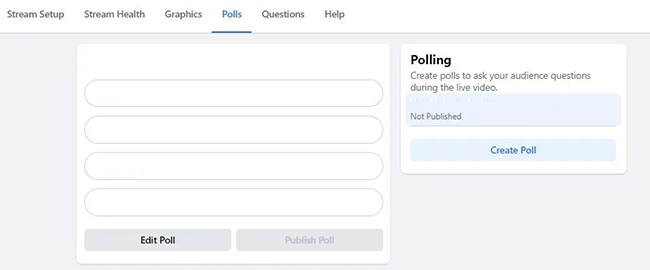
There are also some neat interactive features like Live Polls that can help make your streams even more interactive. Try creating a poll beforehand and then react to your audience’s responses in real-time as you stream.
Aside from giving your viewers what they want, focusing on interaction and engagement can also help you to grow your audience. This is because Facebook monitors video engagement signals and the more engaged your audience is, the higher your broadcast will rank in the News Feed.
8. Go Live with other creators
Facebook’s Live With feature lets you team up with another co-host to broadcast together in a split-screen format. This is a really useful feature as it lets you tap into your co-host’s audience and expand your reach.
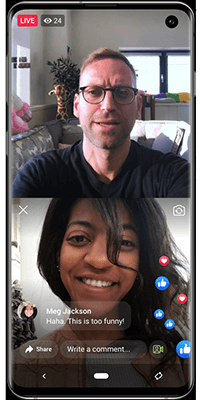
Plus, having someone to talk to while you’re hosting helps keep the conversation flowing smoothly. Two talking heads are better than one!
9. Add moderators to your chat
As your audience gets bigger, your chat can start to get out of hand. Left unchecked, it can become rife with spam, advertisements, and toxic comments that drown out everything else.
This is obviously something you want to avoid. But it can be tough to manage the conversation and keep one eye on chat while you’re busy hosting.
The solution is to designate your most valued and trusted viewers to moderate comments on your behalf. Your moderators can limit who’s allowed to comment and make sure your chat remains a safe, positive space.
10. Use a chatbot
Aside from moderators, you might also want to utilize a chatbot to help manage your live chat. Chatbots are AI-powered programs that interact with viewers on your behalf.
You can use them to do things like answer frequently asked questions with pre-programmed responses, share your stream schedule, automatically promote your next event, etc.
11. Avoid controversial topics
If you want to maximize your viewership, you should probably avoid talking about controversial topics like politics or religion.
While these sorts of subjects certainly drive engagement, they’re also polarizing. Half of your viewers might strongly agree with your opinion, but the other half might take offense and leave your stream. And the goal is to keep as many viewers watching as possible.
12. Focus on longer broadcasts
You can stay live for up to 8 hours but at the very least, you should make sure to live stream for at least 10 minutes. But ideally, you should aim for half an hour or more. This will give more viewers a chance to join. Facebook Live statistics also show that broadcasts that last for over an hour have higher engagement rates.
13. Use overlays (but not too many)
Overlays are the elements that sit on top of your video feed, like custom graphics and logos. Professional live streamers tend to use overlays to enhance the appearance of their streams and make their broadcasts more interesting and interactive—just be careful that you don’t overdo it.
Your viewers don’t need to be able to see who last week’s top donors were, or who today’s new followers are. And having too many overlays can make your broadcast look messy. You could start with eye-catching alerts and go from there.
Promoting your Facebook Live streams
Next, let’s look at some tips to help you promote your Facebook Live streams and grow your audience.
14. Share your stream
The more channels viewers can access your Facebook Live stream through, the greater your reach will be—so share it far and wide.
For example, you can use the Live in Stories feature to share your Facebook Live broadcast directly to Facebook Stories as well as on your Page, group, event, etc.
15. Consider multi-streaming
Another way to maximize your reach is to broadcast to different platforms simultaneously. In addition to Facebook Live, you could stream to Twitch and YouTube live at the same time. This is called multi-streaming, and you’ll need professional streaming software to do it.
16. Edit your saved live streams
Once your live stream finishes, a recording will be automatically posted to your timeline and saved in your Facebook video library. You can get more mileage out of your livestreams by repurposing this video-on-demand (VOD) version.
The first thing you’re going to want to do is to click Edit video and change the thumbnail. An eye-catching custom thumbnail will improve your click rate dramatically.
Then, you might want to use the clipping tool to cut out the boring parts and create highlight reels with the best bits from your stream.
Make sure you cut out the intro because Facebook News Feeds auto plays videos as the viewer scrolls, so you want to get right to the action straight away.
17. Upload your highlight reels to other platforms
Once you’ve edited your live stream recording (see above) to create a highlight reel, download it to your computer and upload it to other platforms, like YouTube, TikTok, and Instagram Reels.
Then, add a link in the video description to your Facebook Page and invite viewers to tune in when you next go live. Targeting multiple social networks will help you to grow your audience quickly.
18. Pin your live video to the top of your page
You should always pin your live video to the top of your News Feed. This will help it to get more traction as it’s the first thing visitors will see when they open your page.
19. Live stream a giveaway
This is a great marketing tactic for new streamers that want to gain some momentum. You can use a social media contest tool like SweepWidget to set up a prize giveaway in which people have to like your Facebook Page or share your live stream in order to enter.
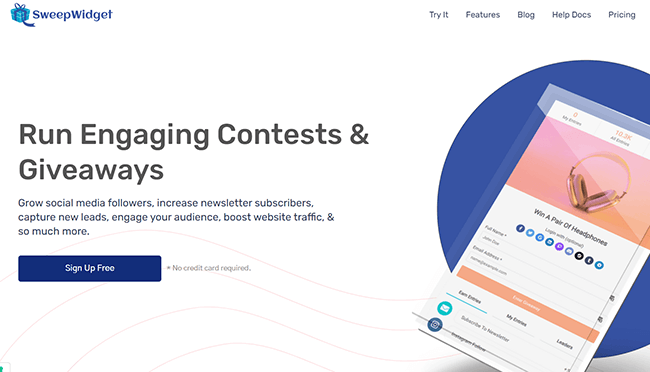
And then, you can announce the winner when you go live to encourage contest entrants to watch.
If you can’t think of a prize you think people would want, you could consider partnering up with a brand and offering their products as a prize.
Related: 8 Proven Facebook Giveaway Ideas To Generate Traffic, And Sales
20. Avoid using copyright materials
Using copyrighted audio and video in your streams can get you shadow-banned and eliminate the reach of your page so that no one is notified when you go live. That’s why it’s important to only use music that you’re licensed to use. You can get royalty-free licensed music through sites like Epidemic Sounds, etc.
21. Avoid shady marketing practices.
Lots of new live streamers make the mistake of using follow-for-follow schemes—or worse, paying for view bots—to try to build their audience quickly.
Unfortunately, these kinds of shady practices just don’t work.
The problem is that these methods artificially inflate your view or follower count but don’t increase watch time and engagement. This sends the wrong signals to the Facebook algorithm and can negatively impact your reach.
22. Analyze your performance
If you want to grow, it’s important to analyze your performance over time and gather insights that will help you to improve. Fortunately, Facebook has a pretty great analytics tool that you can use to do just that.
To analyze your Facebook Live broadcasts, go to the Insights tab of your page.
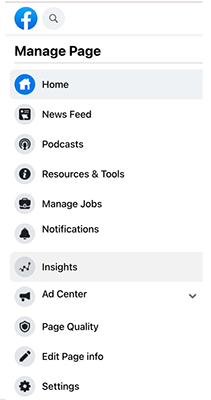
Then, select Videos > Top Videos and choose the Facebook Live video that you want to analyze.
Here, you’ll be able to analyze metrics like minutes viewed, unique viewers, average video completion rate, engagements, peak live viewers, people reached, average watch time, etc. You can also click any metric to see how it changed over time while you were live.
23. Be consistent
One last—and perhaps the most important—tip for growing your Facebook Live audience is to be consistent. If you go live at the same time and day every week, your regular viewers will know what to expect, and watching will become part of their daily routine.
How to monetize Facebook Live
Finally, let’s look at some tips on how to monetize your Facebook Live audience.
24. Host paid events
One way to make money from Facebook Live is to set up paid online events. You can limit distribution and only allow access to those who have purchased admission and registered to attend.
Just be aware that the Paid Online Events feature is still being rolled out and is only available to eligible creators in select markets.
25. Utilize Live Shopping
If you have products to sell, you can sign up for Facebook Shops and create a product playlist in the Commerce Manager to feature during your live stream.
You can tag products and link them to your eCommerce store so that viewers can click on products they see in your live broadcasts to head to your store and buy them.
26. Add a Donate button
If you want to raise money for a good cause, you can add a Donate button to your Facebook Live videos through Live Producer. Viewers can click it to donate to a non-profit or charitable organization during the stream, and 100% of the donations go straight to the charity.
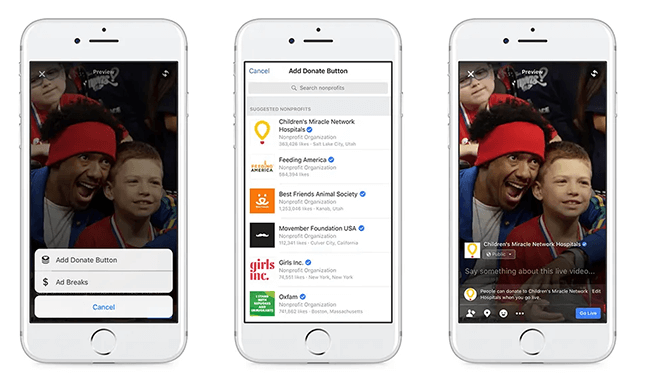
Unfortunately, this fundraising feature isn’t available in all markets yet, so check to make sure it’s available in your region first.
27. Create your own paid community space
Live streaming on Facebook is a great way to build your own community—but you don’t have to keep your community exclusively on Facebook.
You could use a platform like Podia to set up a members-only community space outside of the social media platform and require viewers to pay a monthly subscription fee to access it.
As an incentive, you could release exclusive video content to your Podia community and host Q&A discussions, etc.
28. Build a mailing list
Facebook Live is a rented marketing channel. Meta essentially owns your audience while they’re on Facebook, which limits your monetization opportunities.
That’s why it makes sense to move your audience over to an owned marketing channel like email as soon as possible. The best way to do that is to build a landing page with an email opt-in form, add a featured link to that page in your live streams, and ask your viewers to click the link and sign up for your newsletter.
Once you’ve built your mailing list, you can monetize it by promoting affiliate offers, selling products, etc. And you can loop in your email subscribers when you release a new stream to help your broadcasts gain more traction.
Related: The Definitive Guide To Growing Your Email List
Final thoughts
That concludes our in-depth guide on how to use Facebook Live. We hope these tips will take your Facebook marketing strategy to the next level.
If you want to learn more about Facebook or live streaming in general, here are some other posts you might enjoy: