How To Create A Facebook Marketing Strategy (Beginner’s Guide)

Want to learn how to create a winning Facebook marketing strategy? You’re in the right place.
As the most used social media network in the world, Facebook is still an essential marketing channel for businesses of all sizes. You can use it to boost brand awareness, expand your reach, improve visibility, and generate new leads for your business.
And the first step in that process is to put together a strategy. To that end, we’ve put together this comprehensive guide on creating a Facebook marketing strategy that works.
Let’s get into it.
Step 1: Set up your Facebook Page (& optimize it)
Step number one is to make sure you’ve set up a Facebook Page for your business.
This is an essential first step as you won’t be able to advertise, track performance, or generally market your business on Facebook without one.
You’ll also need to optimize your business Facebook Page in order to maximize its visibility and conversion rate.
How to get started
To create a page, log in to your personal Facebook profile and tap on your profile picture to open the menu. Then, click Pages > Create.
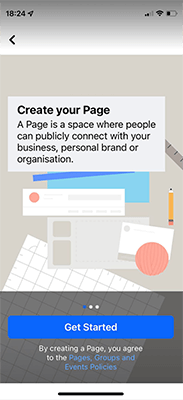
Next, enter a name for your Facebook business page (usually, you’ll just want to use your brand name), select a category, and hit Create.
Now your page is set up, you need to fill it out with content. Upload your logo as a profile picture and an eye-catching, on-brand cover photo. Here’s what ours looks like:
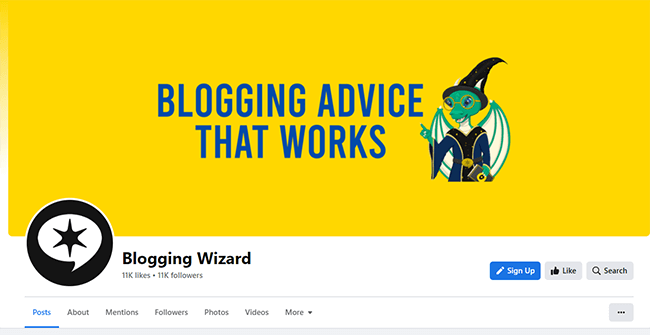
Then, fill out your bio, set a custom URL, and add your contact information, business location, operating hours, and all the other stuff your customers/audience needs to know.
You’ll also need to choose an action button. This is a super important part of the page as it’s essentially a clickable CTA that helps drive conversions. There are lots of choices, and the best action button for you will depend on your goals.
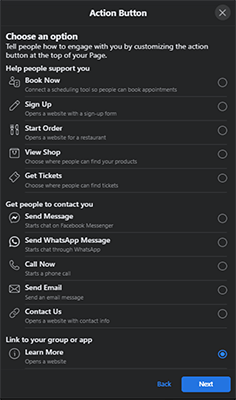
For example, if your goal from Facebook marketing is to generate leads, you might have it set to ‘Book Now’ and connected to your appointment booking tool.
If your goal is to build your email list, you might have it set to ‘Sign Up’ and linked to your opt-in page.
If your goal is to generate sales, you might have it set to ‘View shop’ and connected to your online store. You get the idea
Finally, create a pinned post. This will be the first post that Facebook users who visit your page will see as they scroll down the page, so use it to highlight the most important marketing message you want to communicate with your audience (e.g. a specific offer, promotion, FAQ, or product).
Bonus tip: Established brands and public figures might want to apply to have their Facebook pages verified. This is worth doing as verified pages get a blue checkmark next to their name, which serves as fantastic social proof and helps boost your credibility and promote trust.
Step 2: Set up your Meta Business Suite account
The next thing you’re going to need to do is set up your Meta Business Suite Account.
This is another essential preliminary step as Meta Business Suite is where you go to boost posts and run paid ad campaigns on Facebook—two tactics that will likely play an important part in your Facebook marketing strategy.
Even if you’re focusing purely on organic content and not planning on running ads at all, it’s still worth setting up a Meta Business Suite account as it’ll give you access to a bunch of useful analytics, planning, inbox management, and testing tools.
How to get started
Head to business.facebook.com and log in or click Create an account to get started.
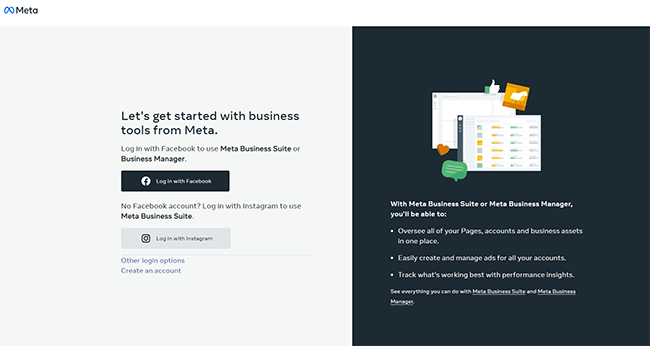
Next, follow the on-screen instructions to set your account up. You’ll need to enter some details about your business, like your business name and email address.
Once you’re in, click Settings from the bottom left of your Meta Business Suite dashboard. Then go to Business settings > Pages > Add to connect your page.
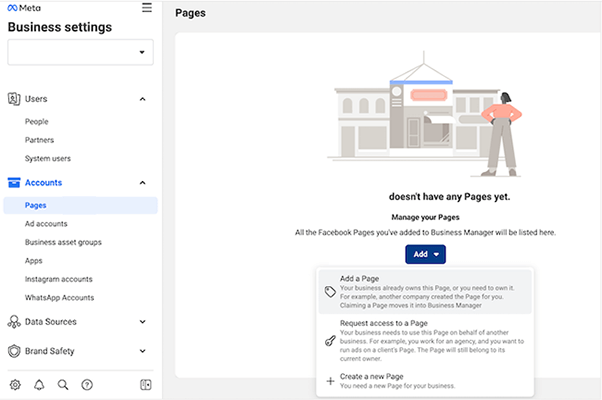
After that, go to Accounts > Ad account > Add and follow the instructions to set up your Facebook ad account. You’ll use this to run ad campaigns later.
Bonus tip: It may also be worth installing the Meta Pixel on your website at this stage. The pixel is a little snippet of code that collects data about what your website visitors do on your site and then sends that information to Facebook.
You can use this data to retarget those visitors in your Facebook ads. For example, if someone has visited a particular product page on your website, you can automatically send them a Facebook ad promoting that same product later.
You can set up the pixel from Meta Business Suite. Go to Data Sources > Pixels > Add, then either use an integration or copy-paste a code snippet to your site to set it up.
Step 3: Define your goals
Now we’ve taken care of the preliminary stuff, we can start actually putting together our marketing strategy.
And the first step in that process is clearly defining what exactly we’re trying to achieve through our Facebook marketing efforts.
And no, ‘my goal is to promote my business’ isn’t going to cut it.
We need to set specific, measurable, achievable, relevant, and time-bound goals—SMART goals.
And we need to have a plan in place for how we’re going to measure progress toward those goals. That usually means defining our KPIs (key performance indicators).
How to get started
First, decide what your overarching goals are. Here’s an example of some goals different businesses might want to aim for:
- Build brand awareness
- Generate leads
- Drive sales
- Improve customer service
- Collect feedback
- Drive website traffic
- Improve visibility
- Improve brand sentiment
- Collect UGC (user-generated content)
Related reading: 13 Critical Social Media Goals & How To Hit Them
Once you’ve chosen your overarching goals, make them SMART by specifying your KPIs and the time period in which you want to achieve them.
For example, let’s say my main goal is to build brand awareness. Here’s one way I might expand on that and formalize it in my marketing plan.
Primary goal:
Build brand awareness
KPIs:
- Brand mentions
- Share of voice
- Impressions
Mini-objectives:
- Increase total brand mentions on Facebook to 1,000/month by next year
- Achieve 15%+ share of voice on Facebook within 6 months
- Achieve 1 million Facebook impressions over the next 12 months
See how that works? Once you’ve set clear, measurable goals like this, you can start putting a plan in place for how you’re going to achieve them.
Step 4: Research your audience
So, you know what your goals are. Now, you need to know who it is you’re trying to reach through your Facebook marketing efforts, and that means researching your target audience.
Having a clear picture of who your target audience is will help you plan your content strategy and create well-targeted Facebook ads, boosted posts, etc.
How to get started
Do some research to find out who your target customers/audience are and jot down some notes on them. The main questions you’ll want to answer are:
- What age are they? (i.e. 20-35, 36-50, 65+, etc.)
- Where do they live? (e.g. f you’re doing Facebook marketing for a local business, this is probably going to be the business’s service area)
- What are their interests? (e.g. if you’re doing marketing for a driving school, your target audience will be those interested in ‘learning to drive’)
You’ll need to specify all of the above if/when you run Facebook ads, which is why it’s so important to answer those three questions first. But you should also try to find out things like how/when your target audience uses Facebook, what jobs they do, etc.
The easiest way to research your audience and find out all of the above and more is to use a Facebook analytics tool like Social Status. These tools will usually be able to give you detailed insights into your existing audience demographics.
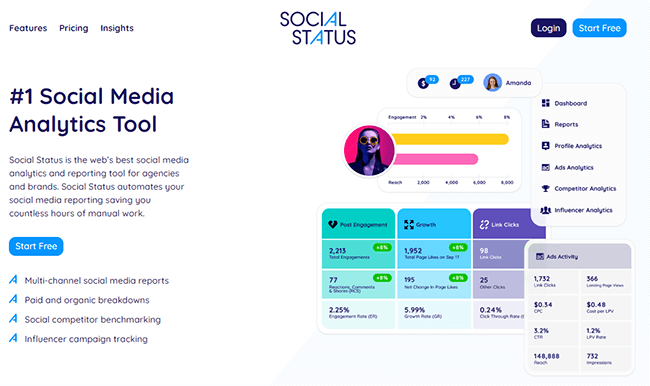
Alternatively, you can check out the Audience Insights tab of Meta Business Suite, but you won’t usually get as deep a level of insight as you would if you used a paid tool.
Step 5: Plan your content mix
Okay, now we’re getting to the good stuff. Your content plan is the most important part of your whole Facebook marketing strategy.
It tells you what kind of Facebook posts you’re going to be sharing, and how often you’re going to be sharing them. Here’s how to create it.
How to get started
First, decide on your content mix. Your content mix is the ‘blend’ of different post types that you’re going to be sharing as part of your organic or paid Facebook marketing campaigns.
Often, marketers find it’s best to aim for a good variety of different posts in different formats (i.e. video posts, photo posts, etc.) and with different purposes (i.e. to educate, to inform, to entertain, to persuade, etc.)
A good rule of thumb is to follow the 80/20 rule: Only 20% of your posts should be promotional, and the rest should be sharing valuable content with your audience.
Here’s an overview of some of the different types of posts that you might want to include in your content mix.
- Text posts – Standard Facebook posts that consist entirely of text. These are a little boring and don’t tend to perform as well as texts featuring media, so keep these to a minimum.
- Photo posts – Posts featuring an image. The image catches the eye and makes it more likely for users to stop scrolling and take a look, so they perform better than text posts. Photo posts also command more real estate in the Facebook news feed.
- Video posts – Posts featuring a video of any length. Some of the best-performing Facebook posts feature video content, but they also take a lot more work to create, so they’ll likely only make up a small fraction of the posts you share.
- Link posts – Like text posts, but with a hyperlink that points to a website page. Facebook automatically generates a visual when you share a link post. Link posts are great for driving traffic but can some pushy and overly promotional, so use them in moderation.
- Facebook Stories – These are temporary posts that appear at the top of the news feed for 24 hours, and then disappear.
- Reels – Short-form videos up to 60 seconds. Quicker and easier to create than long-form videos, and great for growing your audience.
- Live streams – Events in which you interact with your audience over a live video stream in real time. Great for generating engagement and building brand loyalty.
Note down when/how frequently you plan on sharing each of these post types.
For example, you might decide to share promotional link posts every Monday. Then on Tuesdays, you might post funny/viral images and memes. You might decide to post a Reel and a Story every day, and a video post every month. You get the idea.
Bonus tip: Consider using curated content in your content mix, alongside original content that you’ve created yourself, to save time. Missinglettr is perfect for this. It automatically finds content that your audience will enjoy and schedules it to your content calendar. However, most Facebook schedulers will provide an easy way to line-up content in advance.
Step 6: Create a content calendar
Once you’ve planned your Facebook content mix, you can start putting together a content calendar.
Your content calendar is essentially your posting schedule. It’s a visual calendar through which you can create and schedule Facebook posts in advance. Here’s how to set it up.
How to get started
You’ll need to use a social media scheduling tool to create your content calendar. We’d recommend SocialBee.
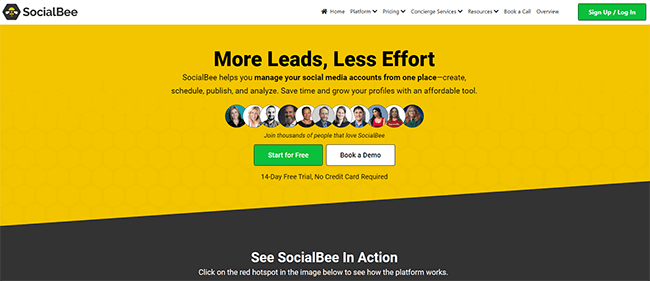
SocialBee works on a category-based scheduling system.
So first, you set up some ‘categories’ for different types of posts. For example, one category might be ‘funny memes’, another might be ‘industry news’, and another might be ‘new products and promotions’.
The categories you choose should align with your content mix (which we planned in the last step).
Next, you can start creating posts. As you do, you’ll assign each of them to a specific category. This should give you a few ‘buckets’ of content in different categories, ready to be posted to Facebook.
Then, you can schedule entire content categories at once to different dates in your content calendar. For example, you could set it up to have SocialBee share posts from the ‘funny memes’ category every Tuesday at 6 PM. SocialBee will then do that for you automatically, cycling through all the content in the bucket until it’s empty.
Of course, you can also schedule specific posts for specific dates in your calendar individually. And what’s cool is you can use SocialBee’s evergreen content features to re-queue your best-performing posts again and again to get more value out of them.
It’s worth mentioning that SocialBee has an AI Copilot that will help you automate a lot of this process.
Bonus tip: When scheduling posts to your calendar, it helps to know the best times to post on Facebook. According to the statistics, that’s 9 AM. However, it’ll ultimately depend on your audience. Check out our guide to the best times to post on social media for more information.
Related reading: 27 Engaging Facebook Post Ideas (With Examples)
Step 7: Plan your paid ad strategy
Posting engaging content on Facebook to promote your business organically can only get you so far.
The unfortunate truth is that these days, Facebook is pretty much a pay-to-play platform. If you want to reach a good amount of potential customers and see decent results from your campaigns, you’ll need to invest in Facebook ads.
With that in mind, the next step is to plan your Facebook advertising strategy. Here’s how to go about it.
How to get started
Start by setting yourself a monthly budget for Facebook ads. How much of your wider marketing budget can you afford to spend on Facebook per month?
If in doubt, it’s best to start small. You can test the waters with as little as $10 and see what kind of results your ads are driving, then scale up from there.
Next, think about ad targeting. The goal is to generate the best possible return on investment (ROI) from your Facebook ads. To that end, it makes sense to make sure that you’re only paying for ads to go out to people who closely align with your target audience/buyer persona.
Fortunately, if you’ve completed step 4 of this guide already, you should already have a good idea of who your target audience is. Use this to inform your targeting options.
And finally, start planning/designing your creative assets. These are the visuals that are displayed in your ads. They can be images or videos, carousels, or collections.
When you’re ready to launch your Facebook ad campaign, you have two options: The easy way and the hard way.
The easy way is to pick one of your existing posts and ‘boost’ it. This turns it into an ad and delivers it to users who aren’t part of your existing, organic audience.
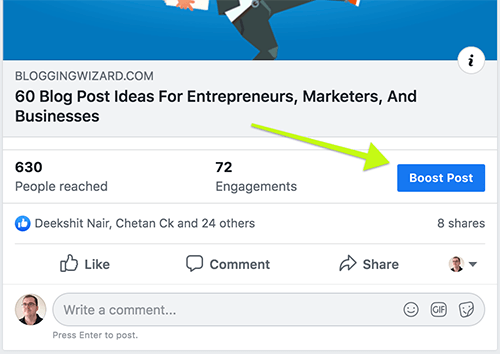
Boosting is a good way to get a bit of momentum/traction going on your best posts as it’ll help to drive some initial engagement, which should help to boost that post’s organic reach later down the line.
The hard way is to set up an ad campaign via your Ad account in Meta Business Suite (see step 2 to set this up). The process is a little more involved but it gives you more options and control over your campaign.
You’ll first need to choose a campaign objective from one of the pre-set options. Objective options include brand awareness, reach, traffic, engagement, lead generation, conversions, and more. Choose whichever one aligns most closely with your own marketing goals (see step 3).
After that, you’ll need to set your campaign spending limit and choose how you want Facebook to optimize ad delivery (e.g. to maximize landing page views, link clicks, impressions, etc.).
Then, you’ll be prompted to choose your audience. You can set targeting options manually by specifying things like the location, age, gender, interests, and behaviors of your target audience. Or alternatively, target custom audiences (pixel-based retargeted customers/leads) or lookalike audiences (people similar to your existing customers).
Finally, you’ll need to set your ad creative, write the ad copy, choose a CTA, and set your tracking options.
Related reading: Why I Write Bad Facebook Ad Copy On Purpose
Step 8: Consider other Facebook marketing strategies
At this point, you’ve planned your organic posting schedule and paid ads—-so you already have a pretty solid Facebook marketing strategy in place.
However, there are a few other tactics you might want to incorporate into your Facebook marketing strategy to drive even better results. Let’s take a look at some of them.
How to get started
One marketing tactic to consider is Facebook giveaway campaigns.
With giveaway campaigns, you create a contest that users can enter to win a prize (e.g. a free bundle of your best products) and share it through your Facebook page.
First, you’ll need to sign up for a giveaway platform. We’d recommend SweepWidget.
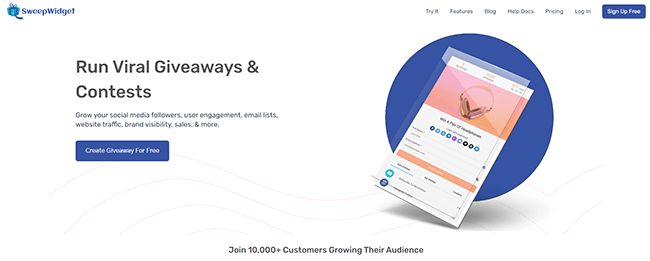
Then, choose a prize for the giveaway and set the entry requirements—the actions that users have to complete in order to be entered into the draw.
Your entry requirements should align with your Facebook marketing goals, for example:
- If one of your goals is to grow your audience, the entry requirement could be ‘follow our Facebook page’.
- If your goal is to build your email list, the entry requirement could be ‘subscribe to our newsletter’.
- If your goal is to drive website traffic, the entry requirement could be ‘visit this page’ or ‘share this page with a friend’.
- If your goal is to promote a new product, the entry requirement could be ‘submit a name idea for our new product’.
You get the idea. Giveaways like these have tons of viral potential, so they can reach thousands of viewers and drive superb results.
Related reading: 8 Proven Facebook Giveaway Ideas To Generate Maximum Engagement, Traffic, And Sales
Another marketing tactic you can try is to create a Facebook Group around your business. Groups are a great way to connect with your audience without being at the mercy of the news feed algorithm. They’re especially useful if your main goal is to boost brand loyalty or sentiment
Related reading: 15+ Ways To Grow Your Facebook Group 3x Faster, How To Start A Facebook Group And Get Loyal Fans
You can even try promoting your business on other Facebook groups that your target audience hangs out in. Just make sure to pay attention to group rules and only promote your business if the rules allow.
Step 9: Track, measure, and optimize
Your Facebook marketing strategy isn’t something you create once and never look at again. It’s something you constantly refine and improve on.
With that in mind, the final step is to track and measure the results of your campaigns, and then use that data to optimize your strategy going forward.
How to get started
In order to measure the success of your Facebook marketing strategy, you’re going to need the right tools.
Sendible is great for keeping track of your KPIs. It comes with excellent analytics and reporting tools, ROI tracking, and even a social listening tool (so you can keep track of things like brand mentions and sentiment).
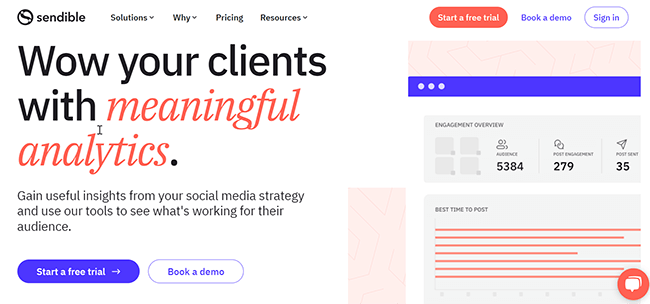
Look at the data to figure out which of your efforts are having the biggest positive impact on your KPIs. Then, prioritize these efforts going forward.
For example, let’s say your goal is to build brand awareness, and you notice that after running a Facebook giveaway contest, your brand mentions and social share of voice shot up. In that case, you might decide to run a new contest every month.
It’s also worth experimenting with different ad creatives, placement options, and audience targeting. You can set up A/B tests from your Facebook Ad account to compare two variations, and then determine the winner.
Final thoughts
That concludes our guide on how to create a Facebook marketing strategy.
Hopefully, you now have all the information you need to start promoting your business on Facebook.
Remember: Facebook is just one of many social media platforms that might have a place in your wider marketing strategy.
With that in mind, you might want to check out our guide on how to build a complete social media marketing strategy while you’re here.
Or for platform-specific advice, check out these posts:
- How To Get More Followers On Twitter: 30 Proven Methods
- 30+ Instagram Tips, Features & Hacks To Grow Your Audience & Save Time
- How To Get More Views On TikTok: 13 Proven Strategies
Disclosure: Our content is reader-supported. If you click on certain links we may make a commission.
