

Are you publishing more of your blog content on social media?
Increasing social media distribution is becoming a popular strategy for dealing with a decrease in organic traffic. Thanks to changing algorithms and the emergence of AI search, earning clicks from Google SERPs is harder than ever.
But social media can provide the clicks you aren’t receiving from Google.
In this post, you will learn how to turn every blog post you publish into multiple social media posts created for multiple social media platforms.
1. Choose your primary social media platforms
These platforms work great for repurposing blog posts:
- TikTok
- YouTube
- Threads
LinkedIn works if you target professionals in your niche or if you target a business-to-business (B2B) niche.
Threads is a direct competitor of Twitter (X) and Bluesky, so any advice I suggest for Threads should work for those platforms as well.
Here’s how to figure out which platforms to focus on:
- View the Social section of your website’s traffic analytics, and see which platforms generate the highest amount of social traffic for your site.
- Enter broad search terms into each platform’s search bar, and see which platforms generate the most amount of views and likes. Make note of the number of followers the biggest creators have as well.
The first method tells you which platforms you already have a presence on.
The second method tells you which platforms your audience is most active on.
2. Choose a weekly social media publishing schedule
According to our research, the absolute best day of the week to post on social media is Monday and the absolute best time to post is 3PM.
In general, most of the studies we referenced found that weekdays are the best time to post on social media.

For those reasons, I highly recommend basing your publishing structure around a Monday through Friday publishing schedule.
How often you publish to social media should mostly be determined by how much content you can produce on a weekly basis.
I share tips on how to create social media posts more efficiently later on in this post. But I also highly recommend timing yourself to see how long it takes you to create different post types, specifically short-form videos, long-form videos (videos longer than five minutes), carousel posts, threads, and link posts.
That way you can make a more informed decision on how much content you can realistically produce every week.
Here’s an example of a simple social media publishing schedule:
- Monday
- 1 short-form video
- Tuesday
- 1 carousel post
- 1 thread
- Wednesday
- 1 short-form video
- Thursday
- 1 carousel post
- 1 pin (Pinterest)
- Friday
- 1 short-form video
- 1 long-form video
- Daily
- 1-3 Instagram stories
- link posts
Related:
- The Best Time to Post Instagram Reels (includes Real Data)
- The Best Time to Post On Instagram
- The Best Time to Post On Facebook
- The Best Time to Post YouTube Shorts
- The Best Time to Publish YouTube Videos
- The Best Time to Post On TikTok
- The Best Time to Post On Twitter
- The Best Time to Post On LinkedIn
Cross posting and reposting
Cross posting is a fantastic strategy to use if you don’t have the time or budget to create original videos for each platform you want to publish to.
All you have to do is make content for one platform, then cross post it to another platform.
For example, if Instagram is your preferred platform, you can cross post reels as short-form videos to TikTok, YouTube Shorts, Facebook Reels, and video pins on Pinterest.
You can also repost content at a later date. If you’re reposting the same video, make sure you put “Repost” and the original upload date in your caption so your followers know the video isn’t new.
3. Choose a social media scheduling tool
A social media scheduling tool allows you to manage your social media calendar for multiple platforms at once.
At minimum, it allows you to create drafts, and either publish them right away or schedule them to be published at a later date/time.
At most, a tool like this allows you to create posts for multiple platforms from a single draft, organize your posts into categories, and even reschedule posts so they repost on a later date automatically.
SocialBee is one of the best scheduling tools you can use to manage your social media schedule, especially a week’s worth of content.
One of the reasons we recommend SocialBee for this is partly because it has one of the best systems for rescheduling evergreen content automatically.
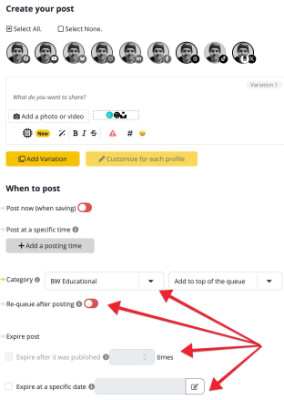
You can use it to post content to Facebook, Instagram, TikTok, Twitter, YouTube, Bluesky, Threads and Pinterest.
One of SocialBee’s most useful features is the way you can create drafts for multiple platforms at once but optimize the content for each platform.
For example, a Facebook post has a character limit of 63,206 characters while Threads only allows you to include 500 characters.
If you want to use SocialBee to share a blog link on both Facebook and Threads, you can create a draft that’s several-thousand characters long on Facebook but less than 500 on Threads.
A feature like this makes cross posting incredibly easy to do.
Related: SocialBee Review: Is It the Best Social Media Scheduling Tool?
You don’t necessarily need a tool like this. Other tools are available. But it makes managing your social media marketing strategy so much simpler, especially when your strategy includes turning a blog into several social media posts.
4. Develop a better strategy for sharing links
Here’s how most bloggers promote a freshly-published blog post:
- Link posts published to Facebook and Twitter (and maybe Threads and Bluesky)
- Email campaign sent to the blog’s email list
Sound familiar?
These are fine strategies to use, but you have to use them right. Just posting a simple “check out my post on this topic” message alongside a link is not going to cut it in this day and age.
A lot of social media users aren’t interested in visiting a web page to “learn more.” They want to learn everything they need to know from the post they’re already reading on social media.
A simple link post message really only works if you’re promoting a high-interest topic, such as a current event, something highly relatable (or at least something that triggers an emotional response in your follower), or a wild fact or statistic you uncovered.
With that said, the first post you should create for your week of social media content is a better link post.
Use these methods to create more engaging link posts:
- Share a fact (works best for Twitter, Threads and Bluesky)
- Summarize your post (works best for Facebook)
- Use an image that contains your headline (and maybe a subheading)
- On Facebook, add your link as your first comment instead of the post body itself. This improves visibility
Here’s an example from IGN’s Twitter account.
They shared two similar tweets within 30 minutes of each other. One at 12:31PM on August 4th, 2025:

And another at 1:01PM:

You can see from these two images how the second tweet received 428.67% more engagements than the first tweet even though they share a similar message.
The biggest engagement factor of the second tweet is the image it uses. Yes, it does feature a more flattering image of Brad Pitt, but more importantly, it contains part of the tweet’s statistic and rephrases it into a much more reader-friendly message.
The lesson here is this: try to include text in your images when you share link posts on social media. It can be your headline or a fact or statistic from your article.
A graphic design tool like Visme can help. They have thousands of social media templates.
Related: Visme Review: Create Great Images Without Any Design Experience
Share links on a link-in-bio page
Platforms like Instagram and TikTok do not allow you to share links in posts. You get one custom link to share, which must be inserted in your profile’s bio.
This is why influencers always say “link in bio.”
You can’t always control when viewers see your post. If you only share links in your bio, you’ll probably wind up changing the link by the time a user sees your post.
This is why a lot of social media creators use what’s known as a link-in-bio page instead. You can host one on your website, but it’s much easier to create one with a dedicated link-in-bio tool.
A tool like Shorby allows you to create a page filled with link cards. These pages are mostly optimized for mobile devices.
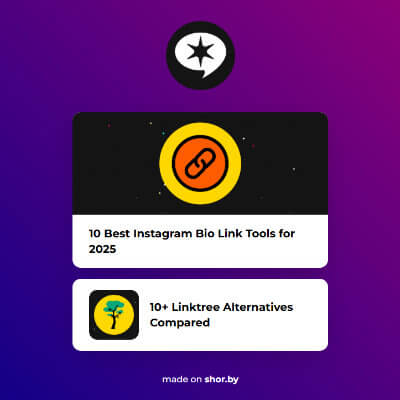
With a tool like this, you can promote a blog link whenever you publish posts to TikTok and Instagram. Just say something along the lines of “learn more by visiting the link in my bio.”
Related:
5. Turn your blog post into short-form videos
There are three different types of short-form videos you can create for social media:
- Talking head – Just as it sounds, it’s a video that primarily showcases your head and features you talking about a topic. In this case, the topic your blog post is about
- Demonstration – For tutorials and reviews, it’s best to shoot a video of you demonstrating blog content
- Text based – Videos that feature text, graphics and animations. It might feature a voiceover, but this isn’t necessary
In case you don’t already, start browsing social media content like TikTok, Instagram reels, Facebook reels and YouTube shorts.
You’ll become very familiar with short-form videos and the different styles you can use to create them.
The easiest type of videos to create are text-based videos. This is because you can use NotebookLM and Canva (you need a Pro account. A free trial will work) to automate them.
Follow this process to do so:
- Enter your blog link into NotebookLM.
- Enter a prompt into the chat, such as:
- “Turn this post into a list of 20 facts”
- (For list posts) “Turn the numbered headings in this post into a list”
- Create a new project in Canva using the Mobile Video template.
- Select a template. It helps to enter “facts” into the search bar.
- Click Apps in the left-hand menu, enter “bulk create,” and click on the Bulk Create app.
- Upload your data however you wish. Each fact/list item should have its own row in the tool’s table.
- Scroll through the template until you find where you want your facts to appear, then right-click on that element, and click Connect Data to import your data into the template.
- Then, generate your designs, open them as a project, and download them (as one video or several).
It’s much harder to automate videos that include real footage.
First, you need decent equipment. At minimum, shoot your videos with a high-quality smartphone.
Shoot near a window that receives indirect light if you don’t want to invest in a proper filming setup just yet. Also, try to invest in some type of wireless mic for improved audio.
Boxes and a stack of books can serve as a tripod.
Adam has a process for cranking out a lot of short-form videos really fast:
It uses a video editing tool called Kapwing, which is a fantastic tool to use to edit short-form videos.
For help with turning your blog post into a talking head video, try using NotebookLM.
Simply add your blog link to it, and ask it to turn your blog into a script for a short-form video.
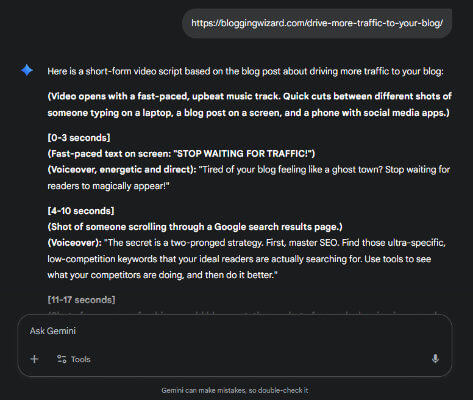
Just be sure to edit and rewrite each section for clarity. Put your post and the script side by side as well to ensure the tool summarized it properly.
You should definitely do this if you use Gemini or ChatGPT instead. This will ensure the tool isn’t pulling in information from other sources.
NotebookLM is designed to only pull information from sources you give it.
6. Turn your blog post into carousel posts and text-based images
A carousel post is an Instagram or TikTok post that acts as a slider. It contains multiple images instead of one, and the user can scroll through each as fast as they like.
Both Instagram and TikTok allow you to attach music and sounds to carousel posts.
You can automate these as well using the same process I suggested for automating short-form videos.
Instead of using a Mobile Video template, use Canva’s templates for carousels and regular posts instead.
The process is the same, including having NotebookLM turn your post into a list. You just need to use a different type of template.
You don’t have to automate this process, though. You can just as easily go through your post yourself and figure out the best way to turn it into a carousel post or a few text-based images.
TikTok gives you a maximum image count of 35 for carousels while Instagram gives you 20. Instagram carousels can feature a mixture of images and videos.
Even if you’re not automating these posts, you can still use tools like Canva and Visme to create posts more efficiently with templates.
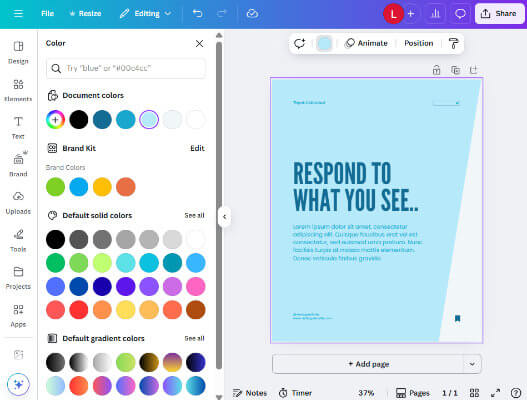
All you need to do is change the template’s styles to match your own brand’s styles.
If you don’t have a social media style, yet, take the time to come up with colors, fonts and templates to use for social media posts.
A cohesive brand style improves brand recognition.
7. Turn your post into a YouTube video
A YouTube video is a long-form video. You can upload long-form videos to YouTube and Facebook (Facebook videos that aren’t reels can have a maximum runtime of up to 240 minutes, or 4 hours).
You can use the same process you use for creating short-form videos to create long-form videos. You just need to shoot more footage or include more text.
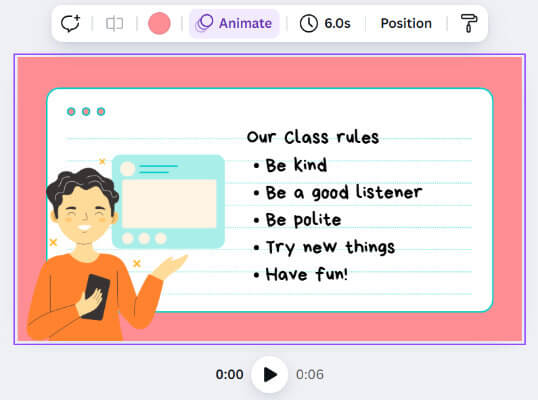
Canva does have templates for YouTube videos. They’re even fully animated.
But for the most part, YouTube is best when used as a platform for content in which you present the content yourself.
You can even ask NotebookLM to create a script for a YouTube video.
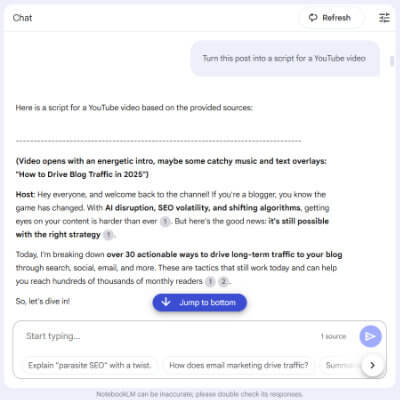
Again, read through the script, and make sure it accurately represents your blog post and how you, personally, would present information.
Even if you create a talking head or demonstration video for YouTube, Canva templates can help you create title cards and information cards to present certain details as you speak.
You can use Kapwing to edit YouTube videos as well.
8. Turn your blog post into a Thread
A thread is a social media post type you can create with Twitter (X), Threads and Bluesky.
They’re several posts you link together to create one long “thread” users can scroll through to read.
By separating each post, you create natural pauses that make these types of posts more engaging than if you had published them all in one long tweet.
Plus, users can like and share individual posts that are more quotable than others.
Use NotebookLM to turn your blog post into a thread.
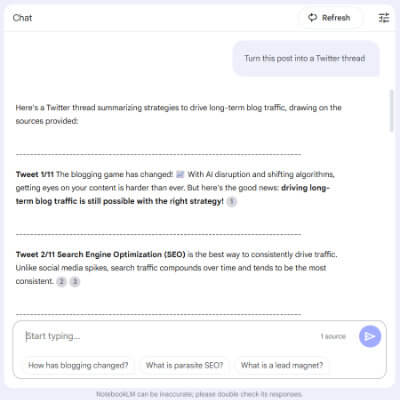
If you don’t like what NotebookLM generates, hit the Refresh button, and ask it the same prompt again.
Once again, make sure you edit what this tool generates for you. It does a pretty good job, but it’s best to make the text more personable so it feels like it’s actually from your brain and not what a computer thinks your brain would say.
Finally, you can use whatever graphic design tool you like to create one-off graphics from quotable sentences in your post.
Templates work great for this purpose.
Final thoughts
Now, instead of just having a single blog post, you’ll also have a week’s worth of social media content.
This process is all about working smarter. Not harder.
Do this for every post you publish, and your social media calendar will be rammed full of useful content.
And if you’re sharing evergreen content, you can requeue some of those social media posts to squeeze even more life out of your content.
Disclosure: This post is sponsored but our opinions are our own.
