Payhip Review 2024: A Complete Solution For Selling Online?

Welcome to our Payhip review.
Payhip is an easy-to-use platform with all the tools you need to start selling online—but how good is it?
That’s the question we’ll be exploring in this post.
First, I’ll explain exactly what Payhip is. Then, I’ll outline all of its key features, and let you watch over my shoulder as I try them out.
After that, I’ll break down the pricing options and reveal what I think Payhip’s biggest pros and cons are. And finally, I’ll wrap up with some final thoughts.
What is Payhip?
Payhip is a simple all-in-one ecommerce platform. It’s a popular choice for new sellers, with over 130,000 users.
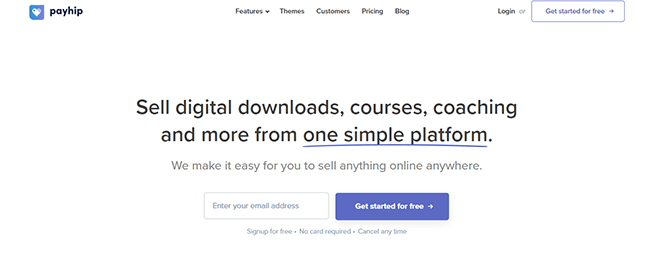
You can use Payhip to build your own website and online store. Then, use it to sell digital downloads, online courses, coaching products, memberships, and physical inventory.
There are lots of other ecommerce platforms out there that can do the same thing, but unlike some of its competitors (Shopify, I’m looking at you), Payhip caters more to creators and solopreneurs than big businesses. And its feature set reflects that.
It comes loaded with lots of tools that take the hassle out of ecommerce, like automatic tax & VAT collection (and EU/UK VAT reporting), a simple no-code website builder, lots of great pre-built store themes, built-in marketing tools, and more.
It’s also one of the few ecommerce platforms out there to offer a complete free forever plan with access to all features and no caps on your revenue. This is another reason why it’s such a popular choice for beginners and cash-strapped startups.
What features does Payhip offer?
Payhip offers all the essential features you need to start selling online, including:
- Drag-and-drop store builder
- Digital downloads
- Online course builder
- Coaching
- Memberships
- Physical products
- Inventory management
- VAT & Taxes
- Payments
- Marketing tools
- Analytics
- Customer management
Next, we’ll test out all of these features as we test out the platform and show you how everything works.
Getting started
One of the best things about Payhip is how beginner-friendly it is.
When you first sign up and log in to your Payhip account, you’ll be greeted by a setup wizard that walks you through everything you need to do to get your store up and running, step-by-step.
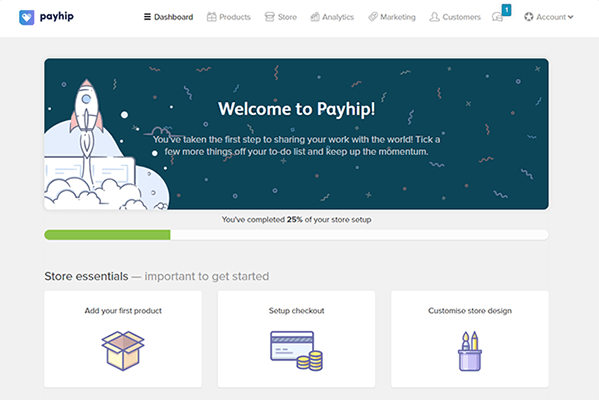
The first thing you’re going to want to do is add your products, so let’s start there.
Either click the Add your first product button in the setup wizard, or click Products in the navigation menu at the top to get started.
Digital products
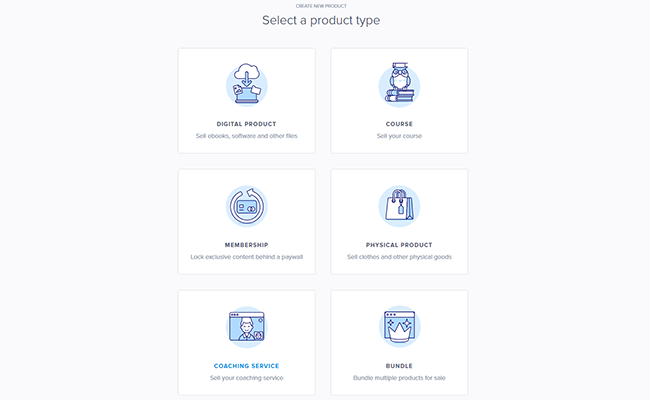
There are six types of products you can sell with Payhip: Digital products (i.e. ebooks, software, photos, etc.), Courses, Memberships, Physical Products, Coaching Services, and Bundles.
To add a digital product, you’ll need to upload the file. Then, enter a product title, description, and price.
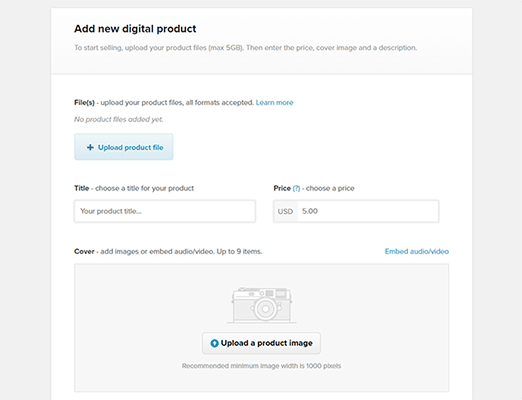
Payhip supports multiple currencies, so you can sell in whatever currency your customers use.
And what’s cool is that it also supports pay-what-you-want pricing. So instead of entering a flat rate, you can enter 0+ in the pricing box to let your customers choose how much they want to pay.
Below the pricing box, you can add your cover media. You can upload up to 9 images, video, or audio per product listing.
That’s the basics of it. But if you want, you can also click Advanced options to change some additional settings before you publish your product to your store.
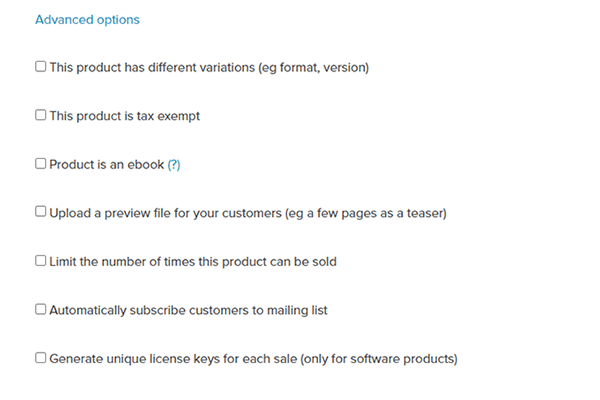
In the advanced options menu, you can do things like add product variations (e.g. different sizes, versions, etc.), make a product tax-exempt, limit sales, etc.
If you’re selling software, you can also tick the Generate unique license keys for each sale box to provide your customers with a license key for the installation.
Once you’re done, click Add product to publish it to your store. Payhip will automatically generate a product page for you, and you can grab the link to share it and start selling.
Here’s what the default product page looks like:
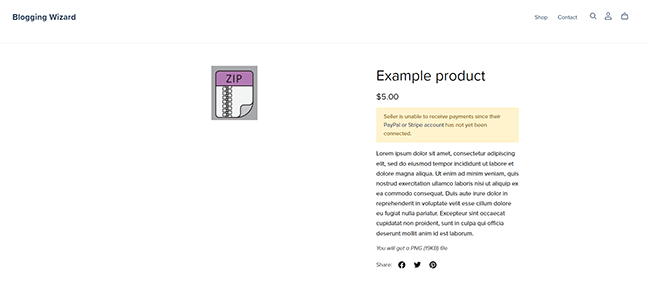
It’s simple and clean, but a little boring. As we’ll see later, though, you can change it when you customize the way your store looks.
We’ll get to all that shortly, but first, let’s look at some of the other things you can do in the Products tool.
Course creator
Payhip has a built-in online course builder, which you can use to create eLearning products.
To get started, go back to Products > Add new product, then select Course.
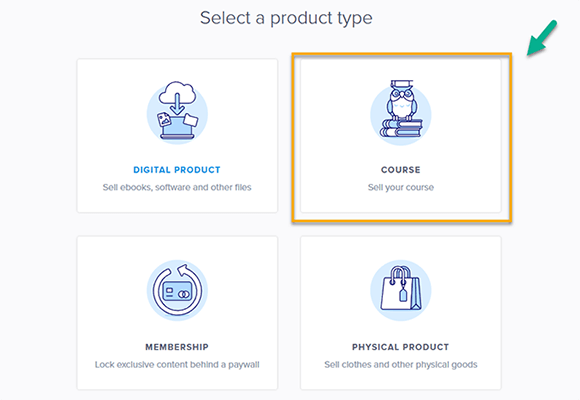
Next, create the structure of your course by adding sections and lessons. Sections are like modules, and lessons are individual classes within those modules.
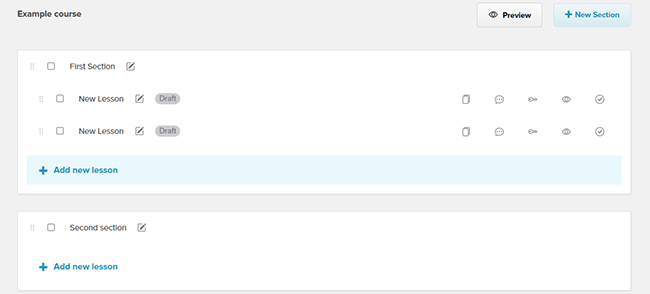
If you want students to progress through the course linearly, click the key icon next to each lesson to make it a prerequisite (so that students must complete it in order to proceed to the next).
You can click other icons to turn on discussions (so students can comment on lessons) and free previews (so that visitors can access the lesson for free as part of your course preview)
Once you’ve finished creating the structure, you can add content to your lessons. First, click on the lesson you want to work on. Then, enter a title and select a lesson type (i.e. video, text, assignment, survey, quiz, etc.)
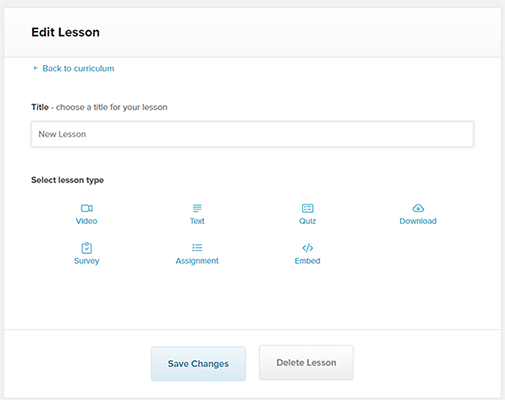
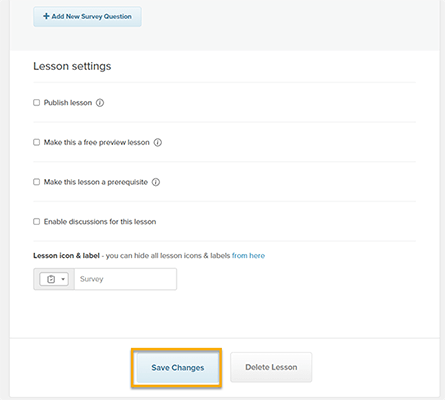
Next, add your content by uploading your videos/downloads, entering text, or choosing survey/quiz Q&As, then tick the Publish lesson box and hit Save changes.
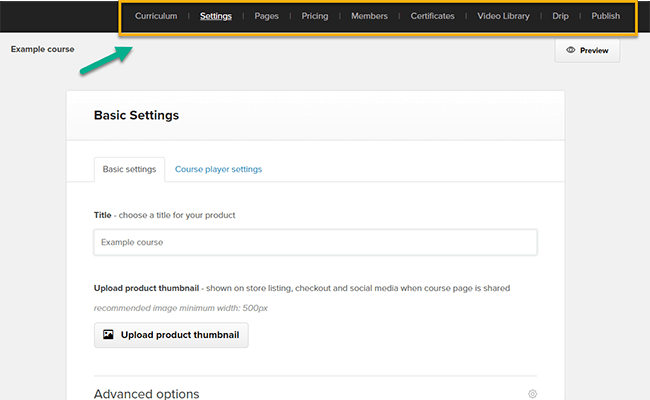
Once you’ve built your course, you can manage your learners, customize your course pages, set your pricing, set up drip schedules and certificates, and do all the other stuff you need to do from the tabs at the top of the page.
Memberships
Aside from courses and digital downloads, you can also create membership products with Payhip.
With memberships, you can create exclusive, members-only content and lock it behind a paywall so that visitors have to subscribe for access.
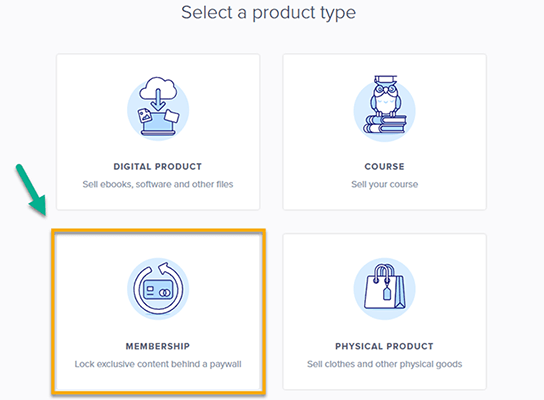
To get started, go to Products > Add new product > Membership. Then, choose a product title.
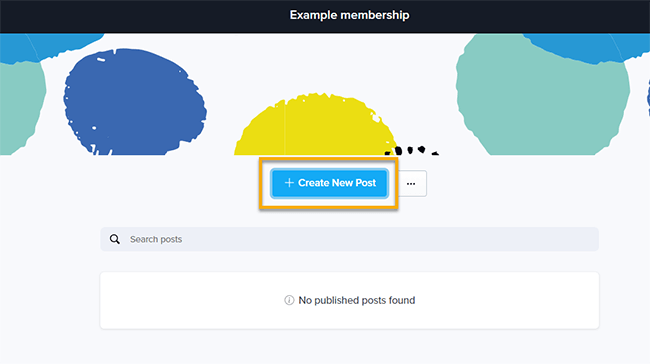
After that, click Manage Posts > + Create New Post to start creating your members-only content. You can create different types of posts including video posts, images, text posts, polls, links, and embeds.
Once you’ve created your content, head to the Pricing tab to set up your payment options.
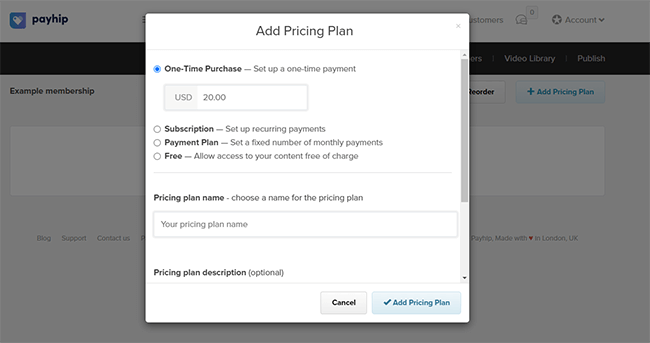
You can sell access for one-time payments. Or alternatively, charge recurring subscription payments at custom billing intervals, offer a payment plan, or allow access to the content for free.
You can manage and share updates with your members from the Members tab.
Physical products
If you want to sell physical products through your Payhip store, you can add them pretty much the same way as you would add digital products.
The only difference is that you can also set up inventory tracking for physical products. Plus, add SKUs, and set the product weight (for shipping calculations).

One last thing you’ll need to do before selling physical products is set up your shipping details. You do this through the Settings page (Account > Settings > Shipping).
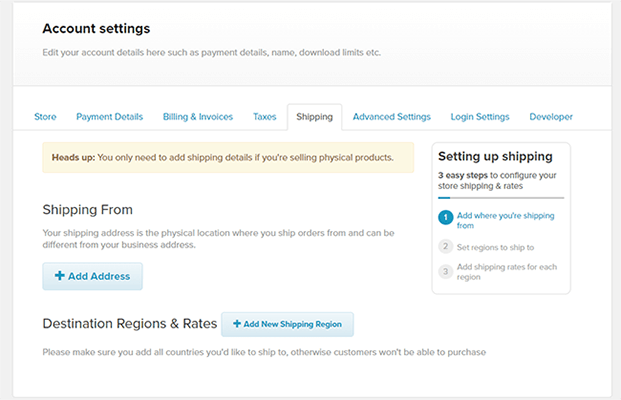
You’ll need to enter the address you’re shipping from, as well as the destination region, and select how you want to charge for shipping (e.g. flat rate, free shipping, by order weight, or by order total)
While you’re on the Settings page, you might also want to connect to a payment processor (you’ll need to do this before you can start accepting payments).
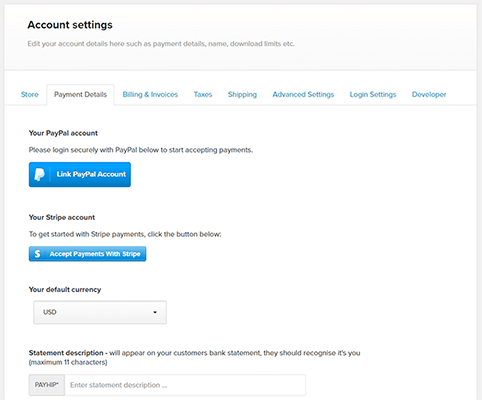
Payhip supports both PayPal and Stripe, and you can connect them on the Payment Details tab.
VAT & taxes
One of the most complicated parts of starting an online business is managing tax & VAT.
For example, if you’re selling digital products to customers based in the EU, you’re legally obliged to charge VAT. A similar law applies to customers in the UK too.
But for new sellers, charging and reporting VAT can be a real headache.
Fortunately, Payhip makes it easy by reporting and paying VAT for you. They act as your reseller and take on full responsibility for complying with digital EU/UK VAT.
They’ll detect when customers are based in these regions, apply the right amount of VAT to their transactions, and report and submit VAT to the relevant tax authorities for you.
Plus, Payhip can help you apply and collect other types of taxes too. Just go to Settings > Taxes > Add Tax Rate, then set the tax rate for each country/state you need to collect taxes for.
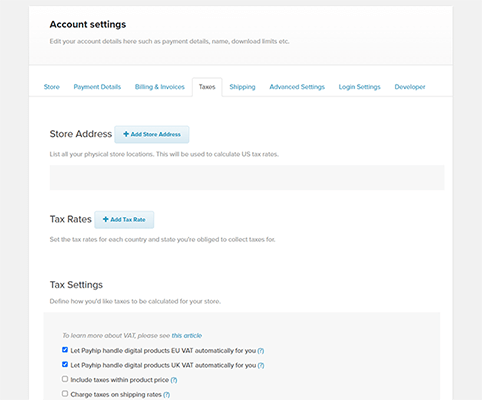
This page is also where you change your Tax Settings and add your physical store locations for tax purposes.
Store builder
You can customize the way your Payhip store looks through the Store Builder. To get started, click Store > Launch Your Store Builder.
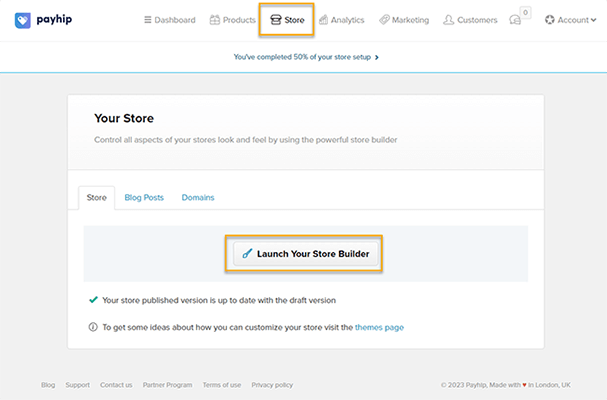
The Store Builder works like any other drag-and-drop page editor. You can change the structure by adding, removing, and reordering sections on the left, and then see how it looks in the real-time preview window.
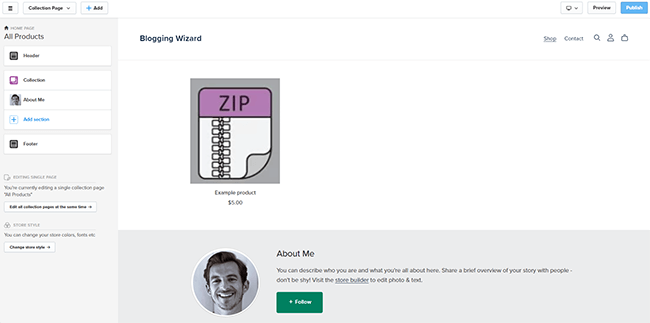
There are a bunch of pre-built sections for things like image galleries and slideshows, product testimonials, newsletters, FAQs, featured products, etc.
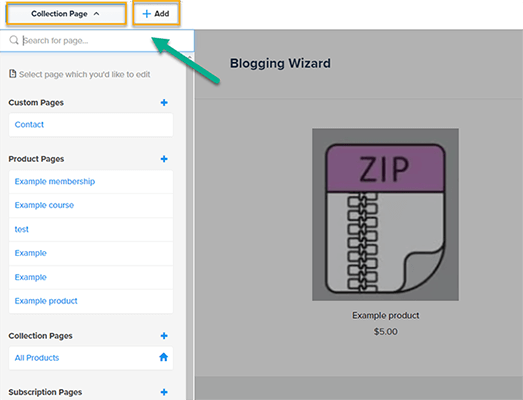
You can switch between different pages by clicking the dropdown menu at the top of the page, and then edit each of them individually. Or click the + Add icon to create a new page.
If you want to change style elements (like colors, fonts, etc.), click the Change store style button at the bottom of the sidebar.
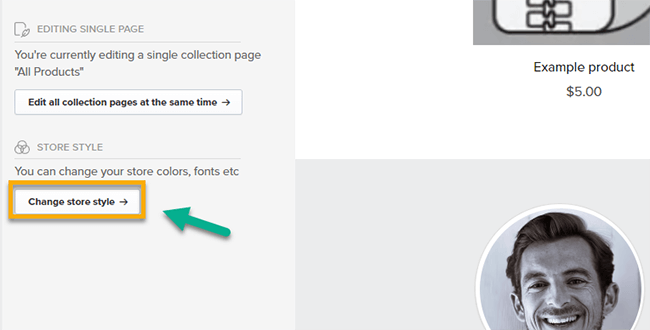
From here, you can change style elements individually or click Themes to switch to a different site theme. There are around 8 to choose from, and they all look professionally designed.
Marketing features
Payhip comes with a few useful marketing tools to help you promote your store and boost sales. You can access them from the Marketing section of the dashboard.
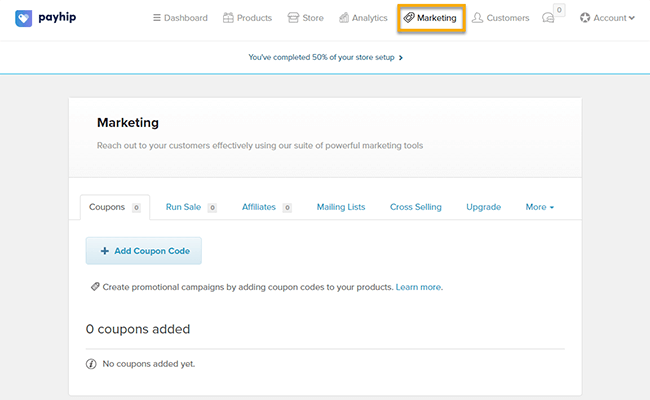
Under Coupons, you can create discount codes for your products, and then share them in your promotional campaigns. And under Run Sale, you can set up limited-time price reductions.
The Cross Selling tool allows you to promote extra products to your customers during the checkout process. For example, you could offer 50% off if they buy a complementary product. This is a great way to increase your average order values and boost revenue.
On top of that, there’s also an Affiliate system. All you have to do is grab a sign-up link and share it with your affiliates. Then, they’ll be able to start spreading the word about your store and earning commissions. You can view your affiliate sales report to keep track of their performance.
Payhip even comes with very basic Email Marketing features. You can link it to your email service provider, and Payhip will automatically subscribe your customers to your mailing list during checkout (with a consent box for EU/UK customers for GDPR compliance).
Analytics
From the Analytics section of your Payhip dashboard, you can keep track of most of the important metrics that matter to your business.
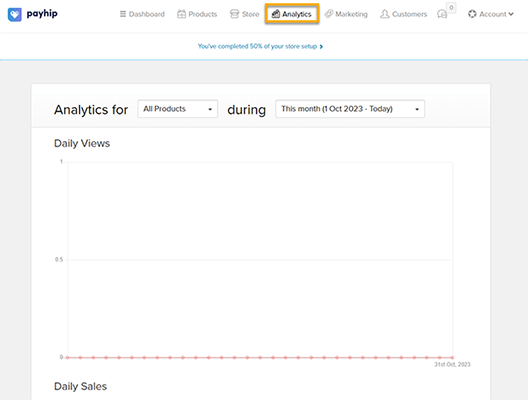
At the top of the analytics page, you can choose what you want to view analytics for (e.g. all products, or a specific product), and the time period (e.g. last 7 days, last month, last year, etc.).
Payhip will then generate a report with a bunch of graphs that help you to visualize the data.
The first graph shows you at a glance the total number of daily views to your product pages over time, so you can see whether it’s trending up or down and evaluate the effectiveness of your marketing campaigns.
Below that, there’s a graph showing daily sales over time, so you can see whether your revenue is increasing or decreasing, alongside stats that tell you your total number of unique customers, orders, etc.
Further down the page, you can see a more detailed breakdown of your sales, your conversion rate, your top 10 visitor sources, and more.
There’s even a nifty Visits Map that shows you the countries your store visitors are based in.

Overall, we like how simple and clean Payhip’s analytics dashboard is, but it isn’t very detailed. It’s missing some important metrics and KPIs, and there’s no easy way to customize and export your reports.
Customers
The last section of Payhip that we haven’t explored yet is the Customers dashboard.
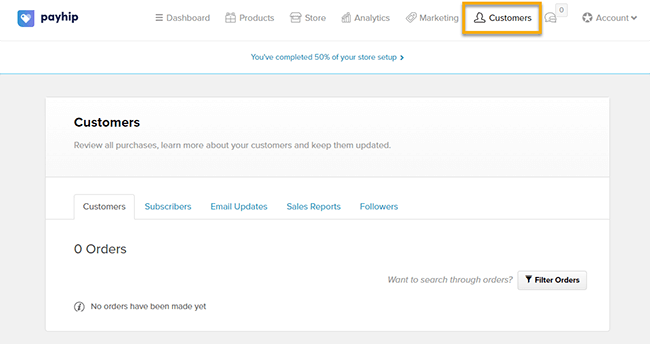
Here, you can view and manage all of your store’s customers, orders, followers, and subscribers.
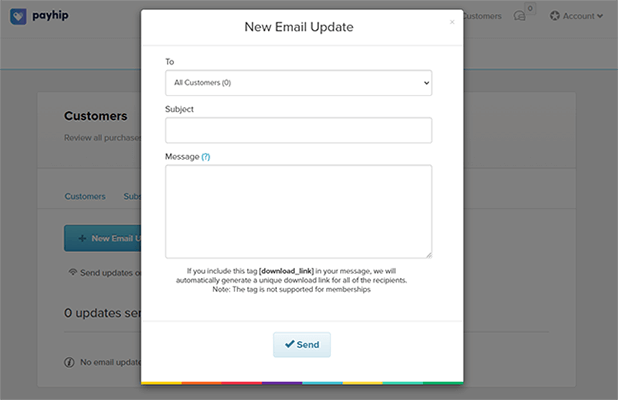
You can also send email updates to your customers in bulk or individually from the Customers dashboard.
Just switch over to the Email Updates tab, then click + New Email Update. Then, enter your subject line and message, and hit Send.
How much does Payhip cost?
Payhip’s pricing is super straightforward.
There are only free plans to choose from: Free Forever, Plus, and Pro.
No matter which plan you choose, you get access to all features, plus unlimited products and revenues. The only difference between plans is their transaction fees.
The Free Forever plan has zero monthly subscription costs, but Payhip will take a 5% cut of your revenue as their transaction fee.
If you want lower transaction fees, you can upgrade to the Plus plan for $29/month. Plus users only pay a 2% transaction fee.
For zero transaction fees, you’ll need to upgrade to the Pro plan. It’s a little pricey at $99/month but has 0% transaction fees so Payhip won’t take a cut of your revenue. As such, it works out to be the cheaper option for sellers who earn over $5,000/month in revenue.
Discounts are available to charities, but you’ll need to reach out to Payhip for a quote.
Payhip pros and cons
Now we’ve had the chance to try it out, here’s a summary of what we think Payhip’s biggest pros and cons are.
Payhip pros
- Very easy to use. Payhip might just be the easiest-to-use online selling platform on the market. Everything feels really easy and hassle-free, from building your store to adding products, managing taxes/VAT, etc.
- No feature-gating. Payhip gives you access to all of its features on every plan, even the free plan. This is great to see, as most ecommerce platforms limit access to more advanced features on the entry-level plans to encourage you to pay more.
- Unlimited everything. With Payhip, there’s no ceiling to your growth. You can earn unlimited revenue, and add unlimited products, on every plan, so you don’t have to worry about exceeding usage limits.
- Great value for money. Payhip offers a super generous free plan, and its paid plans are very affordable. Of course, the tradeoff for the low monthly subscription costs is that there are extra transaction fees on the lower-tier plans. But for low-volume sellers, it still works out super cheap.
- Perfect for digital products. Payhip seems to be built primarily around digital products. Features like the built-in course builder, license key generator, etc. make it perfect for those selling digital goods.
Payhip cons
- Only basic analytics. Payhip’s analytics dashboard leaves a lot to be desired. It only gives you access to very basic analytics. You don’t get any heat maps, A/B testing tools, or any other advanced features to help you better analyze your store performance. And there’s no way to customize your reports either.
- Not very flexible or expandable. Compared to platforms like Shopify, BigCommerce, and WooCommerce, Payhip isn’t very flexible. It doesn’t offer as deep a feature set, its store builder isn’t very customizable, and it doesn’t have a large app store so you can’t easily expand its capabilities through third-party apps and plugins.
- Transaction fees. Payhip’s Free and Pro plans both come with extra transaction fees, so Payhip takes a small cut of your sales revenue. This shouldn’t be too much of a big deal for low-volume sellers, but it adds up quickly if you have high monthly revenue. And if your margins are already tight, the extra fees could be a big problem.
Payhip alternatives
If you don’t think Payhip is the right choice for you, here are our top-recommended alternatives:
- Sellfy | Our review — The overall best ecommerce platform for selling digital products. Super easy to use and very affordable, with zero transaction fees. Includes print-on-demand functionality so you can also sell custom-printed merchandise.
- Podia | Our review — One of the best subscription platforms for ecommerce. Use it to create and sell paid communities, online courses, and other physical and digital products.
- Thinkific | Our review — The best Payhip alternative for selling courses, and our top pick for the overall best online course platform of the year.
Final thoughts on Payhip
That concludes our in-depth Payhip review.
Overall, Payhip is a fantastic ecommerce platform for beginners and creators who just need basic selling features.
It’s easy to use, and its Free Forever plan is one of the best we’ve seen anywhere.
However, it lacks the more advanced features and flexibility that larger businesses might need.
If you’d like to try out Payhip for yourself, you can click the button below to sign up for their free plan.
Disclosure: Our content is reader-supported. If you click on certain links we may make a commission.
