Are you looking for the best WordPress mailing list plugin to grow your email list?
Maybe you want a basic plugin for creating opt-in forms. Or, maybe you need a full-featured list building plugin that offers advanced features such as split-testing, lead magnet delivery, or multi-step forms, etc.
There are so many plugins on the market but which should you choose?
In this post, you will discover the best WordPress email list building plugins on the market – broken down by category.
First, we’ll look at email subscription plugins, then we’ll look at landing page plugins and other types of opt-in form plugins.
And at the end, I’ll share recommendations for different use cases.
The best WordPress email subscription plugins
Want to add opt-in forms to your WordPress website? No problem. These WordPress plugins make it easy to add opt-in forms that convert.
1. Convert Pro
Convert Pro is a popular WordPress opt-in form plugin from Brainstorm Force. The same company behind the Astra Theme and Schema Pro plugin.
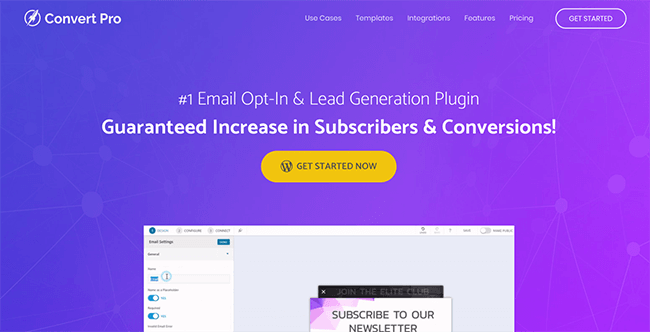
With this plugin, you can deploy a wide range of opt-in form types using a drag & drop editor. And leverage plenty of targeting & behavioural trigger options.
You get access form types you’d expect such as popovers, widgets, slide-ins, etc. As well as the more advanced types such as yes/no forms, multi-state, and content locking.
You’ll find support for a wide range of email service providers such as Mailerlite, Kit, ActiveCampaign, AWeber, Brevo, GetResponse, MailChimp, and more (view full list).
Convert Pro is a modular plugin. What does this mean? While it’s loaded with useful features, you can disable the ones you don’t need. This will improve your website’s performance.
Modules you can disable include the likes of reporting, A/B testing, email integrations, etc.
Advanced targeting functionality allows you to create forms targeting specific countries, all EU countries, or non-EU countries, for example. You can also target specific devices such as mobile & desktop.
Features:
- Advanced display triggers – The widest selection of display triggers I have found in a plugin. Includes time on page, inactivity, scroll to CSS class, exit intent, and more. They can be stacked and configured groups.
- Advanced targeting functionality – Ensure the right people see the right forms on your website. Target forms to specific pages, posts or taxonomies. Geographical targeting also available.
- Modular plugin design – Turn off the features you don’t need to improve website performance.
Pricing:
Introductory price from $87/year. Lifetime offer from $387.
Read our Convert Pro review.
2. ConvertBox
ConvertBox is a hidden gem in the world of lead generation tools. It’s a SaaS platform that connects directly to WordPress.

Over the years I’ve tested a lot of tools designed to create email sign up forms but this has the simplest user interface I’ve tried.
I can go from opening the editor to publishing a form in minutes. There aren’t many templates to choose from but those that are available look great.
You can create several different form types – sticky bars, popovers, slide-ins, embedded forms and full page forms. New features are added frequently.
You can run A/B split tests quickly by duplicating an existing form, display your forms the URL’s you choose or exclude (or categories and tags if you have their WordPress plugin installed.)
There are a number of targeting rules you can use which include device type, location, URL string, referring website, and more.
What stands out above all else is how easy it is to set up multiple choice forms where each answer can assign subscribers to a different tag/group/list – this is extremely powerful when used for email segmentation funnels.
Key features:
- API integrations and custom HTML forms – Most email service providers are supported, but if yours isn’t – you can use their custom HTML form option.
- Advanced display and targeting options – Display forms when users are about to leave, on a timer, link click, etc. Then select exactly which page, and which targeting options (location, referring website, etc.) you want to use.
- Real-time analytics – See exactly how your forms and split-tests are performing. Not only will you see leads, views, and conversion rates, but you’ll also see interactions.
Pricing:
$495 lifetime offer available for a limited time. Supports 500,000 monthly impressions and 50 websites. After that, it looks to be priced at $99/month. Unfortunately we have no ETA on when their pricing will changes.
3. Thrive Leads
Thrive Leads is a very feature-intensive WordPress email subscription plugin.
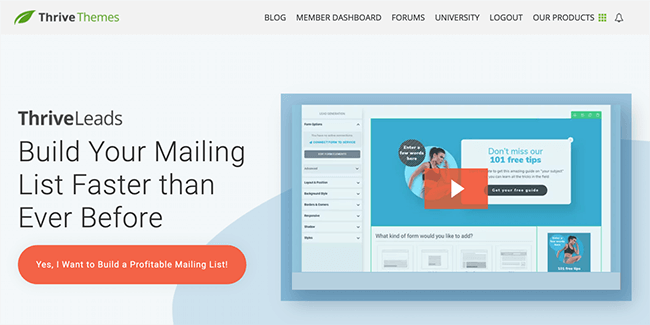
This powerful plugin allows you to design and deploy opt-in forms using a drag & drop editor. Customize one of the 60+ included templates or create the perfect opt-in form from scratch.
Then, choose how you want your forms to be displayed. You can set certain form types to appear based on exit intent, time on page, or a variety of other triggers.
And, you can display forms on specific posts and pages or via categories, tags, etc. And create dedicated forms for mobile and desktop.
You can run A/B tests to find what converts best for your audience. Duplicate a form to test copy & design changes or test different form types against each other for maximum conversions.
Thrive Leads also gives you deep reporting and analytical insights so you can understand how your forms are performing, and where your highest converting traffic comes from.
Key features:
- Supports almost every type of opt-in form – Add mobile-specific forms, 2-step forms, popovers, in-content forms, after post forms, slide-ins, widgets, content lockers, ribbons, and more.
- API integrations and custom HTML forms – Most email providers are supported. Custom HTML forms provide a way to connect any that aren’t supported.
- Boost conversions with SmartLinks – Display different content to those who have already signed up to your email list. Great for boosting product sales after people join your mailing list.
Pricing:
$99/year (renews at $199/year thereafter) for standalone product or access all Thrive Themes products for $299/year (renews at $599/year thereafter) with Thrive Suite membership.
4. Bloom
Bloom is a full-featured list building plugin for WordPress, created by the team at Elegant Themes.

Use this plugin to add 6 different types of opt-in forms – including popovers, widgets, fly-ins, below post forms, inline forms, and content lockers.
There isn’t a visual editor or even a live preview like you get with Convert Pro and Thrive Leads – but the edit is simple to use.
You get access to a lot of templates but most of them look quite similar. Unlimited email accounts can be connected, and there’s a custom HTML form option for any providers there isn’t a direct API integration for.
Good analytics functionality and targeting features are included.
Key features:
- Simple editor with plenty of templates – It’s not a drag & drop editor but it’s easy to use.
- Built-in form analytics – Everything you need to monitor performance.
- Advanced targeting – Display opt-in forms on specific pages, posts, and categories. Exclude from specific pages when needed.
Pricing:
$89/year for unlimited websites and access to all other Elegant Themes products. Including the popular Divi theme, a social sharing plugin and more.
5. WP Subscribe
WP Subscribe is a free opt-in form plugin for WordPress that is extremely lightweight.

This plugin is free and designed to be as simple as possible.
Just install & activate, then head to your widgets page and add the widget to whichever widget area you like.
It’s fairly limited but if you only want to add basic opt-in forms to widget areas – it could be all you need.
There is a pro version of this plugin which offers the option to change colours, display exit intent popovers, and more.
Key features:
- Support for several email providers – Currently, MailChimp, AWeber and Feedburner are supported.
- Simple opt-in forms – Easily add an opt-in form to widget areas on your WordPress website.
- Pro version adds extra features and integrations – This includes additional integrations for MailRelay, Mad Mimi, MailPoet, Mailerlite, GetResponse, and more.
Pricing:
FREE. Pro version costs $19 for unlimited websites.
6. WP Notification Bar Pro
WP Notification Bar Pro makes it easy to add notification bars to the top or bottom of your WordPress website.

You can choose to display an opt-in form within notification bars, or you can display text & a button linking to one of your landing pages.
You can also display text, links to your social profiles, or a timer.
This plugin allows you to choose where on your website your notification bars are displayed, and who it is displayed to.
For example, you could choose to show certain bars only on mobile, while hiding them on desktop. Or you could create specific bars for Search Engine Visitors.
A priority can be set in case there are multiple bars showing on a single page – this ensures visitors don’t see multiple bars.
There is a free version of this plugin that can be used to link to landing pages or display custom content but there is no opt-in form functionality.
Key features:
- A/B split testing – Discover what converts best for your audience.
- Basic analytics – Track which notification bars your visitors are clicking on.
- Supports most popular email providers – This includes MailChimp, GetResponse, AWeber, Campaign Monitor, Constant Contact, ActiveCampaign, Benchmark, Brevo, Drip, Kit, Mad Mimi, and more.
- Several bar types – Opt-in form, timer, text, button, social profiles, and more.
Pricing:
$19 for unlimited sites.
7. MailChimp for WordPress (MC4WP)
As you’ve probably guessed from the name, MailChimp for WordPress helps you connect your WordPress website with your MailChimp account.

If you’re looking for a quick and easy way to add opt-in forms to your website, and you use MailChimp – this plugin is a nice free option.
It’s somewhat limited on big features but it adds some smaller features that other plugins don’t offer.
For example, you can add “tick to subscribe” boxes to comment forms, registration forms, WooCommerce checkout pages, and more.
You get full control over form fields and can easily customize colors to match your website’s branding.
Key features:
- Easy way to add opt-in forms – Quick to integrate with basic customization.
- Click to subscribe tick box feature – Add tick boxes to comments, registration forms, and more.
- Integrates nicely with other popular plugins – Integrates well with WooCommerce, Contact Form 7, Gravity Forms, WPForms, BuddyPress, MemberPress, and more.
Pricing:
FREE.
The best landing page builders for WordPress
Using a dedicated landing page is a great way to get more email subscribers. They’re ideal for paid traffic and they convert far better than an opt-in form on your blog.
These WordPress plugins make it easy to create email capture pages, sales pages, and other funnel pages.
I highly recommend checking out my article on WordPress landing page plugins, but here are my top picks:
8. OptimizePress 3
OptimizePress is a conversion-suite that includes a powerful plugin for building landing pages and sales funnels. This is what I use on all of my sites.

If you’ve heard about OptimizePress before – forget everything you’ve heard.
With version 3, their entire plugin was re-built from the ground up.
OptimizePress now has the fastest editor I’ve tested. That’s from both a back-end and front-end loading perspective. And from a UX perspective, it beats a lot of SaaS platforms I’ve tested.
It comes with plenty of templates for all sorts of funnel pages and it’s own WordPress theme that allows you to add opt-in forms to your site – right out of the box.
There’s also a funnel builder that allows you to build entire sales funnels, A/B test your landing pages and view detailed analytics.
Their checkout add-on allows you to build checkout pages and handle the entire process of selling digital products. Right from integrating payment providers like Stripe to delivering digital products to your customers.
Key features:
- 100+ landing page templates – Create all sorts of types of landing pages & funnel pages using these templates.
- Page sections – Similar to with Thrive Architect’s page blocks, you can add pre-designed content blocks to speed up the design process.
- WordPress theme – Includes a customizable theme with opt-in form functionality.
- Funnel builder – Create entire sales funnels easily. Funnel types include launch funnels, list building funnels, webinar funnels, and more.
- A/B testing & analytics – No need to use an external plugin like Google Optimize.
- Checkout builder – Build your own checkout pages and integrate directly with payment providers like Stripe.
Pricing:
Landing page builder starts at $129/year. OptimizeFunnels and all other add-ons are available for $199/year and can be used on 20 personal sites.
Read our OptimizePress review.
9. Thrive Architect
Thrive Architect is one of the best landing page plugins on the market. With it’s drag & drop editor and themed template sets, it’s ideal for creating email capture pages.

With this plugin, you get one of the best visual editors around giving you the ability to customize freely. Including the option to change how pages display on mobile devices. For example, you can hide certain elements from mobile devices.
Start your landing page from scratch or one of the 270+ landing page templates.
Templates include webinar pages, course pages, opt-in form pages, sales pages, and more.
Key features:
- 270+ landing page templates – Grouped into themed sets so you can build sales funnels with consistent branding.
- Build landing pages faster with page blocks – Build entire pages in minutes using pre-designed content blocks.
- Deep integration with other plugins in the Thrive Suite – When you use other plugins such as Thrive Leads, Thrive Quiz Builder, and Thrive Comments – they appear as elements to add within Thrive Architect.
- A/B split-testing add-on available – If you opt for Thrive Suite, you get this add-on included. It’s great for running quick tests to improve conversions.
Pricing:
Introductory price at $99/year (renews at $199/year thereafter) for standalone product or access all Thrive Themes products for $299/year (renews at $599/year thereafter) with Thrive Suite membership.
10. Leadpages
Leadpages is a lead generation platform with a great landing page builder that integrates directly with WordPress.

Due to Leadpages being a SaaS app, it hosts all of your landing pages for you. You can host landing pages on a Leadpages URL or you can use their WordPress plugin to integrate directly with your website.
There are over 100 landing page templates you can customize – this includes email capture pages, lead generation pages, sales pages, webinar pages, and more.
What I love about Leadpages is the convenience and simplicity. I can manage landing pages across multiple domains from a single dashboard and run A/B tests with a few clicks. Then, their reporting shows me how my pages are performing.
Other lead generation features include alert bars, popovers, and LeadLinks. Leadpages also doubles as a website builder.
Key features:
- Leadmeter conversion assistant – This tool evaluates your landing page and provides recommendations as you’re building it.
- Digital asset delivery – Deliver lead magnets to your subscribers using this useful feature.
- Checkout builder – Stripe integration made easy.
- Built-in A/B testing – Run split-tests quickly and view analytics to monitor performance.
Pricing:
From $49/month, annual discounts available. Free trial for 14-day available.
Read our Leadpages review.
Other email capture plugins for WordPress
Aside from adding email capture forms and creating landing pages, there are a bunch of other unique ways to grow your email list.
In some cases, these plugins will also help you drive more traffic to your website.
11. Thrive Quiz Builder
Thrive Quiz Builder makes it easy to create viral quizzes that generate traffic and email subscribers.

Quizzes are one of the most underrated content types you can create and they are very effective at growing mailing lists. In fact, a friend of mine used viral quizzes to generate 5,000+ monthly visitors to a brand new website – with a tiny audience.
They are quick to create and have viral social sharing built-in. Then, you can take advantage of all the traffic you receive to build your email list.
Simply choose a quiz template (list building in this case), customize your pages and add your questions & answers.
And powerful analytics allow you to see exactly how your quizzes are performing, and where people are dropping off.
Key features:
- Show personalized offers to your readers – Instead of guessing what your readers want, you can ask them. Then deliver recommended content based on their answers.
- Segment your email list easily – This is critical to get the best performance out of your email list.
- A/B test critical quiz stages to boost conversions – A/B test your splash page, opt-in gate, opt-in forms, and results pages to boost performance.
- Integrates with popular email providers – Thrive have plenty of API integrations for popular providers such as ActiveCampaign, Drip, Kit, Mailerlite, and more.
Pricing:
$99/year (renews at $199/year thereafter) for standalone product or access all Thrive Themes products for $299/year (renews at $599/year thereafter) with Thrive Suite membership.
12. RafflePress
RafflePress is a powerful giveaway plugin that can be used to increase traffic, social media followers, and email subscribers.

Back when I was managing a marketing agency, giveaways were one of my favourite marketing tactics to use for new clients.
With minimal time and effort, we could significantly boost traffic, social followers, and email subscribers. Free stuff is a powerful motivator and viral sharing is built-in to the entry process.
And, you don’t need to pay out for prizes. Just reach out to brands in your niche and ask them to donate prizes. In exchange, they’ll get brand awareness and you can set additional entry methods such as following them on Twitter.
With RafflePress you can set up your own giveaways fast using pre-made templates. And allow all sorts of entry types – joining your email list, following your social profiles, answering a question, etc.
You can choose to embed your giveaway on any page or create a giveaway landing page.
Key features:
- Create viral giveaways fast – A simple user interface allows you to create giveaways in minutes.
- Embed your giveaway or use a landing page – If you don’t want to create a new post/page on your blog, RafflePress can create a distraction free landing page.
- Integrations for popular email providers – You can use any of the API integrations, connect to Zapier or use a custom web form.
Pricing:
Free plan available. Introductory prices from $39.50/year with a 14-day money back guarantee.
Final thoughts
Building an email list gets easier when you have the right plugin for the job.
The WordPress mailing list plugins listed above will help you collect emails, generate leads, build landing pages and more.
You’ll be able to take advantage of cutting edge features and strategies that will increase your email sign up conversions significantly.
So, now it’s time to get started. Pick out a plugin and start building your email list.
Related Reading:
- The Best Email Capture Tools To Generate More Leads.
- A Comparison Of Leading Email Marketing Services.
Disclosure: Our content is reader-supported. If you click on certain links we may make a commission.