How To Use Categories In WordPress

Does your blog need a bit of organization? Have you been blogging for a while without so much as a second thought as to the multiple categories you’ve been creating?
We’re going to teach you about WordPress categories in this post, including how to add a new category and how use them properly.
What is a WordPress category?
Categories are part of WordPress’ taxonomy system, the system the content management system uses to classify the various types of content on your WordPress site.
From the backend, categories allow you to organize all of the content you publish to your blog by topic. Take a look at our own blog as an example. If you hover over the Blog item in our menu, you’ll see some of the categories we use here at Blogging Wizard.
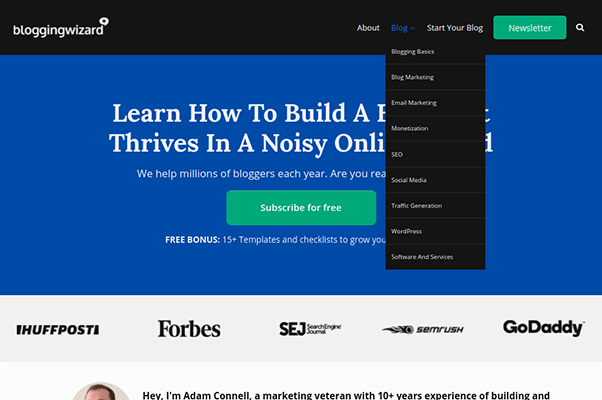
Each of these categories represents a common topic we cover on our blog.
This is also a great example of how blog categories improve user experience on the frontend. By assigning blog posts to their appropriate categories based on the topics they cover, readers are able to find content much easier on the site.
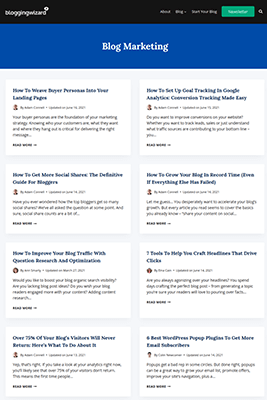
This is because all the posts you assign to categories will show up on each individual category’s archive page. Here’s an example from our blog:
WordPress categories can also be used in a hierarchy by creating parent categories, child categories and grandchild categories.
WordPress categories vs WordPress tags
WordPress tags are another part of WordPress’ default taxonomy system, and they’re not to be confused with categories. Whereas categories represent the main topics your blog covers, tags should represent topics you cover frequently on your blog but aren’t necessarily its primary focus.
For instance, we mention Thrive Themes’ suite of products quite often on the blog. This would make “Thrive Themes” a fantastic tag but a poor category as our blog’s primary (and even secondary) focus is not Thrive Themes content.
How to use categories in WordPress
Creating categories can be achieved in two ways in WordPress: in the Categories section of the WordPress admin area and in the WordPress editor.
Navigate to Posts → Categories. All WordPress sites have one default category to start out with, and you can’t delete it. That’s because WordPress is designed to assign blog posts to this category automatically if you don’t assign a category yourself.
As such, the default category name is “Uncategorized.” Fortunately, you can rename it. First, let’s go over how to decide which categories to create for your blog.
There’s really no rule on the number of categories you can create. However, sticking with two to five parent categories is a great way to ensure you stay on topic in regards to your niche as you fill out your editorial calendar.
With that said, take a look at the posts you’ve published or plan to publish, and write a list of all the topics they cover. No matter how many topics you come up with, try to organize all of them into those two to five primary categories we talked about.
Let’s use a technology blog as an example. Common topics this blog publishes content for include Android smartphones, iOS smartphones, Chromebooks, Macbooks, Windows laptops, graphics cards, other PC hardware and more.
Instead of creating a different category for each, you should create a smaller number of parent categories to represent the primary topics you can group them into. For our example blog, these parent categories could be “Mobile Devices,” “Laptops,” and “Desktops.”
Do the same with the topics your blog covers, then decide which parent category you use the most or which one seems most important. We’ll turn the default category into this category.
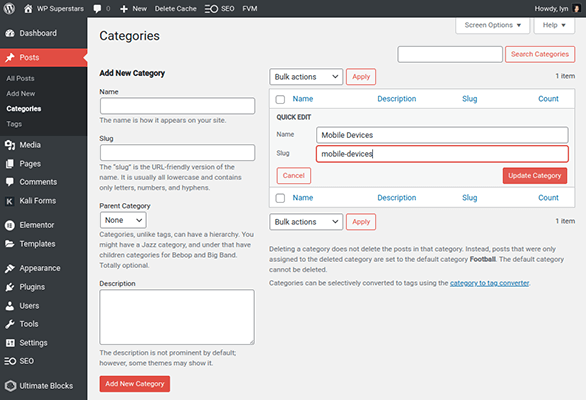
Hover over the default category, and click Quick Edit. There are two fields you need to worry about here. The Name field controls the way the name of your category appears in menus and the title of your category archive page. The slug controls the way it appears in your site’s URLs.
Use title case for the blank field and all lower case letters for the slug. Insert dashes – between words in the slug, meaning “mobile-devices” instead of “mobile devices” or “mobiledevices.” Click Update Category to save your changes.
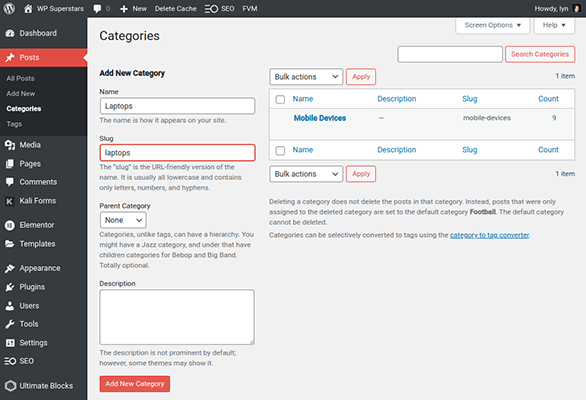
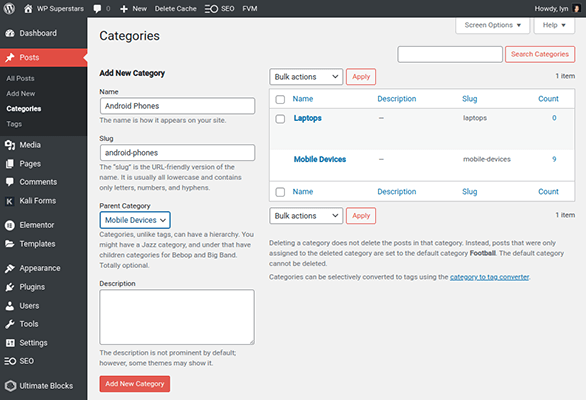
Now, let’s learn how to create a new category. It’s the same process. Enter the name in title case in the Name field and the URL format in the slug field. You can also add a category description.
Then, click Add New Category.
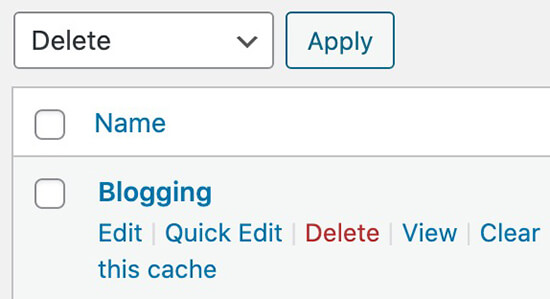
To delete categories hover over the category name and select Delete. You can select multiple categories at one and delete these in bulk by clicking on the tab at the top, selecting Delete and clicking Apply.
How to create a child categories in WordPress
Use the same process to create child categories. This time, though, choose a parent category to assign the child to before you click Add.
Do the same with grandchildren, but choose a child category as its parent instead.
Using WordPress categories in the WordPress editor
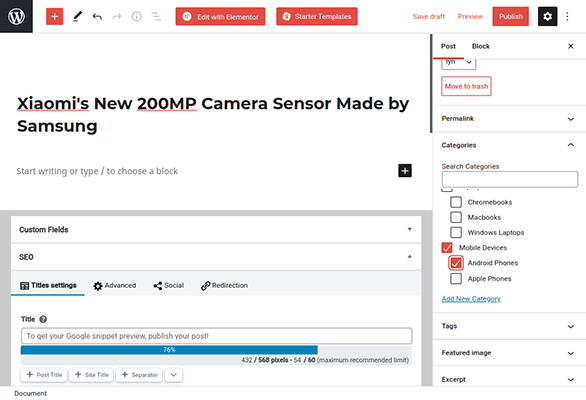
The WordPress editor has a section for categories in the right sidebar. All you need to do is open it, and select the category or categories you want to assign an individual post to.
Generally, you should only assign one parent category to each blog post. If you want to assign it to another category based on the topic the post covers, use a child category as well. For example, our example post “Xiaomi’s New 200MP Camera Sensor Made by Samsung” fits under the parent category “Mobile Devices” and the child category “Android Phones.”
If your post doesn’t fit under a category you already have, create a new one on the spot. Just click Create New Category, and follow the same guidelines as before.
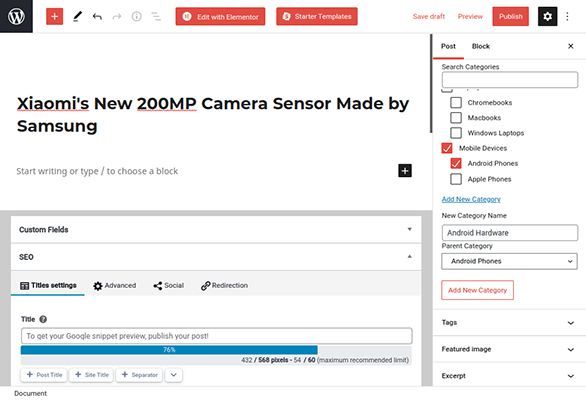
The Slug field is missing, but WordPress will generate one for you.
If you already had posts published before starting this tutorial, take a bit of time to recategorize them post by post. Just be sure to click Update on each.
How to edit permalinks for WordPress categories
Warning: Ignore this section if your site is already established. Changing your permalink structure can lead to a lot of broken links and will likely damage your site’s overall SEO performance.
Generally, it’s best to choose Post Name as your permalink structure for blog posts. It creates a shorter, straight-to-the-point permalink, which is better for SEO.
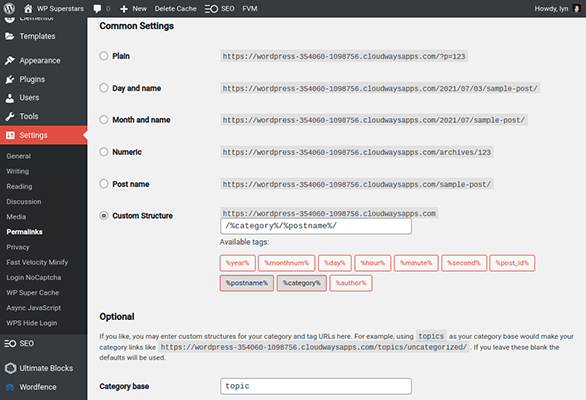
However, if you want to add your parent category to your permalink structure, choose Custom Structure on the Permalinks settings page. Next, clear the field, and click the %category% button followed immediately by the %postname% button.
So, if I use “xiaomi-200mp-camera-sensor” as the permalink for the example blog post I used earlier and choose the parent category “Mobile Devices,” here’s how that would look:
- Post Name Structure: mydomain.com/xiaomi-200mp-camera-sensor
- Custom Structure with Category: mydomain.com/mobile-devices/xiaomi-200mp-camera-sensor
This next tip is unnecessary, but feel free to do it for new sites if you wish.
You can also change the base phrase WordPress uses for the permalink structure of categories. This is “category” by default.
WordPress uses “topic” as an example. By adding “topic” to the Category Base field, your permalink structure would look this like:
- Default Category Base: mydomain.com/category/mobile-devices
- “Topic” Category Base: mydomain.com/topic/mobile-devices
Some WordPress SEO plugins remove this base from your permalink structure. For example, SEOpress has “Remove /category/ in your permalinks” enabled by default in the Advanced settings tab.
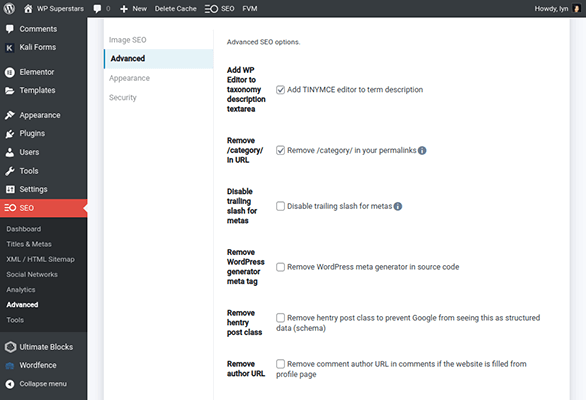
You’ll need to disable this setting if you want to use a category within your permalink structure.
Over to you
We hope you’ve found this tutorial on WordPress categories useful.
What’s next? We’ve got plenty more beginner-friendly tutorials you may find useful: