How To Make And Sell Lightroom Presets: The Definitive Guide

Want to learn how to create and sell Lightroom presets? You’re in the right place.
Lightroom presets are like Instagram filters, but a whole lot better.
They’re pre-made configurations of settings in Adobe Lightroom that you can use to transform your photos in one click. Photographers and influencers often utilize them to achieve a specific ‘look’.
In this post, we’ll be showing you how you can create a passive income stream by creating and selling your own Lightroom presets online.
Ready? Let’s get started.
Why sell Lightroom presets?
Lightroom presets are one of the best digital products you can sell online. Here’s why:
- High market demand. Thanks to the growth of social media platforms like Instagram, there’s a huge market demand for unique photo editing filters right now. Everyone wants their feed to stand out and look visually stunning, so there are tons of potential customers for your presets.
- Great side income for photographers. If you’re a professional photographer, the chances are you already use Lightroom and have your own go-to, custom-made presets, so there’s really no reason not to list them for sale online. It could open up a new passive income stream for you for very little effort.
- Hone your craft. Making Lightroom presets gives you the opportunity to experiment with photo editing and develop your skills while making money at the same time.
- Unlimited stock. Once you’ve made a Lightroom preset once, you can sell it as many times as you want, with no stock to worry about. And fulfillment is as simple as providing the customer with a download link.
- Low overheads. There are very few expenses involved in selling Lightroom presets (or any digital product, for that matter), so the vast majority of your sales revenue will be profit.
How to make lightroom presets
First, let’s talk about how to create Lightroom presets. If you’ve already made your own presets and just want to know how to sell them, feel free to skip this part. If not, read on and we’ll walk you through it.
Choose a niche
Step number one is to choose your niche.
By that, we mean figuring out what kind of presets you want to make and who you’re going to sell them to.
Presets are typically sold in cohesive packs. Those that sell the best are designed around a specific theme with a clear use case in mind.
Here’s an example to illustrate what we mean. Take a look at this Night Sky preset pack:
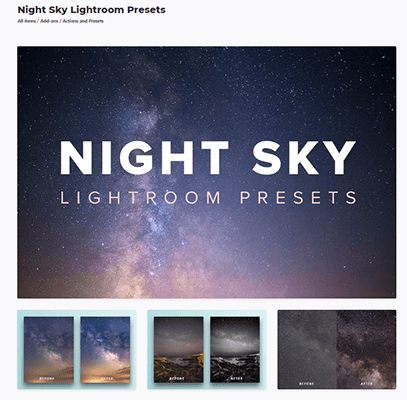
It has a clear target market and use case: It’s targeted at astrophotographers and is meant to be used to process photos of the Milky Way and the starry night sky.
Here’s another example:
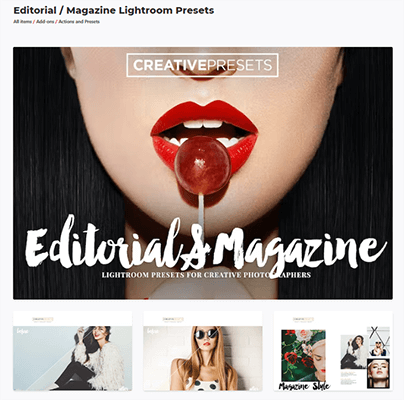
This preset pack is targeted at creative photographers working on photos for magazines/editorials. And it’s the most popular Lightroom preset on Envato Elements.
Like the two examples above, you should have a clear niche in mind before you start making your presets, and keep them all clustered around a single theme. That preset theme might be a specific use case, aesthetic, atmosphere, color, or anything else.
For example, you could create presets for:
- Portrait photographers
- Food photography
- Car photo processing
- Autumn photos
- Bringing out orange tones
- Applying a vintage look
You get the idea.
When choosing your niche, you should also try to find a gap in the market.
Ideally, you should create something there’s a clear demand for but with little competition. Keyword research tools can help with this by showing you what people are searching for. You can also browse preset marketplaces to see what sells well.
Choose some photos and import them to Lightroom
Once you’re clear on what kind of presets you want to sell, it’s time to start creating them. And for that, you’ll need two things:
- Adobe Lightroom software
- Some photos to edit
You’ll need at least 3 photos for each preset you plan on making: One for creating the initial edit, and two for testing how it looks when applied to different types of photos.
So if you’re hoping to create a pack with 10 different presets, you’ll need 30 photos in total.
The photos you use should make sense for the niche you’re targeting, but should also have some variety. For example, if you’re creating an astrophotography preset pack, they should probably all be shots of the night sky, but with different levels of white balance, exposure, etc.
If you’re creating a preset pack for landscape photographers, include a mix of photos shot at different times of day, some with water and some without water, etc.
Or if you’re creating presets for portrait photography, include a mix of photos with subjects that differ in skin complexion, age, gender, pose, etc.
Also, we’d recommend using RAW image files instead of JPEGs as presets tend to work better with RAW files.
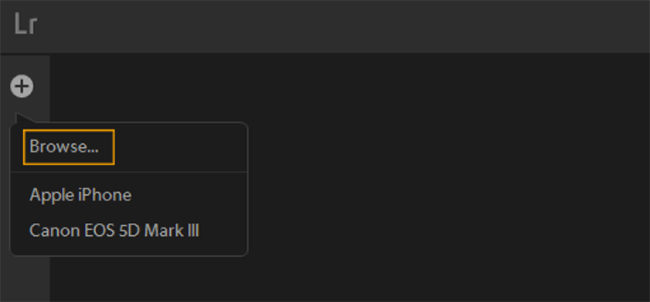
Once you’ve selected your photos, import them to Lightroom and you’re ready to start editing.
Create your first edit
To create your first preset in Lightroom, you’re going to play around with the editing settings until you achieve the desired look.
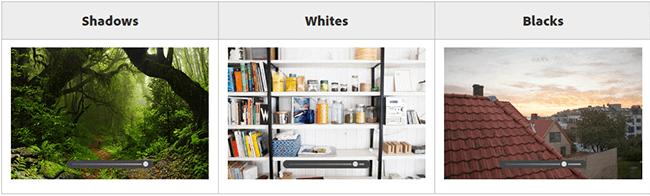
There are a lot of sliders and things you can change when editing your photos.
For example, you can adjust brightness with the Exposure slider, change the texture/detail with the Clarity slider, and adjust coolness/warmth with the Temp slider. Plus, change the shadows, highlights, contrast, vibrance, and more.
This guide isn’t meant to be a complete crash course on how to use Lightroom, so we’ll assume you know the basics already for the sake of brevity.
However, we will briefly cover some important tips to keep in mind that specifically apply to the editing process when you’re creating presets.
The first tip is to never change the global white balance sliders. Here’s why.
Other photographers are going to use your presets on their own images, right? And each of these images will have been shot at a different white balance.
So even if a particular global white balance setting looks good on the images that you’re testing, it might not look good on theirs. That’s why you should always leave the white balance slider set to As Shot.
The next tip is to utilize curves. We don’t want to change the global white balance, but it’s possible to change the temperature of the photo using curves without affecting the global white balance.
To do so, select Tone Curve from the preset menu.
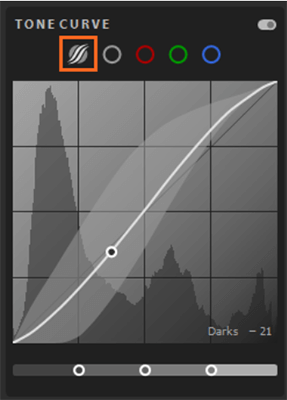
Then, you can make temperature adjustments that are relative to whatever global temperature the image has, so the effect will work correctly regardless of the photo being edited. You can also play around with the Calibration tool to adjust relative color temperatures.
The third tip is to utilize adaptive masks. Adaptive masks are another really powerful tool for making relative edits to photos, rather than global changes, which is what we’re aiming for.
Just click the masking icon, then select the part of the photo you want to apply changes to: Sky, Background, or Subject.
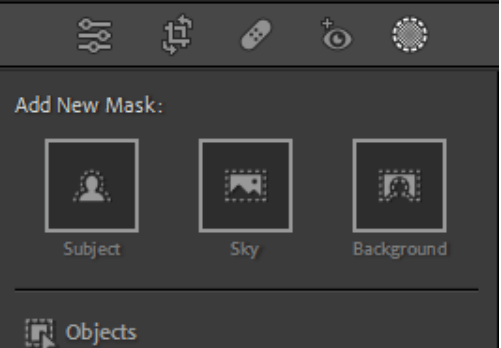
You can then change the color temperature/tint relative to the selected mask, rather than the global white balance.
The final tip is to avoid using location-based, selective adjustments with the Adjustment Brush, Radial Filter, etc. The reason for this is the same reason we don’t want to make global white balance adjustments: It won’t look right on every photo.
For example, let’s say you’re editing a portrait photo to create your preset, and you apply an adjustment to the subject’s eyes with a Radial Filter. It’ll work perfectly on the first photo.
But when the customer applies the preset to their own photo, unless by pure coincidence their subject’s eyes are in exactly the same place as on your photo, it’ll miss the mark and affect a different area.
Save your preset
Once you’re happy with the edit, you’re going to save it as a preset.
To do so, click the + icon on the preset panel, and click Create preset.
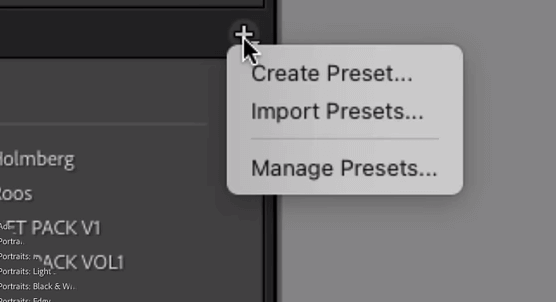
On the next window, enter a name for the individual preset (choose something that makes it clear what the preset does), and create a group to save it in. The group will be your preset pack and is where you’ll save the next few presets you make too.
Then, make sure all the relevant Settings checkboxes are ticked.
The only ones that should be ticked are the settings that you’ve changed. So for example, if your preset adjusts the Tone Curve and HSL settings but nothing else, make sure only these two boxes are ticked.
This will ensure the preset doesn’t needlessly override other settings and mess up the user’s existing edits.
Test your preset on other images
The preset you just saved is your first draft. Next, you’re going to test it out on two other images and polish it up as needed.
Open up image number two, and apply your newly-saved preset by selecting it from the preset panel.
You might find it doesn’t look as good in this image as the first one. For example, the preset might make the photo look oversaturated or undersaturated. Or you might decide you want to boost the luminance or add more contrast or clarity.
In that case, you can make further edits and update the preset with the new adjustments as you go. Just right-click it in the preset panel at any time and select Update with Current Settings.

Do the same again with image number 3. Once it looks good on all three images, it’s ready to sell as part of your preset pack.
Repeat the process to create more presets
At this point, you should have one preset ready to go. But you’re going to want at least a few more in your pack to make it more attractive to customers. We’d recommend 10 to 20.
So repeat the process to fill out your preset pack with more presets. Each edit should be different, but they should all be grouped around a consistent theme.
Export your preset pack as a ZIP folder
Once you’ve finished making all the presets, right-click the group you saved them to in the preset panel and click Export Group.
Then, enter a name for your preset pack and hit Save to export it as a ZIP folder.
This is the folder you’re going to sell to your customers online and contains all the individual XMP preset files.
Prepare your listing images
One final step before we’re ready to start selling is to prepare your listing images.
The main listing image should include the title of your preset pack on top of a photo that shows how your best preset looks when applied to a photo.
The rest of your listing images should showcase how the different presets in your pack look on different kinds of photos.
A good way to do this is to cut each photo in half, with one half showing the way it looks before the preset, and the other half showing how it looks after the preset.
You can use graphic design tools like Canva to create your listing images, or just grab shots of your edits in Lightroom.
How to sell Lightroom presets on your website
The best place to sell Lightroom presets is on your own website.
That’s because, unlike people who sell presets on third-party marketplaces, you won’t have to share a cut of your sales with anyone else. You keep all the profit for yourself.
Plus, you also have complete control over everything: pricing, store design, checkout, etc.
And it’s not even hard to get started. You can build your own ecommerce website in minutes using Sellfy. Here’s how to do it.
Step 1: Sign up for Sellfy.
Sellfy is an ecommerce platform that was built specifically for selling digital products, so it’s the perfect solution for selling Lightroom presets.
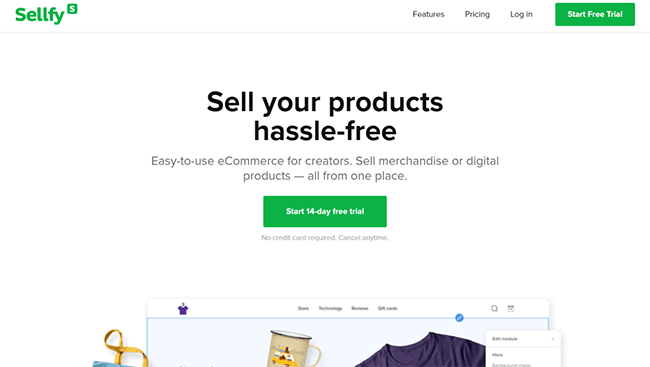
It’s incredibly easy to use, doesn’t charge any transaction fees, and comes with all the tools you need to build your online store, market your products, and accept payments.
First, head to Sellfy’s website and sign up for a free trial. You can build your store and use the platform free for the first 14 days, and if you like it, upgrade to a paid plan later (we’d recommend the Starter plan).
Once you’ve signed up, log in and work through the setup wizard until you reach your dashboard.
Step 2: Upload your preset pack.
Next, select Product > Digital product > Add new product, and then upload your preset pack as a ZIP file. You’ll need to give the preset pack a product name and add a product description.

In the description, make sure you specify what presets are included in the pack, as well as basic instructions on how to use them, tips for best results, software/file type compatibility, and any other important information you think your customers will need to know.
You can add your listing images under the Product preview section, then set a price.
It’s up to you how much you charge for your presets and what sort of license you want to offer. Some sellers charge as little as $5 per pack, whereas others (especially famous photographers) charge hundreds of dollars.
Once you’re done filling out the product details, hit Save product and your product page will be live on your site.
Step 3: Finish setting up your store
Lastly, head to your Store settings page to finish setting everything up.
From here, you can connect a payment processor (Stripe or PayPal) so that your customers can check out, and also connect a custom domain if you want one.
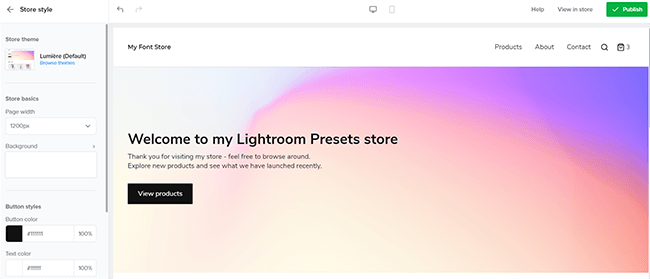
You can also open up the Store Customizer from the settings page. In the Customizer, you can choose a theme to change your site design in one click, and then customize the design and content in a drag-and-drop editor.
How to sell Lightroom presets on marketplaces
Aside from your website, you can also list your Lightroom presets for sale on other, third-party platforms and marketplaces.
In doing so, you’ll be able to tap into their existing customer base, which can make it easier for your presets to be discovered and for you to make sales.
But the downside is that most marketplaces will take a cut of the sales you make through their platforms.
Here are some marketplaces you might want to list your presets on:
- FilterGrade. A popular marketplace for professional photographers, with 500,000 monthly visitors. Lots of big-name photographers use FilterGrade and many preset packs sell for hundreds of dollars. However, you only earn 70% commission on your sale – FilterGrade takes a big cut.
- Etsy. Another popular place to sell presets. It has a huge user base with millions of regular shoppers, so it’s great for discovery. However, you’ll need to pay a listing fee for each preset you list for sale, plus transaction fees of 6.5%.
- Envato Elements. A subscription-based platform that pays sellers through a revenue-share model. You can’t set your own prices – the amount you earn will depend on the number of Envato subscribers that download your presets.
How to market Lightroom presets
Now that you’ve listed your Lightroom presets for sale, it’s time to sit back and let the sales roll in, right? Not quite. In order to get customers, you’ll need to have a solid marketing plan in place. Here are some marketing strategies you can try to get the ball rolling.
Drive sales through Instagram.
Instagram is one of the best marketing channels for photographers as it’s entirely based on sharing photos.
If you’re a photographer, try to grow your Instagram following by consistently posting awesome shots, using the right hashtags, engaging with other accounts, etc.
Then, when you’ve grown your following, you can monetize your audience by selling your Lightroom presets to them. Add a link to your Sellfy store in your Instagram bio and include a CTA in some of your social posts asking your audience to check it out.
Launch a social media contest
You can grow your Instagram following and promote your store even faster by running a giveaway contest. You can use a social media contest tool like SweepWidget to set it up and require users to follow your Instagram, visit your store, or sign up to your emailing list in order to enter.
Use email marketing
Build a mailing list and use email marketing software to set up automated email marketing campaigns that promote your preset products and nurture leads. Sellfy comes with basic email marketing functionality to help you get started.
Final thoughts
That concludes our guide on how to make and sell Lightroom presets online. We hope you found it helpful!
Selling presets can be a great side hustle. But there are plenty of other digital products you can sell instead. These guides will help you get started:
- How To Sell Fonts
- How To Sell Videos
- How To Sell Digital Art
- How To Sell Audio Files & Sound Effects
- How To Sell Audiobooks
- How To Sell PDFs
Good luck!
Disclosure: Our content is reader-supported. If you click on certain links we may make a commission.