Want to learn how to add a shopping cart to your website? We’ve got you covered.
In this post, we’ll share a step-by-step guide you can follow to add a shopping cart to your site using Sellfy.
And don’t worry, it’s super easy. You don’t need to be an experienced web developer to follow this tutorial and the whole process should take less than 10 minutes.
Why use Sellfy to add a shopping cart?
There are a few different ways you could implement a shopping cart on your site.
For example, you could custom code your own shopping cart from scratch, or install licensed shopping cart software on your web server, but that’s a lot of work—you’d need a whole dev team behind you.
Another option would be to rebuild your online store on an all-in-one ecommerce platform that already has a shopping cart built-in. But if you already have an existing website built on something like WordPress, you probably don’t want to start over on a whole new platform.
That’s why in this tutorial, we’re going to be following a much simpler and quicker method to add a shopping cart.
We’re going to embed ready-made, hosted shopping cart software onto our existing website using Sellfy.
It’s much more hands-off than other methods: You just add your products, and then copy-paste a few lines of code. Sellfy does all the heavy lifting for you.
How to add a shopping cart to your website: Step-by-step
Alright, let’s get started. Here’s how to integrate a shopping cart on your site broken down into six easy steps.
Step 1: Sign up for Sellfy
First off, you’re going to need to sign up for Sellfy.
Sellfy is an ecommerce platform that will power the backend of your shopping cart. It hosts your products, handles payments, and manages the checkout process.
Plus, as a bonus, it also comes with a bunch of other useful features, like marketing tools, print-on-demand fulfillment, and more.
You can get started with a 14-day free trial, but customers won’t be able to actually checkout through your cart until you subscribe to a paid monthly plan.
There are a few different plans available. The main difference between them is how much you can sell per year.
On the Starter plan, you can only process up to $10k in sales. Business users can have up to $50k in sales, and Premium users up to $200k. Higher-priced plans also come with other features and benefits.
Choose whichever one best fits your needs, and then move on to the next step.
Step 2: Add your products
Once you’ve signed up for Sellfy and logged in, you’ll be brought to your dashboard.
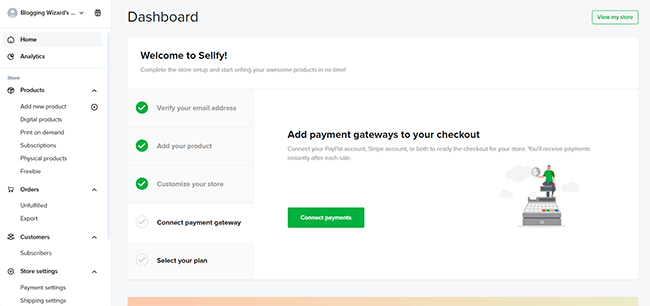
The next step is going to be to add the products you plan on selling through your website into Sellfy.
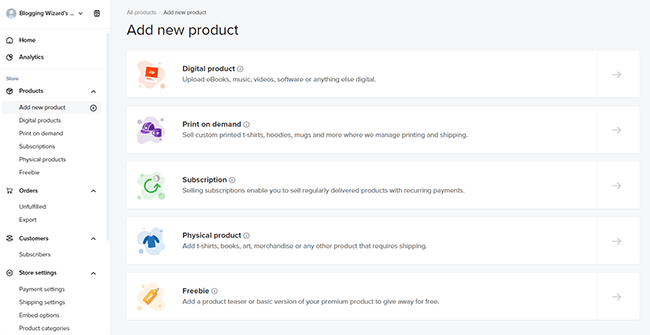
To do so, click Products in the sidebar, then Add new product, and choose a product type.
You can sell digital products, subscriptions, physical products, print-on-demand products, and more.
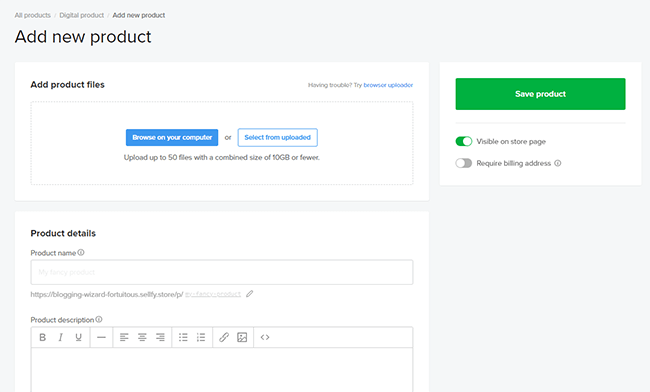
On the next page, give your product a name, add a product description, and upload any preview images you want to show. Then, choose the price you want to sell it for, set your stock, add any product variants as needed, and hit Save product.
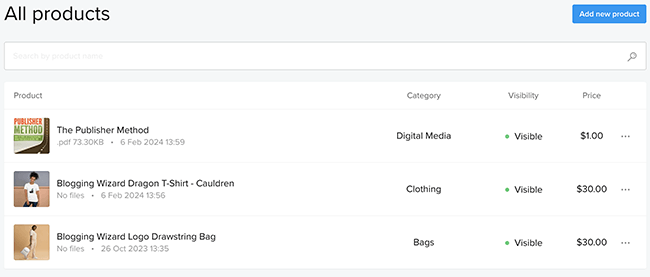
Repeat this process until you’ve added every product you want to sell, and you should be able to see a list of them in your dashboard.
Step 3: Grab the shopping cart embed code
At this point, you should have a Sellfy store complete with products. But we don’t want to sell our products through Sellfy—we want to sell them through our existing website.
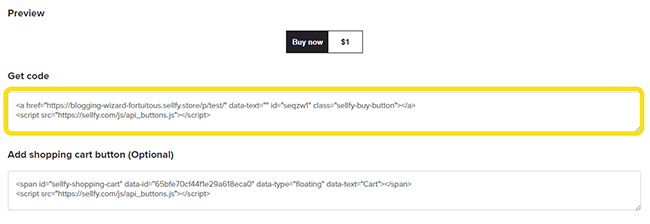
So next, we’re going to open Embed options under Store settings in the sidebar. Then, click Buy now button, and select a product.

Below that, you should see two boxes with code snippets: Get code and Add shopping cart button (Optional).
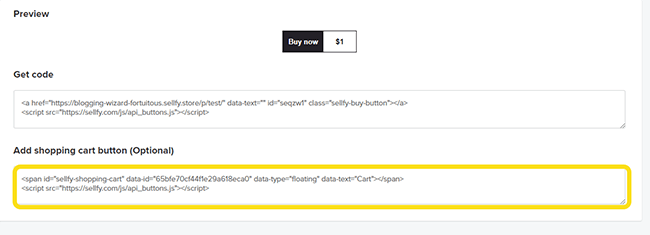
Copy the code under Add shopping cart to your clipboard, and then open up your website.
Step 4: Add it to your website HTML
Note: Before you make any changes to your website, it’s a good idea to make a full website backup. That way, you can revert the changes if you run into any major issues.
To make Sellfy’s shopping cart appear on your site, you need to paste the HTML shopping cart code you just copied into your website. The exact way to do this will depend on the CMS/platform you’ve built your site on.
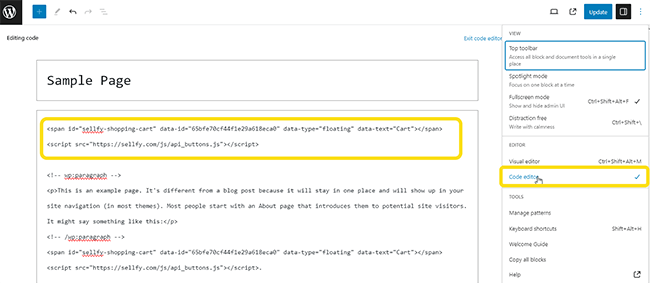
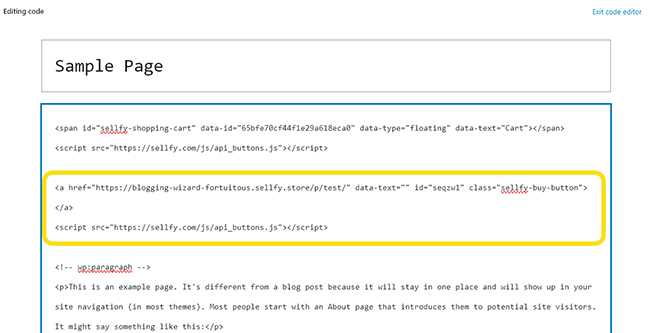
If your site’s built on WordPress, you can start by opening up a page you want the shopping cart to appear on in the WordPress editor. Then, click the three dots in the top right corner, and switch to Code editor:
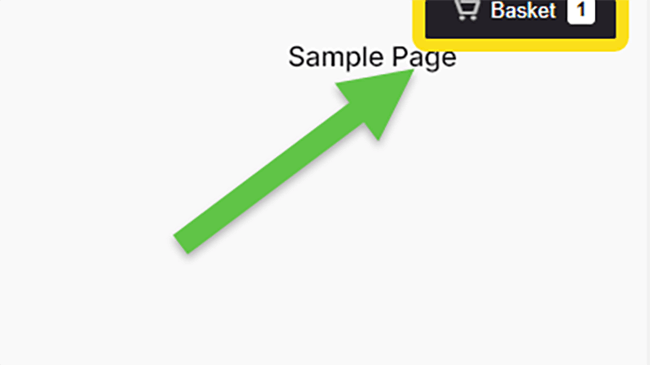
Paste the code snippet you copied to your clipboard into the HTML code in the editor, hit Save, and then view the page in your browser. If you did everything right, you should now see a Cart button floating in the top-right corner of the page.
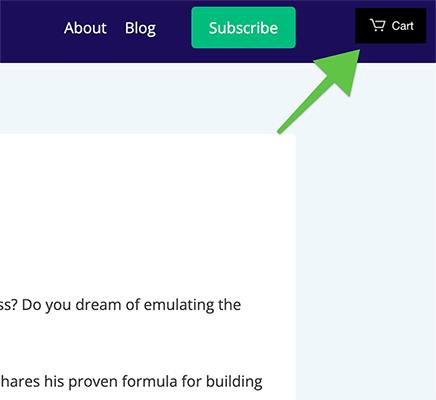
Customers can click the cart icon to view the products they’ve added and proceed to checkout.
Step 5: Embed your products
Okay so now, we have a shopping cart on our website. There’s just one problem: Currently, there’s no way for customers to add products to that cart.
So next, we’re going to embed some.
To do so, go back to the Embed options page on Sellfy, and click one of the tabs at the top to choose how you want to show your products on your site.
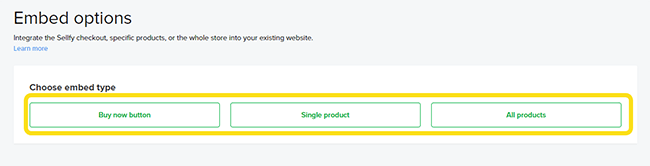
There are three options:
- Buy now buttons. This will embed a single button on your site that customers can click to proceed straight to the checkout page (and skip the cart completely). But if they don’t complete the checkout, the product they clicked will be stored in their cart. You’ll need to add a separate buy now button for each product you want to sell.
- Single product. This will embed a single product cart complete with a thumbnail and description. Customers will be able to click it to add the product to their cart. Again, you’ll need to add a separate card for each product you want to sell.
- All products. This will display a complete listing of all the products you’ve added to your Sellfy site in one widget on the same page.
Once you’ve picked one, you’ll need to copy the code snippet under Get code (this is different from the shopping cart code we embedded in the last step):
Then, paste it into your site’s HTML on whatever page you want the products to appear, just like you did with the shopping cart embed code.
Now, view your page again and you should see the products/buy now buttons. They’ll appear on whatever line you pasted the code in.
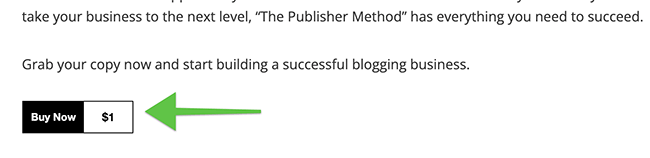
Visitors should now be able to click these buttons to add the product to their cart. As they do, the shopping cart in the top-right will be updated to show all the items they’ve added:
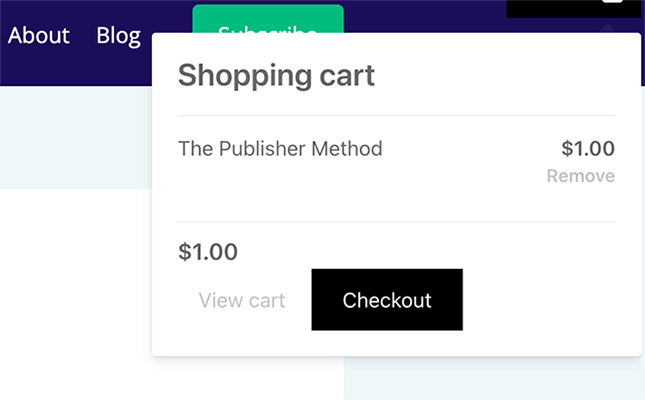
When they’re done adding products, shoppers can click Checkout, and a modal pop-up window will be opened up inside your site, like this:
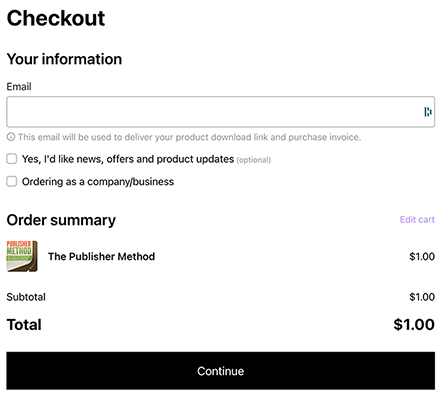
Shoppers then just have to fill out their details in the pop-up window to complete their purchase. However, they won’t be able to do so until you’ve connected a payment gateway, which brings us to the final step…
Step 6: Connect a payment gateway
The last thing we need to do is provide a way for customers to pay for items in their cart.
So, go back to your Sellfy dashboard, and go to Store settings > Payment settings.
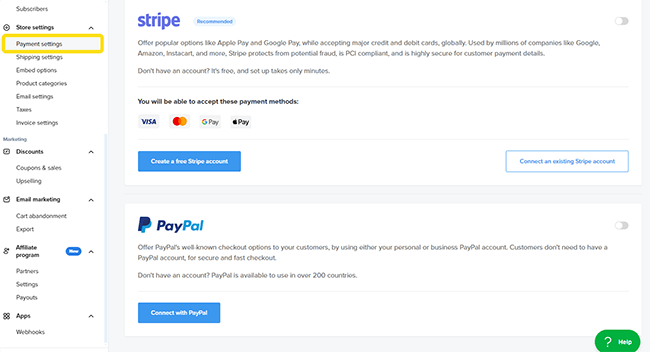
Then, choose whether you want to collect payments through Stripe or PayPal, and follow the on-screen instructions to connect your accounts. It should only take a couple of minutes.
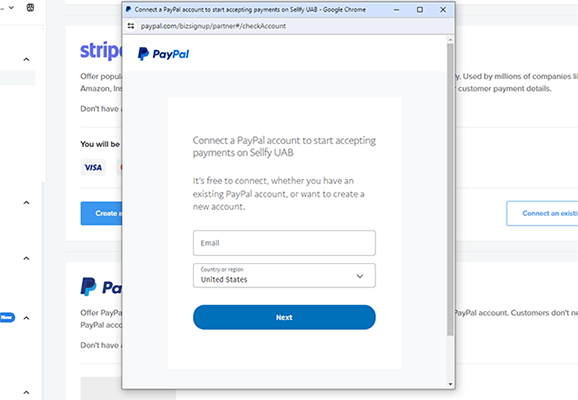
Once you’ve connected your Stripe/PayPal account, make sure the toggle next to that option is set to On, and you’re done!
Customers should now be able to fully checkout through their cart on your website. You can view and manage the orders your customers have placed from your Sellfy dashboard.
How to customize your shopping cart
At this point, you should have a fully functional, working shopping cart on your site, but it might not look quite the way you want it to just yet.
Fortunately, you can customize your shopping cart to change its appearance and position on the page. Here’s how.
Change your shopping cart text
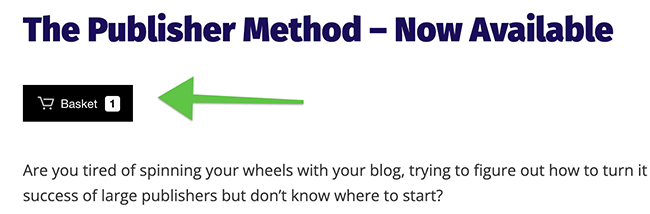
First, let’s change the text. Right now, our shopping cart is labeled Cart, but let’s imagine we want to change that so that it’s labeled Basket instead.
This will require tweaking some code, but don’t worry, it isn’t rocket science.
All we have to do is change what’s written in the part of the code between the speech marks following the data-text= tag. I’ve highlighted the part you need to change in bold below to make things easier:
<span id="sellfy-shopping-cart" data-id="65bfe70cf44f1e29a618eca0" data-type="floating" data-text="Basket"></span>

<script src="https://sellfy.com/js/api_buttons.js"></script>
Once you’ve changed that in your website’s HTML, save your changes, and the live page should be updated to show the updated cart button with the new label.
Note: You can change the text of your buy now/product cards by similarly modifying their code.
Change your shopping cart position
By default, the shopping cart button will be fixed in the top-right corner of your website page.
If you’d prefer it to appear in a different location, you’ll first need to change the data-type= function in the code from floating to inline, as shown in bold below:
<span id="sellfy-shopping-cart" data-id="65bfe70cf44f1e29a618eca0" data-type="inline" data-text="Basket"></span>

<script src="https://sellfy.com/js/api_buttons.js"></script>
Then, make sure you’ve pasted the code into the line of HTML code where you want it to appear on the page. Save your changes, and the page should update to reflect the new position.
Change your shopping cart color & shape
We’ve made all the changes we can make by changing the HTML code. For further cosmetic changes, you’ll need to open up Sellfy’s store Customizer.
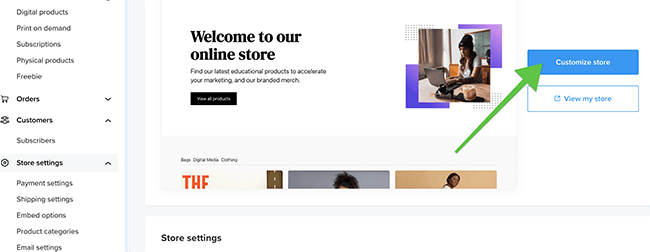
First, go to your Sellfy dashboard, and then click Store settings > Customize store.
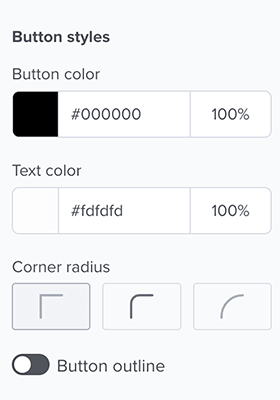
Next, click Store style, and you should see Button styles in the sidebar.
From here, you can change the background and text color of your cart/buy now buttons, as well as the font size, corner shape, and outline.
The buttons you’ve embedded on your site will be updated to reflect changes you make here in Sellfy automatically, just remember to click Publish to save changes when you’re finished.
Change the checkout process
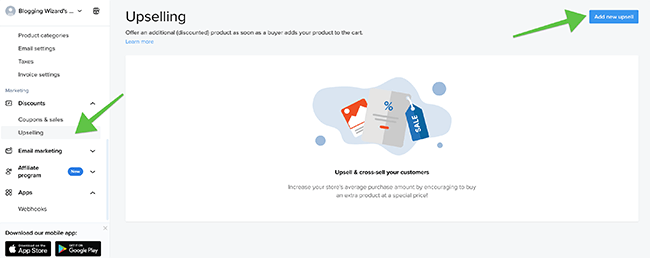
One of the coolest things about Sellfy is that it lets you customize the checkout process by adding upsells and cross-sells.
When you add an upsell, customers will be offered the option to buy an extra product at a special discounted rate after they add an item to their cart. The offer will show up inside the modal pop-up window on your website.
They can choose to decline the offer or add it to their cart. It’s a great way to increase your store’s average order value.
To set it up, open up Sellfy and click Upselling under the Discounts tab in the sidebar. Then, click Add new upsell.
Give your upsell offer a name, then choose what product you want to offer as an upsell, and what products you want to offer the upsells on.
You can customize the upsell pop-up message and choose what discount to apply. And when you’re done, hit Create discount.
Now, when customers add a product to their shopping cart on your site, they should see an offer like this:

FAQ (Frequently Asked Questions)
Final thoughts
As you can see, it’s pretty easy to add a shopping cart to your website with Sellfy. The hard part is making sales.
To learn more about what it takes to run a successful ecommerce site, don’t miss our roundup of the most important ecommerce facts and statistics.
Disclosure: Our content is reader-supported. If you click on certain links we may make a commission.