How To Add A Contact Form To Your WordPress Website


Are you ready to use a contact form on your website to build your email list, forge stronger relationships with site visitors, and build trust in your brand?
Making sure site visitors can get in touch with you while on your website is the key to building your business. But messing with complex contact form solutions is not the way to go.
In today’s post, we’re going to show you how to add a contact form to your WordPress website using a simple, affordable, and feature-packed contact form called Kali Forms.
What is Kali Forms?
Before we jump into adding a contact form to your WordPress website, let’s take a look at what Kali Forms is and why it’s one of the best contact form options out there.
Kali Forms is a powerful yet user-friendly WordPress contact form that gives you a chance to create any kind of form imaginable for your site. It’s hassle-free nature makes staying in touch with site visitors a cinch.
Plus, the free version of this plugin comes with a ton of features, such as pre-designed form templates, mobile-responsive design, and built-in Google reCAPTCHA and spam honeypot functionality to keep annoying spam out.
Need a little more out of your contact form solution?
Kali Forms comes in a pro version that offers neat features such as smart conditional logic, multi-page form creation, and email service provider integrations.
How to add a contact form to your WordPress website using Kali Forms
Once you’ve decided that Kali Forms is the best contact form solution for you, it’s time to create your first contact form using the free version of Kali Forms.
Step 1: Install and activate Kali Forms
The first thing you’ll want to do is go Plugins > Add New in your WordPress dashboard. From there, search for Kali Forms.
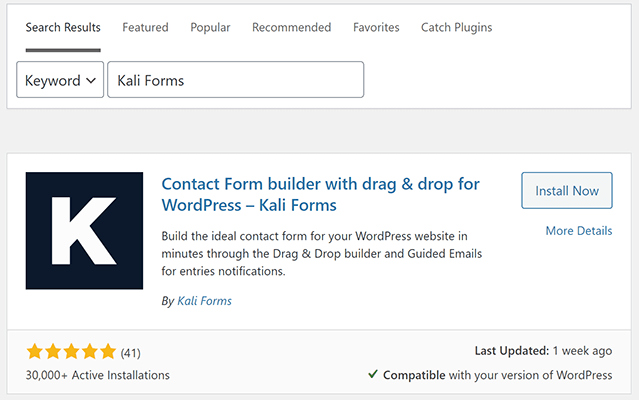
Next, click Install Now and then Activate. Kali Forms is now ready to work on your website.
Step 2: Add a new form
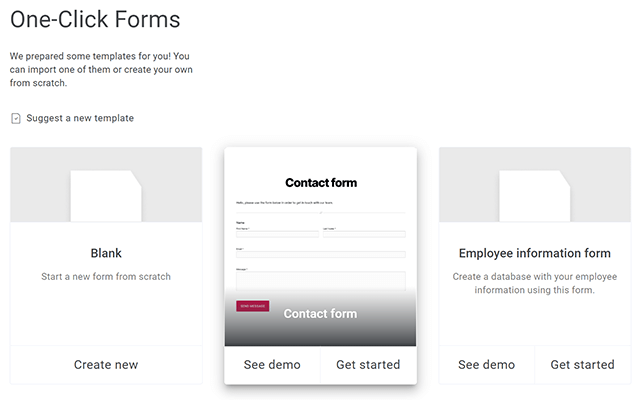
Once installed and activated on your site, it’s time to create your first contact form. To do this, go to Kali Forms > Add New in your WordPress dashboard.
Here you’ll see the available pre-designed form templates. For example, you can create a form from scratch or create a basic contact form or an employee information form.
If you use the pro version of Kali Forms, you’ll have access to additional form templates such as:
- Job application
- Customer feedback
- Appointment
- Running calculator
- Donation
- Request quote
- Reservation
- And more
To create a contact form using a template, click on the Get started under the Contact form template of your choice.
Step 3: Choose a layout for your contact form
After picking the template you want to use, you’ll have the chance to choose a layout for your contact form. In addition, you’ll be able to select the information you want to include on your form.
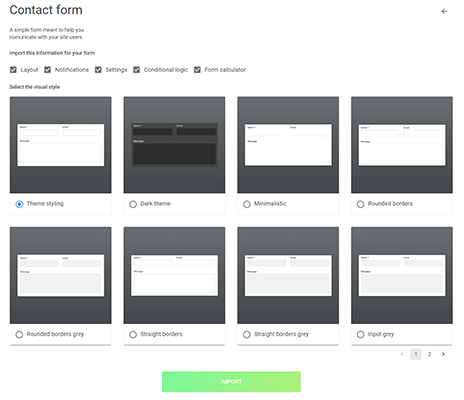
The layouts range from minimalist to dark themed. There are options for rounded corners, straight borders, and even greyed out sections.
Step 4: Set up SMTP settings
You’ll receive a popup message when you try to import your new contact form styling and information settings. This message lets you know that you still need to set up your SMTP settings before moving on.
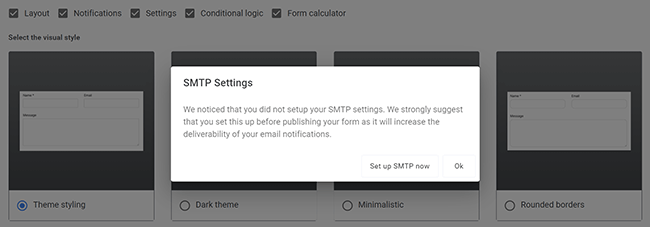
Click Set up SMTP now. When you do, you’ll be taken to a new screen to set up your SMTP settings, which will help with email deliverability issues. In other words, it ensures you can send emails from your WordPress website.
The option you select will depend on your hosting configurations. The Default WP Mailer may be enough. However, if you enter custom SMTP information or integrate with a transactional email provider like Mailgun, you’ll see better deliverability results.
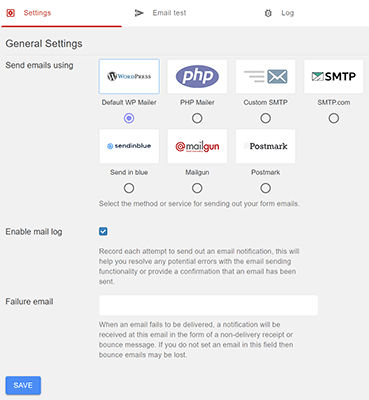
Once you’re done, click Save.
Step 5: Customize your contact form
Kali Forms comes with a user-friendly drag and drop interface that makes customizing your contact form easy.
On the right hand side of the screen you’ll see a live preview of your form. On the left hand side, you’ll see all the form field options such as dropdown, text box, divider, and URL. You’ll also see a number of pro version form fields such as star ratings, page break, and password.
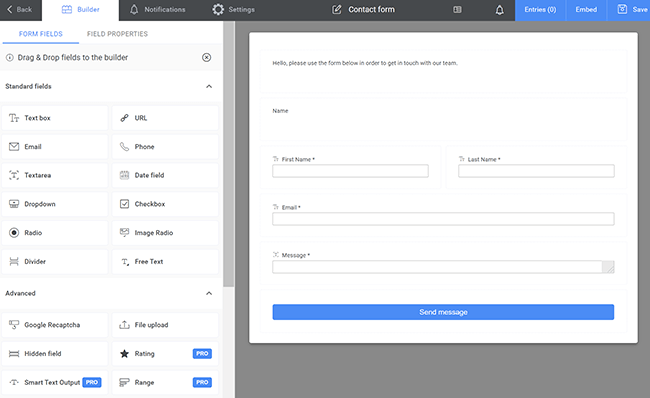
To add a form field to your form, just drag the form from the left side to your form. To edit a form field, just click on it and make your desired changes.

You can add as many form fields as you need to your contact form. When you’re done, click Save to save your progress and then click on the Notifications tab at the top of your form.
Step 6: Configure notifications
Knowing that someone has submitted a form on your website is important. It’s also important your site visitors know that their form submission went through.
Luckily, with Kali Forms, you can create as many email notifications as you need to make sure you, your team, and your site visitors are notified any time a form comes through.
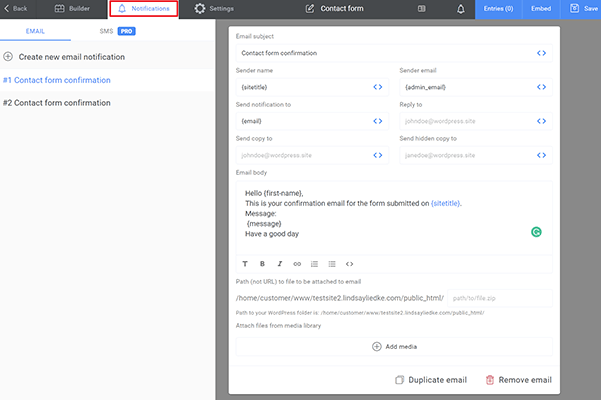
Here you can customize the sender email, the receiving email, and of course, the body of the email. For help with specific, check out this helpful article on Kali Forms email notification settings.
Click Save to save your progress and then click the Settings tab at the top of your screen.
Step 7: Configure general settings
There are some general settings you can configure once your contact form is ready. For example, you can customize things like:
- Required mark
- IP address saves
- Thank you message display
- Akismet and Google reCPATCHA form spam settings
- PayPal payment collection
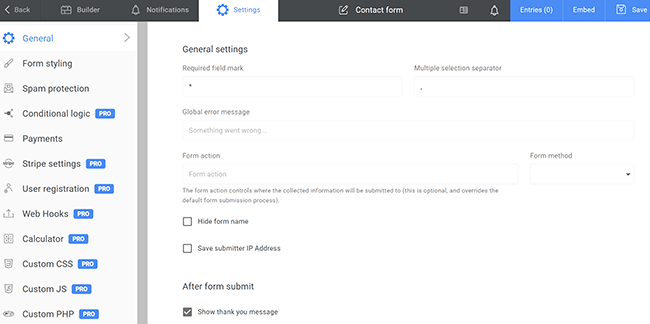
It’s important to note that most of the available settings are only available with the pro version of the plugin. So, if you want to integrate with Slack or HubSpot, add a calculator, integrate with Stripe, or include a newsletter, you’ll need Kali Forms pro.
Step 8: Add a contact form to your WordPress website
The last step in adding a contact form to your WordPress website is embedding the newly creating form on a page or post.
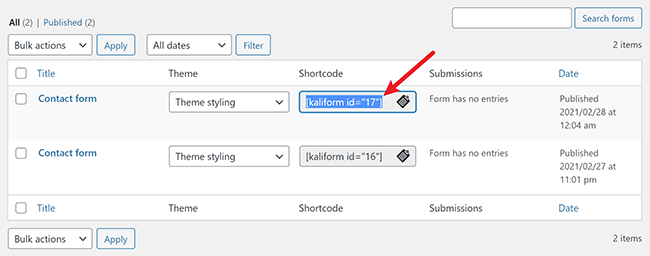
To do this, click the Embed button at the top of the form editor interface. You can also get the shortcode that is generated for each of your forms by going to Kali Forms > All forms.
Then, just cut and paste the shortcode on the post or page you want your contact form to appear and it will display on the frontend of your website like this:

Wrapping it up
And there you have it! You now know how to add a contact form to your WordPress website using the simple, affordable, and feature-packed Kali Forms plugin.
Remember, building long lasting relationships with your site visitors takes more than offering killer content and great products and services. People expect stellar customer support too, and that all starts with a contact form on your website.
Disclosure: Our content is reader-supported. If you click on certain links we may make a commission.