11 Ways To Encourage Social Sharing On Your WordPress Website With Social Snap

Social media is one of the best ways to increase your blog traffic.
But the harsh truth is that most bloggers struggle to get much traffic from social media.
And, it’s about time we fixed that, right?!
In this post, I’ll show you 11 tactics you can use to encourage social sharing on your WordPress website, so you can get more shares on every blog post you publish.
As a result, you’ll drive more traffic to every blog post you publish. And with one tactic, you’ll get more shares to your older posts too.
Let’s dive right in:
Get the plugin: Social Snap
The tactics I’m going to share with you today require installing a paid social sharing plugin called Social Snap.
Now, there is a free version on WordPress.org but it doesn’t have all the features we need. That said, if all you want is basic social share buttons that look great – it’s an awesome choice.
We use the premium version of Social Snap here at Blogging Wizard, and it works wonders. So, I thought it was about time that I show you exactly what it can do!
The best way to think of this plugin is like a social media toolkit. In fact, some of its add-ons can remove the need for expensive social scheduling tools altogether. More on that in a moment.
In the interest of disclosure; I am an affiliate of Social Snap’s but I’m recommending it because it’s a product I believe in, and use myself.
Could you implement some of the tactics I’m about to show you with free plugins? Definitely. But you’d likely still need 6+ different plugins, and some of the best tactics wouldn’t be possible.
Now, let’s take a look at how we can get more people sharing our content, and promote our content more effectively, using Social Snap.
Advanced tactics to boost your social shares
1. Add social sharing buttons to your images
Social networks are highly visual and some images will naturally make for great shareable content.
Quote images are a great example of this.
Adding share buttons to your images makes this possible, and it’s easy to do. Once inside Social Snap, head to Social Sharing → On Media.
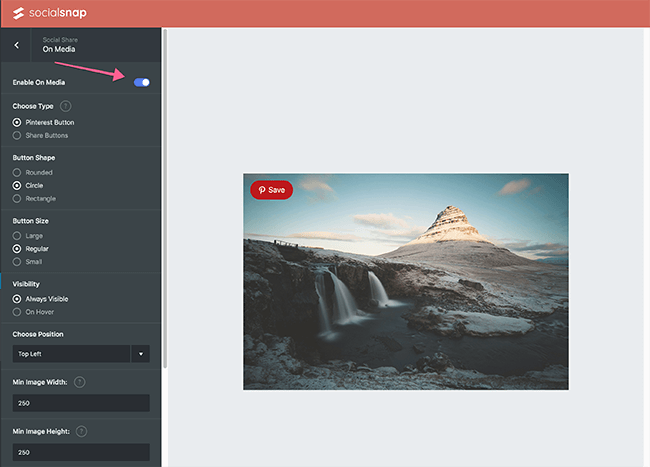
You can just press the enable toggle-button, but you’ve got a lot of useful options here.
You can choose whether you want to just add a Pinterest share button, or add other social networks.
And customise plenty more:
- Display/hide on mobile
- Change the button shape/size
- Select custom colours for the share buttons
- Choose whether you want to hide them on posts/pages, or other custom post types.
- Set the buttons to display on hover, or hide them entirely.
2. Automatically share your latest content to social networks
With the Social Auto Poster add-on, you can automatically share your latest blog posts across your Twitter and LinkedIn profiles.
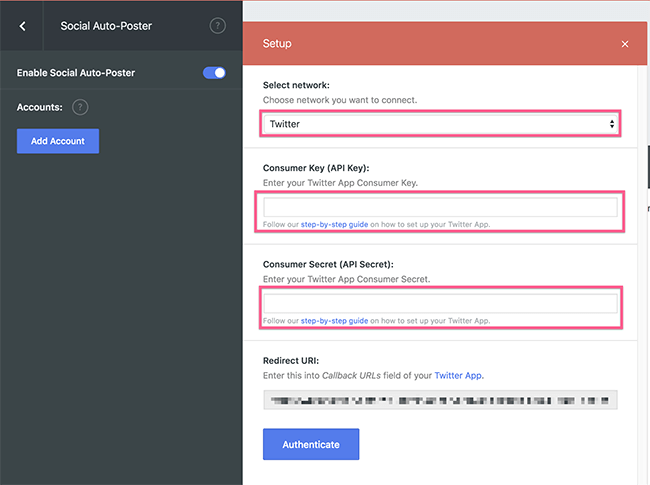
This process does involve setting up your own app for each platform, but don’t worry, it’s quite straightforward to do. And you’ll find links to step-by-step tutorials just under the form fields you need to complete, within the plugin (as seen in the image above).
Unfortunately Facebook isn’t an option within the plugin, but adding more networks is already mentioned in their public roadmap on Trello.
* The add-ons are available on Pro or Agency plans.
3. Re-promote your old blog posts to social networks
Usually in order to re-promote your old blog posts, you’d need to manually grab all of your post titles & URL’s, write out your social media posts, and load them into a social media management tool, or social media scheduling tool.
That’s time consuming and often a significant monthly expense. Alternatively, you could use the Boost Old Posts add-on for Social Snap.
This will ensure your content continues to get traction, well after it’s publication date – without wasting much time or money.
The Boost Old Posts feature works similar to the Social Auto Poster, so you’d simply use the app details you entered previously.
As such, it has the same limitations – only supporting Twitter and LinkedIn currently. Similarly, it’s already on Social Snap’s public roadmap.
* The add-ons are available on Pro or Agency plans.
4. Display the right share buttons on the right device
Some share buttons make more sense when being displayed on a specific device.
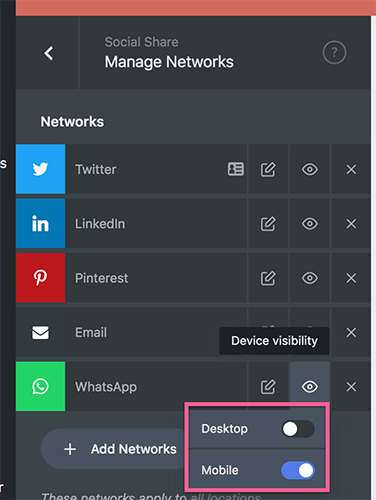
For example, if someone is reading your content on a mobile phone, you’d want to have a WhatsApp button there. But you might not want it on desktop.
You can do this by going to Social Sharing → Manage Networks.
From there, you can add/remove all of the social networks you want. With the addition of print, email and a few others.
Then simply hover over the display options to select which devices you’d like the buttons to appear on.
5. Display positive social proof (and hide negative social proof)
When people see others taking a particular action in social situations, they typically assume that it’s the correct action to take.
In the context of marketing, and social media, this means that displaying high share counts implies that your content should be shared.
However, the opposite can be true. If someone sees share counts displayed on your content that only show a couple of shares, they may assume that they shouldn’t share it because nobody else is.
When you head to Settings → Social Sharing, you’ll find a bunch of different types of share buttons you can add.
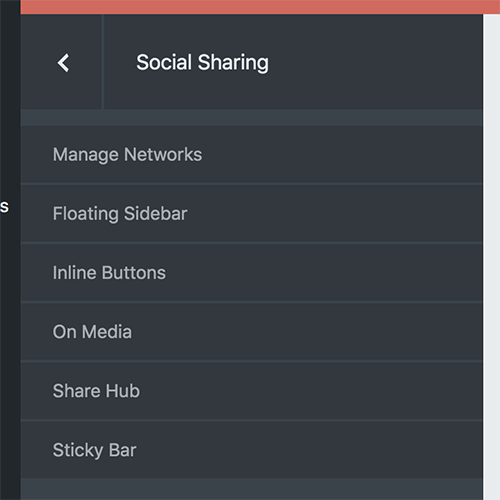
If you select Floating Sidebar, Inline Buttons, or Share Hub – you’ll be able to customise how share counts look.
As an example, let’s go to Social Sharing → Inline Buttons.
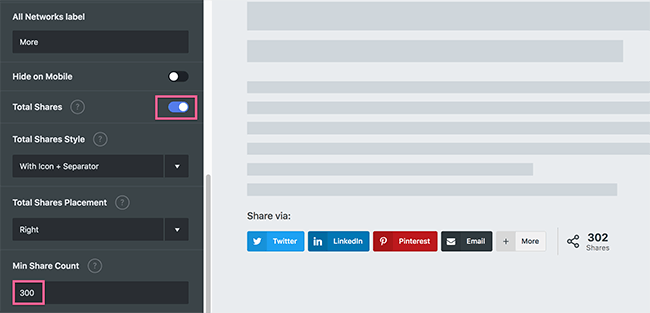
What I’ve done here is enabled total share counts and set the plugin to hide share counts until they hit 300. This means I can show off my share counts when they’re worth showing off. And hide them until then.
6. Add custom share images for social networks
Social networks tend to have different image sizes than the featured images you’d set in WordPress.
With Social Snap, you can add two types of custom images:
- General social media images – these are what will be used for LinkedIn, Twitter, and Facebook, etc.
- Pinterest images – these are vertical images that are the perfect aspect ratio for the platform. Vertical images perform better on Pinterest.
So, you won’t need to worry about social networks cropping your images and making them look messy.
And, Social Snap handles all of the OpenGraph, and Twitter Card tags that help social networks pull in your images.
These settings are edited on a per post/page basis. This means you’ll need edit your blog post, and look for the settings below the WordPress editor.
At the time of writing this, I’m using the Classic Editor on Blogging Wizard, so if you’re using Gutenberg, things will look pretty different but the same options will be there (just down the right hand side, instead.)
You’ll see the Social Meta settings first. This is where you can add custom headlines and descriptions for social networks. And upload your main social media image.
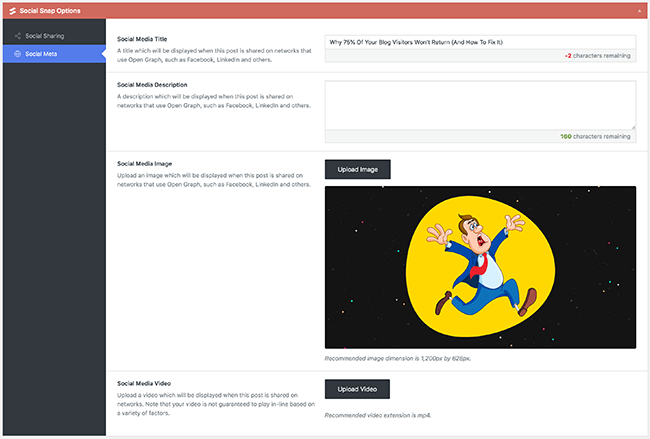
(Note: you can add video too, which is pretty neat!)
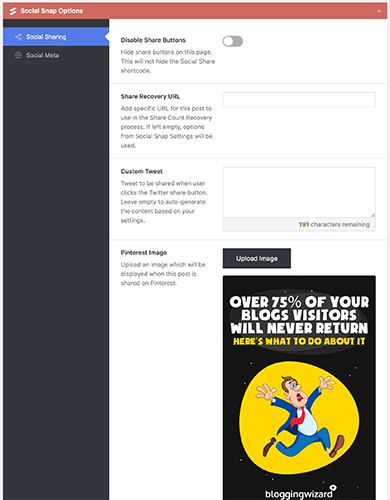
And we can set some other options, and upload our unique Pinterest image on the Social Sharing tab.
7. Add social sharing buttons to your content
This is a basic one but it’s an important one.
With any aspect of marketing, you tend to get the best results when you remove friction from processes. That’s why I love adding social sharing buttons to my content – so it’s easier for people to share my content.
With Social Snap, you get a few different options of how to add social sharing buttons.
- Inline Buttons – These will be at the top, or bottom of your posts/pages. Or both.
- Floating Sidebar – These buttons will be stuck to either the left or right side of your blog. You can move them up, down, or offset the position slightly (great if you have stretched featured images).
- Sticky Bar – Adds a share bar to your content. This stretches across the screen and stays in view as your readers scroll. Specifically for this button type, you can show view counts, and hide it from mobile/desktop.
- Share Hub – This is more of an understated version of the Floating Sidebar option. You get a button with a share icon that stays in view, when readers hover, they’ll see the share buttons you want them to share on.
Each type of share buttons have their own customisation options. So you can tweak colors, display options, etc.
8. Add social share buttons manually via a shortcode
With Social Snap, you can add social share buttons in a variety of ways. One option is manually via a shortcode.
This gives you the ability to add them anywhere, and they can be customised so they’re different to other buttons that are placed automatically.
To generate shortcode, you’ll see these options within the Classic Editor:
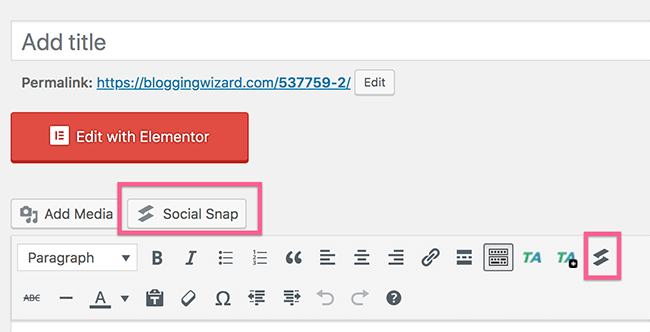
Then, you’ll see a window appear with some settings to choose from.
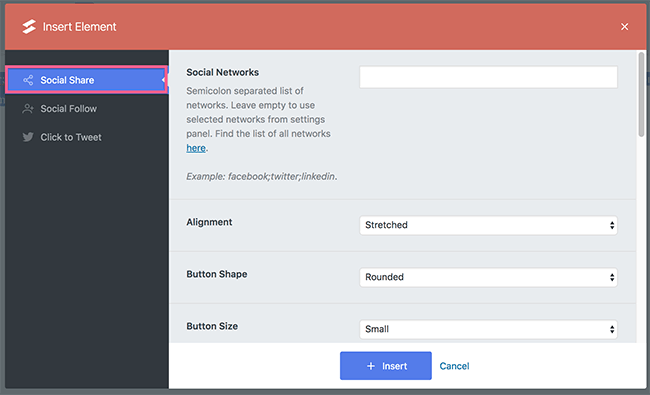
Once you click Insert, a snippet of shortcode will be added within your post. If you use Gutenberg, you’ll find a special block for adding these.
So, what’s the best way to use this?
Well, you may have some pages that you’re trying to drive traffic to. You don’t want to force social share buttons on all pages (for example, about page, contact page, etc.) but you do want them on the occasional page.
If you’re building your email list, or selling products, there’s a really cool way you can incorporate this into your sales funnel.
Let’s say you’re building your email list, and you have a confirmation page that subscribers are sent to once they confirm their subscription. On that page they’ll find a download link for your lead magnet.
An awesome way to get more people into your sales funnel is to add share buttons to that page, but the only problem is people need to go through your lead capture page first. Otherwise, you’ll be missing out on subscribers.
While most WordPress landing page plugins allow you to add share buttons & set a custom share URL, what if you’re just using a regular page in WordPress?
In that case, simply use the manual share buttons feature within Social Snap, and add a link to your lead capture page as the custom share URL.
9. Add click-to-tweet widgets to your content
These work especially well in articles about quotes, but they can be a great way to encourage readers to share any blog post.
Here’s an example:
You can choose a bunch of designs, and even add related accounts for people to follow after they share.
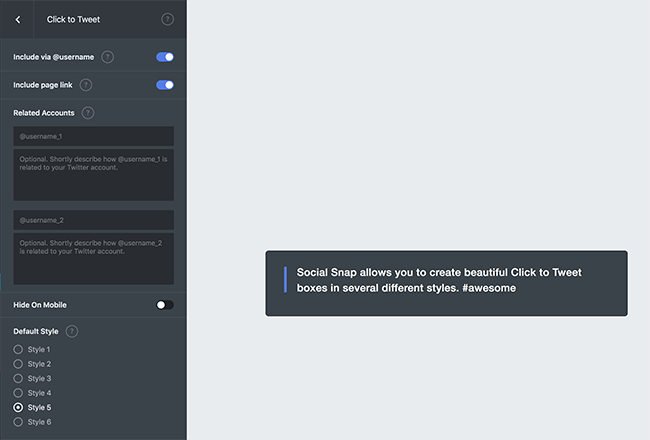
These are added on a per-post basis. If you use the Classic Editor, you’ll be able to click the Social Snap button, just to the right of the Add Media button.
If you use Gutenberg, you’ll find a Click To Tweet for Social Snap – nice and easy.
10. Setup Twitter Cards in a few clicks
By default, Twitter shares look quite bleak. A small square image with some text to the right hand side.
Want your blog posts to stand out more when sharing them on Twitter? Twitter Cards are the answer.
So, instead of that small square image & text, you’ll see something like this:
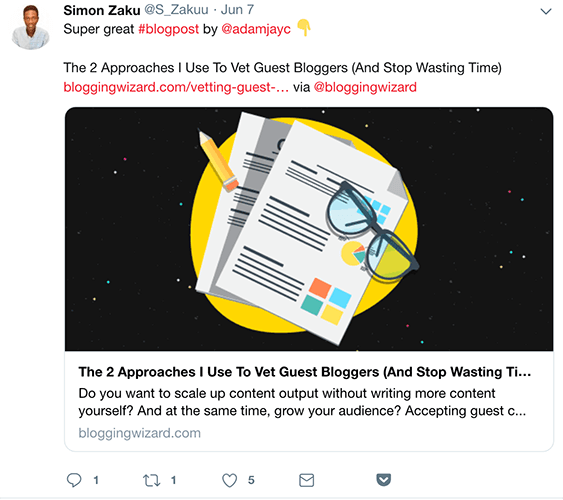
Now, if we go into Social Snap’s settings, we just head to Social Meta and choose Twitter Summary With Large Image.
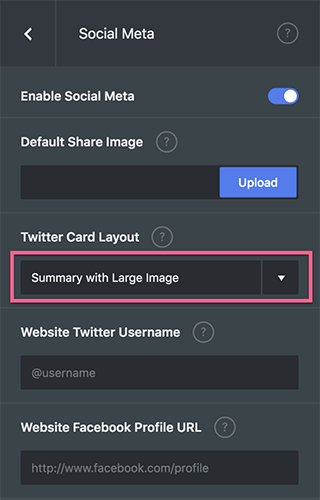
Just remember that if you use a WordPress SEO plugin such as Yoast, you may have this setup already.
11. Keep your social share counts when you change URL’s
If you’ve migrated domains, switched to SSL, or changed permalink structure, you may find that social networks don’t tie the share counts from the old URL to the new URL.
But, with Social Snap, you can use the share recovery feature to ensure your share counts are still shown.
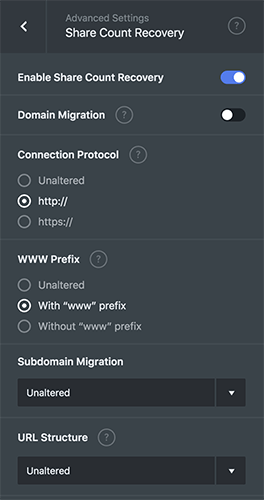
Just to be clear: social networks will never tie the two together. Social Snap is simply tallying the share counts together from the new and old URL’s.
Wrapping it up
Are there more ways you can encourage social sharing of your content? Definitely.
And Social Snap has a few other features you may find useful such as social media follow widgets, etc.
However, these are some of my favourite uses of the Social Snap plugin – my go-to WordPress social share plugin. Use it to optimize your content for social sharing, and drive more traffic to each of your blog posts.
Disclosure: Our content is reader-supported. If you click on certain links we may make a commission.

