Elementor Review 2024: The Best Page Builder Plugin, Or Is It?

The Elementor page builder plugin is a popular WordPress page builder plugin, if not the most popular page builder plugin for WordPress users.
In our Elementor review, we take a look at the plugin’s best features and use case scenarios in a post-WordPress block editor world.
We also take a look at the plugin’s pricing structure and a few pros and cons we noticed while testing it.
What is Elementor?
Elementor is one of the best WordPress page builder plugins on the market as well as one of the most popular. The base Elementor plugin has over 5 million active installations, according to WordPress.org.
We want to know how a single product took the WordPress ecosystem by storm when it first launched in 2016 and how it’s still one of the most influential products in the industry, even as alternatives exist (see below).
The truth is we already know the answer: Elementor was one of the first page builders to offer live frontend editing for free as well as one of the firsts to offer theme building.
Now, it’s a powerful website builder that’s remaining relevant even as WordPress’ default block editor becomes more advanced.
In our Elementor review, we’re going to cover the advantages and disadvantages of using Elementor, alternatives you can use, how much the plugin costs, and features you should know about.

Here’s a quick summary for now: Elementor is a page builder plugin that’s more than just a page builder.
It has a theme editor, a popup builder, a form builder, and numerous free and premium page building modules and templates.
The Elementor team even offers web hosting these days.
They also have their own free WordPress theme that’s designed to be compatible with the plugin’s website building capabilities, so you don’t necessarily need a third-party theme in order to use the plugin’s website builder.
Elementor has free and premium versions. We’re going to focus on Elementor Pro in this review.
What features does Elementor offer?
Elementor is one of the most powerful page builder plugins among the WordPress industry, so it’s also one of the most extensive.
These are the features we’re going to focus on:
- The editor.
- The widgets.
- Global styles.
- Templates and website kits.
- The theme builder.
- The popup builder.
Please note: Some of the features pictured or depicted below are only available in select plans. Please see our pricing section to understand what’s available in the free versus premium versions of Elementor.
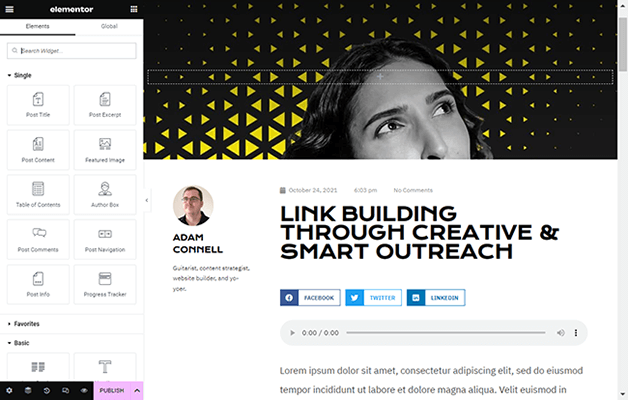
The editor
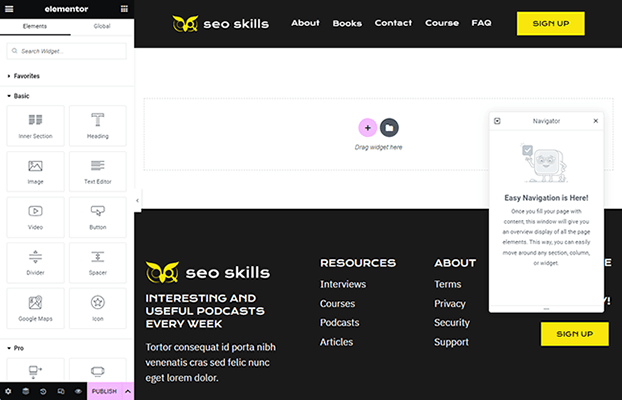
Elementor uses a drag-and-drop interface for its editor layout.
It borrows this layout from the WordPress customizer: options on the left in a sidebar (which you can show and hide) and a frontend view of your page on the right.
There’s also a floating (and draggable) Navigator window you can open and close, but it’s pretty small, so you hardly notice it while it’s open, especially if your monitor has a larger screen size.
You can see from the image above how most new Elementor pages look: your theme’s header at the top, the footer at the bottom and a blank space in the middle, which is where you’ll actually build your page.
Layouts
With Elementor, you can start with a fully-designed page if you load in a template (by clicking the folder button to the right in the middle of the building section), but we’ll get to those later.
For now, let’s talk about the layouts you can use when you add a new section to your page.

Elementor has 12 predesigned section layouts to choose from. Section layouts are broken up into columns, and the layouts determine how much of the section each column takes up.
For instance, in the first layout, the single column takes up 100% of the section.
In the last layout, six columns take up 16.67% of the section each.
Once you choose a layout, you can resize each individual column to whatever size you please.
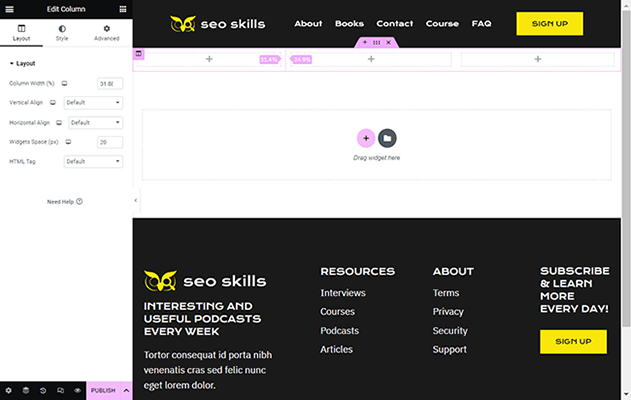
You can also adjust each column’s vertical and horizontal alignments and widget spaces.
For entire sections, you can adjust content widget, vertical and horizontal alignments, overflow settings, margin, padding, and more.
Overall, Elementor gives you plenty of control over the structure of your page.
Responsive design
Before we talk about the widgets Elementor offers, let’s talk about the way in which it optimizes your site for mobile devices.
For starters, widgets are optimized for mobile devices by default, but you can also customize your designs for up to seven screen sizes.
You can also hide and show specific elements for different devices.
For instance, you can show a landscape version of an image for desktop devices and hide it for mobile devices.
Then, show a portrait version of that image for mobile devices and hide it for desktop.
The widgets
Ok, so why are sections and columns so important in Elementor? Widgets!
Widgets are the actual web design elements you use to build pages within Elementor. You do this by dragging widgets from the left-hand sidebar into one of the columns you added to your section.
You can even stack widgets on top of one another in a column to create rows.

These are the Widget categories you’ll find in Elementor as well as the number of widgets you’ll find in each category:
- Basic (10) – Common web design elements (text, image, button, etc.). These are available with the free version of the plugin.
- Pro (33) – Premium widgets.
- General (22) – More widgets available with the free version.
- Site (7) – Common web design elements for web pages (site logo, site title, menu, etc.).
- Single (9) – Widgets for designing your own single page or post template.
- WooCommerce (11) – Ecommerce widgets. This section only appears if you have WooCommerce installed.
- WordPress – WordPress widgets, which you can use in Elementor, appear here.
Here are the widgets available in each main category:
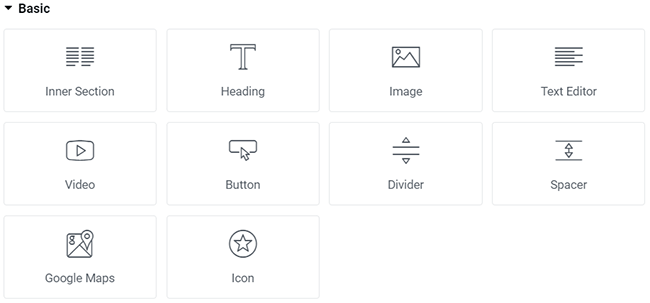
Basic
- Inner Section
- Heading
- Image
- Text Editor
- Video
- Button
- Divider
- Spacer
- Google Maps
- Icon
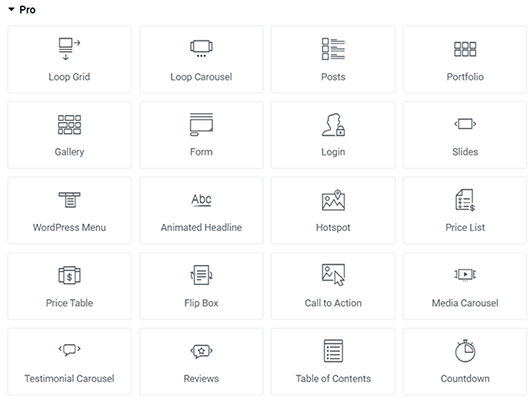
Pro
- Loop Grid
- Loop Carousel
- Posts
- Portfolio
- Gallery
- Form
- Logo
- Slides
- WordPress Menu
- Animated Headline
- Hotspot
- Price List
- Price Table
- Flip Box
- Call to Action
- Media Carousel
- Testimonial Carousel
- Reviews
- Table of Contents
- Countdown
- Share Buttons
- Blockquote
- Facebook Button
- Facebook Comments
- Facebook Embed
- Facebook Page
- Template
- Lottie
- Code Highlight
- Video Playlist
- PayPal Button
- Stripe Button
- Progress Tracker
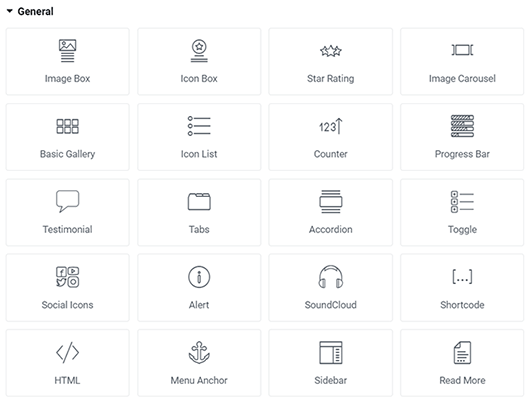
General
- Image Box
- Icon Box
- Star Rating
- Image Carousel
- Basic Gallery
- Icon List
- Counter
- Progress Bar
- Testimonial
- Tabs
- Accordion
- Toggle
- Social Icons
- Alert
- Soundcloud
- Shortcode
- HTML
- Menu Anchor
- Sidebar
- Read More
- Fluent Forms
- Text Path
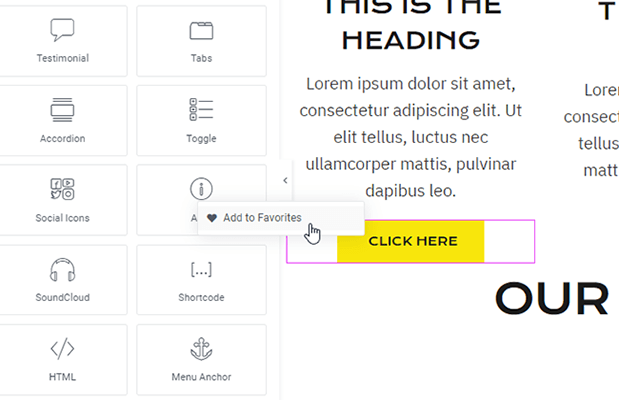
You can even favorite widgets. They’ll appear in the Favorites category, which appears above each widget category.
Widget content and styles
Settings for each individual widget in Elementor are divided into three tabs: Content, Style and Advanced.
Let’s talk about the first two tabs.
The Content tab is where you control the actual text, image, etc. that appears in your widget, such as a button’s text or URL.
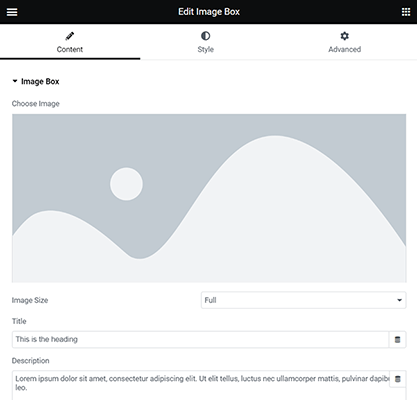
You can also type out text on the page itself.
Some widgets even insert alignment and sizing options here.
The Style tab has settings for spacing, width, colors, text effects, fonts and more.
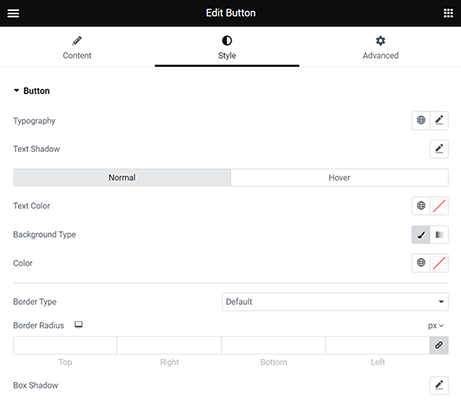
You may have noticed how some settings have a monitor icon next to them. This button enables you to switch between different screen types so you can edit settings individually for each one.
Overall, Elementor makes it incredibly easy to edit the content and styles of web design elements you want to add to your page.
They even make it easy to finetune optimization for certain widgets and settings for mobile.
Effects & assets
Let’s talk about some of the other features available for widgets.
Like sections and columns, you can edit margin and padding sizes individually for each widget.
There are also a number of different effects and animation settings, including hover effects, text transform, motion effects and masks.
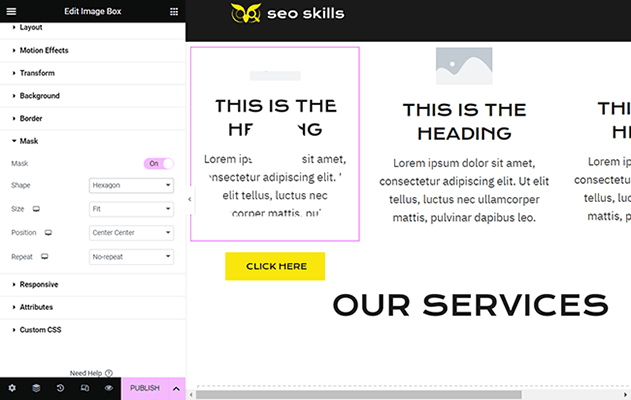
You can even apply custom CSS and attributes to individual widgets.
As for assets, Elementor’s icon library includes over 1,500 icons for you to choose from, but you can also upload your own SVG icons to any widget that uses icons, if you wish.
The navigator
There are a few buttons at the bottom of the sidebar of the Elementor editor.
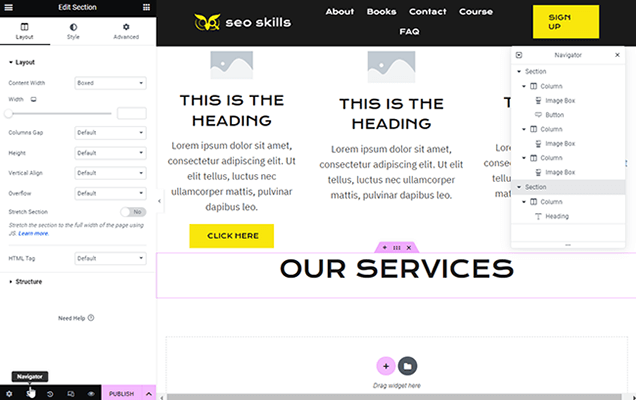
One of them allows you to hide or show the Navigator, the handy popup tool you can use to easily reorder sections or individual widgets.
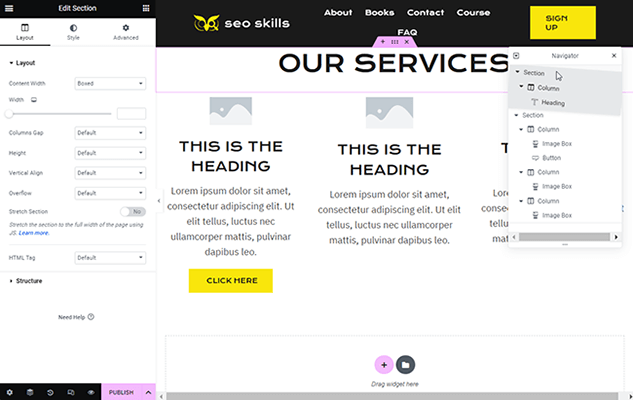
You can even use the Navigator to hide or show specific sections, columns or widgets while you focus on other sections.
Global widgets
When you right click a widget in Elementor, you have the option to save it as a global widget.
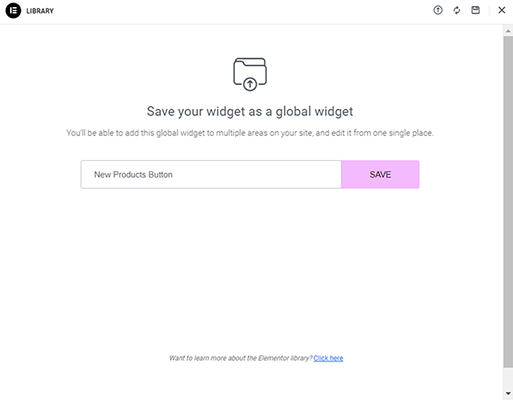
Global widgets are widgets you can reuse on multiple pages across your site and edit them from a single location.
Let’s say you want to advertise your latest sales on a few different pages on your site.
You could create an ad in Elementor (with the Image widget, the Image Box widget, the Call to Action widget, etc.), save it as a global widget, then add it to a few different pages.
When you want to advertise a Christmas sale, edit the ad’s messaging appropriately. When you want to celebrate your company’s anniversary with an anniversary sale, switch out the Christmas elements for elements related to your brand’s anniversary.
Let’s say you added this global widget to Page 1, Page 2 and Page 3.
When you apply changes to it on Page 1, the changes are reflected on Page 2 and Page 3 automatically.
This is one of the most useful features a page builder can have, and it’s great that Elementor now includes it.
Global styles
Elementor has quite a few settings you can control globally across all pages you create with the page builder and even across your entire site.
These settings can be found by clicking the hamburger menu located at the top, left-hand corner of the sidebar and selecting Site Settings.
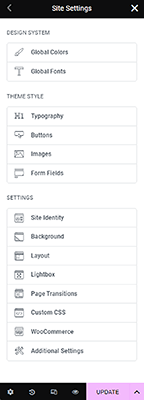
You’ll have a wide range of new settings to configure, including global colors and global fonts.
These settings allow you to come up with a whole design system for your Elementor pages. Choose a primary color, a secondary color, a text color and an accent color.
You can then choose fonts and font styles for each.
This section also contains a series of settings that override your theme’s default styles. They’re all located under the Theme Style section for this reason.
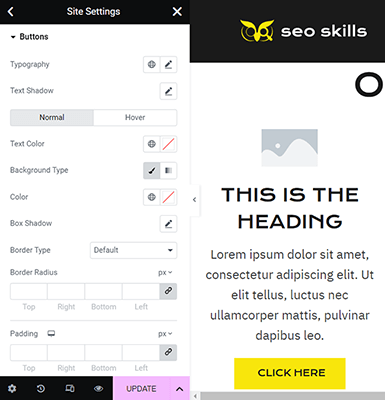
Basically, you can override style settings across your entire site, style settings that are normally dictated by your theme.
Set custom styles for typography, buttons, images and form fields.
Templates & website kits
One of the biggest reasons to use a page builder plugin are the templates you can use.
These are predesigned pages you can import into a new Elementor post or page. When you do, all you need to do is edit the template’s content and styles and replace them with your own.
It shortens the design process quite a bit.
To import a template in Elementor, all you need to do is click the Add Template button instead of the Add New Section button.

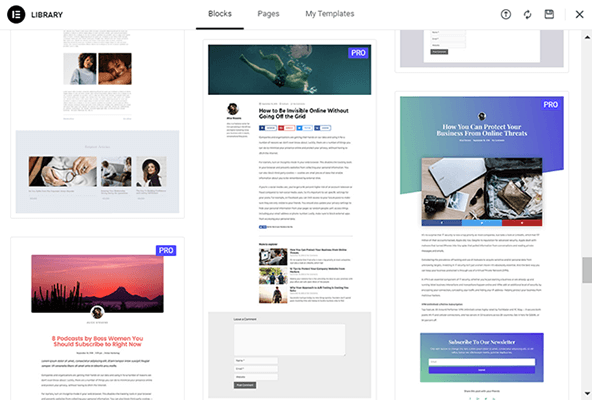
Elementor has two types of templates: block templates and page templates.
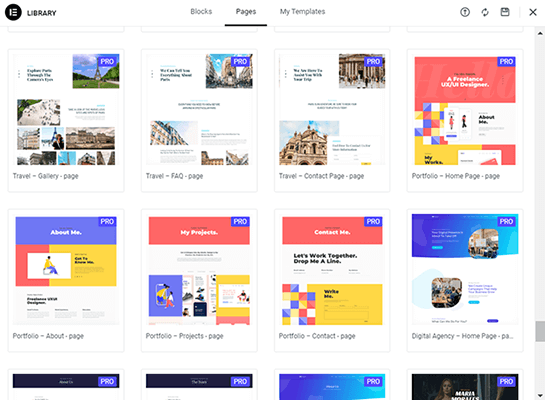
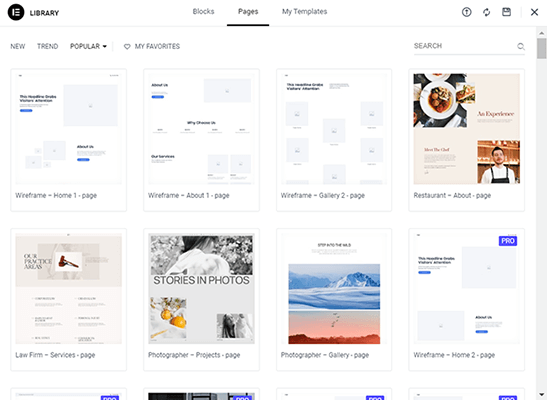
However, Elementor has what they call “website kits” for templates.
Website kits are a series of predesigned templates offered by Elementor that share the same styles, that is, the same color schemes, fonts, font styles, shape dividers, etc.
This is something you’ll notice when you look at the screenshot above as well as when you scroll through the template library yourself.
They’re designed to help you create the most important pages on your website quickly by following a key design rule: using a cohesive style across your website and sticking with it.
Even so, you can still just use one template at a time and completely change its style and content from top to bottom every time.
Common page templates you’ll find in Elementor are the homepage, About page, Contact page, Team page, Menu page (for restaurants), FAQ page, Services page, Projects page, Gallery page, Pricing page and Shop page.
Block templates are predesigned sections you can add to any part of your page.

They work in the same way page templates do in that you can switch out their styles and content for your own. Plus, they’re not as overwhelming as page templates as far as editing goes.
Elementor has several categories for Blocks, including About, Services, Contact, 404, Hero, Product and more.
You can even favorite individual block and page templates so you can access them quickly when you want to import a new template later.
For pages, Elementor lets you filter your search based on what’s most and least popular among the Elementor community.
When you’re happy with a page or section you’ve designed and want to use the design for other pages and sections on your website, you can save it to your own personal template library.
For sections, all you need to do is right click on the section button, then select Save as Template.
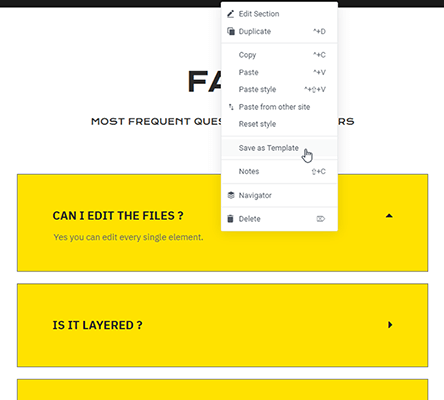
Saving an entire page as a template is just as easy. Just click the arrow button next to the Publish button, and select Save as Template.
You’ll find every template you’ve saved under the My Templates tab when you add new templates to an Elementor page.
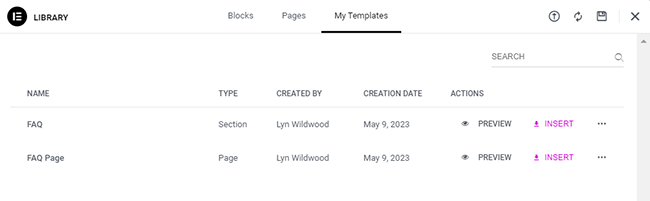
Unfortunately, Elementor doesn’t let you categorize your templates, which can get pretty messy as you create more and more templates.
They do let you search for templates, though, so it’s best to be as descriptive as possible when you name templates.
Importing and exporting templates
When you view your template library in Elementor, you’ll notice a few different buttons.
When you click on the three dot button associated with an individual template, you’ll notice the Export button.
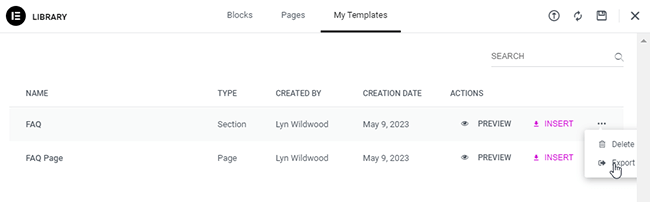
If you look at the top-right corner of the template library, you’ll notice the Import button.
These buttons allow you to export your designs and import them on other sites.
You can even use this feature to export designs, then offer them as lead magnets to your audience or even sell them.
Regardless of how you use this feature, it’s great that Elementor gives you an easy way to use designs you’ve created on other websites you own.
Page layout templates
Elementor also comes with two WordPress page templates, which you can select from the main Edit page.
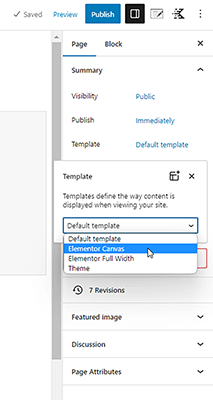
The Elementor Canvas template is the blank page template. It removes your theme’s header, footer and sidebars so that only the content you create with the Elementor editor appears.
This is ideal for landing pages or Checkout pages where you don’t need the rest of your site distracting a lead.
The Elementor Full Width template is designed to ignore your theme’s boxed page layout so you can design a full width page instead.
Elementor’s structure templates are simple and few in numbers, but you’ll see just how useful they are as you design more and more pages with Elementor.
The theme builder
The Elementor theme builder allows you to use the Elementor editor to customize specific parts of your theme, even if that theme wasn’t created by Elementor themselves or for the Elementor editor.
With the theme builder, you can edit the following layouts for your theme:
- Header.
- Footer.
- Single post.
- Single page.
- Archive.
- Search results.
- Single product.
- Products archive.
- 404 page.

Elementor even has predesigned templates for each one in case you don’t want to build a layout from scratch.
The editor even prioritizes the widgets that display based on the theme part you’re working on.
The theme builder is one of the most powerful features Elementor has to offer as it gives you even more control over your site’s design.
Plus, with Elementor’s free Hello theme, you don’t even necessarily need a third-party theme these days.
Elementor gives you the power to design your own site from the ground up.
The popup builder
Elementor adds more and more marketing features to its product every year it seems, but the Elementor popup builder is one of the biggest by far.
It lets you use the same editor to design marketing popups for your site.
They even have a couple dozen popup templates.
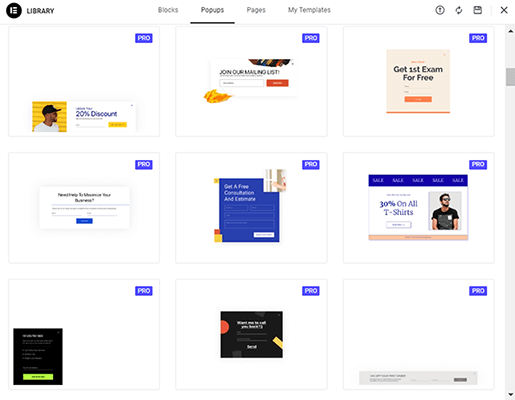
With the editor, you can edit the popup’s content and styles in a few simple clicks.
More importantly, you can edit animation and motion effects for your popup, such as giving it a “bounce in” entrance animation.
Most importantly, the popup editor includes display conditions and triggers for you to edit.
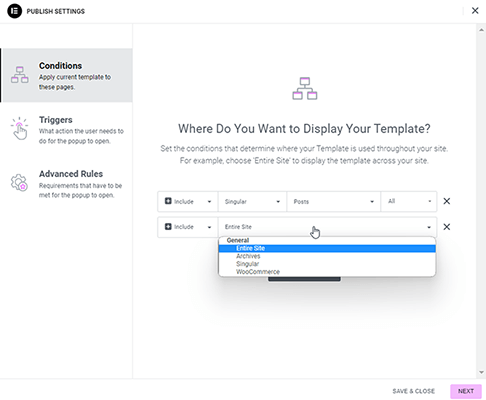
With display conditions, you can assign individual popups to specific post types or even specific pages.
For triggers, you can have your popup appear when users attempt to leave your site (exit intent), when they’re inactive, when they scroll to a certain point and more.
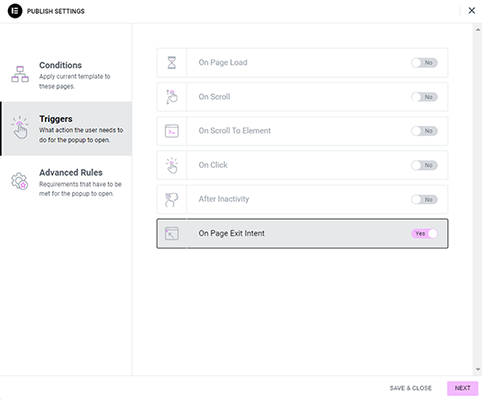
There’s also a trigger that only displays the popup when a user clicks a specific link or button.
This is a great trigger to use as it’s not as intrusive or disruptive as other trigger types for popups.
Plus, when you use your popup builder as an email opt-in form, click triggers offer a better way to weed out subscribers who aren’t likely to engage with your emails.
Overall, the popup builder is yet another feature Elementor gets right.
And when you also take the form builder into consideration, you can see how Elementor allows you to drop expensive marketing plugins like Thrive Leads and OptinMonster.
Elementor review: how much does it cost?
Elementor has a free version of the plugin available to install directly from the WordPress plugin directory as well as four premium plans.
Here’s everything Elementor free offers:
- Visual drag-and-drop editor.
- 40+ free page builder widgets.
- A few free page templates.
- A few free section templates.
- Hello WordPress theme.
- Edit pages, posts and custom post types.
- Save your own section designs as templates.
- Box shadows.
- Motion effects.
- Margin and padding adjustments.
- Background overlays.
- CSS transform.
- Gradient backgrounds.
- Mask options.
- Shape dividers.
- Coming Soon mode.
- Headline and text effects.
- Google Fonts.
- Color picker.
- Plus, many more effects!
- Export/import templates.
Pricing for Elementor Pro starts at $59/year.
All premium plans offer these features:
- 90+ premium widgets.
- Global widgets.
- Hundreds of premium page and section templates.
- Website kits (fully-designed Home page, About page, Contact page, Team page, etc. that all use the same styles).
- Theme builder
- WooCommerce builder.
- Popup builder.
- Form builder
- Dynamic content.
- Advanced motion effects.
- Scroll snap.
- Role manager.
- Custom CSS and code.
- First-party marketing and CRM integrations.
- Premium support.
Here are the attributes of the base plan, Essential:
- $59/year.
- License for a single WordPress site.
The Advanced plan:
- $99/year.
- 3 site licenses.
The Expert plan:
- $199/year.
- 25 site licenses.
And finally, the Agency plan:
- $399/year.
- 1,000 site licenses.
Elementor does not offer a free trial for Elementor Pro, but they do have a 30-day money-back guarantee on all premium plans.
Elementor pros & cons
All page builder plugins have their advantages and disadvantages, and Elementor is no different.
This section is a quick summary of the advantages and disadvantages we noticed about this particular page builder.
Elementor pros
- Easy to use. Once you get to know the plugin’s editor, you’ll find it’s very simple and straightforward to use.
- Allows anyone to create their own designs. One of the best benefits of Elementor is the way it allows anyone, especially non-developers, to design their own web pages without needing to know how to code.
- A lot of third-party support. Because Elementor is one of the most popular plugins in the WordPress industry, it’s also one of the most supported. There are dozens of plugins and WordPress themes that are designed as third-party addons for it, and almost every theme is tested for compatibility with the plugin these days.
- Works with all page types. You can use the page builder on pages, blog posts and custom post types, so you can create your own designs no matter what type of page you need to build.
- Theme builder is affordable. All features available with Elementor Pro are available with every plan the developer offers, so it’s one of the most affordable ways to gain access to a page builder that offers theme editing capabilities.
- Proprietary theme is free. If you don’t want to use a third-party theme to use Elementor to build a WordPress website, all you need to do is download the free, first-party Hello theme from the official theme repository.
- A lot of web design widgets. Elementor has a lot of free and premium widgets as well as animation effects, styles and more. Plus, you can extend the plugin with third-party plugins, which offer even more web design widgets to use.
- Global widget. Label specific widgets as “global,” and edit them all across your entire site from a single location.
- Blank page template. Build pages that have no header or footer with Elementor’s blank page template. This is a great choice for landing pages.
- Developer friendly. Access the Elementor API, hooks, CLI commands, scripts and more with the plugin’s developer-friendly features and tutorials.
- Team friendly. Collaborate with your team by leaving notes on specific widgets.
- 24/7 support. Customer service is available 24/7 via chat support.
Elementor cons
- Learning curve. This is a con of all page builder plugins, not just Elementor. Those who don’t know how to code and are only familiar with WYSIWYG editors that resemble Microsoft Word may find these types of plugins difficult to learn. This could potentially hinder productivity.
- Impacts performance. This is another con that applies to all page builder plugins, not just Elementor. Page builders insert a lot of code into the pages you build with them, which can have a negative impact on performance. Fortunately, if you choose a quality WordPress host and use a performance tool like NitroPack, you can mitigate drops in performance quite a bit.
- No widget templates. While you can save sections and entire pages as templates and even make individual widgets global, you cannot save widget designs as templates and reuse them on other pages.
- No lifetime option or discounts. Some page builders have lifetime options that enable you to pay a one-time fee of a few hundred dollars in exchange for unlimited or a couple dozen licenses that never expire. Others offer discounts when you renew your license year after year. Elementor doesn’t offer deals of any kind. Even worse, while the Agency plan comes with a generous 1,000 site licenses, no plans come with unlimited site licenses.
- No white label option for developers. White labeling is a feature some DevOps tools offer. It removes the tool’s branding from the customer-facing side of the Elementor interface. This causes less confusion for a development team’s customers, and it allows developers to market their services as a proprietary package without needing to develop their own product. Elementor does not offer this feature with their Agency plan despite being used as a key development tool for building custom WordPress sites by many agencies.
Elementor alternatives
Here are some alternative page builders in case Elementor just isn’t the plugin for you or you want to weigh your options:
- Beaver Builder – Primarily a powerful page builder plugin, though they do offer their own theme building capabilities with the Beaver Themer addon and a Beaver Builder-optimized WordPress theme.
- Thrive Architect | Our Review – A great alternative if all you need is a page builder, though they also have the Thrive Theme Builder & Thrive Architect bundle if you want a complete alternative to Elementor. There’s also the Thrive Suite membership program, which comes with numerous marketing plugins.
- Divi – An affordable alternative to all of the previous options. It’s a WordPress theme with page building and theme editing capabilities, and the membership program includes two marketing plugins. There’s even a lifetime option.
Elementor review: final thoughts
As WordPress’ default block editor (originally called the Gutenberg editor) becomes more and more powerful, page builder plugins need to find ways to remain relevant.
Fortunately, by focusing on whole-website web design capabilities and less on single page designs, Elementor is doing just that.
With Elementor Pro, features like the theme builder, popup builder, form builder and global styles allow you to create cohesive designs and even take control of your site’s design.
This is even more true when you use Elementor’s Hello theme.
Even with premium templates and widgets alone, Elementor is still one of the most powerful page builder plugins you can use.
Disclosure: Our content is reader-supported. If you click on certain links we may make a commission.