7 Best Image Editing Tools For 2024 (Hint: Most Are Free)


What is the best image editing tool?
Whether you need to edit photos or work on graphic design for your business, having an online photo editor that is simple and easy to use can save you time and money.
In this post, we’ll be comparing the best image editing tools on the market so you can find the perfect tool for your needs.
The best image editing tools compared
TL;DR
Visme is our top pick for image editing tools. It’s simple to use, loaded with templates, and suitable for graphs/charts/GIFs as well. Activate your free account.
1. Visme
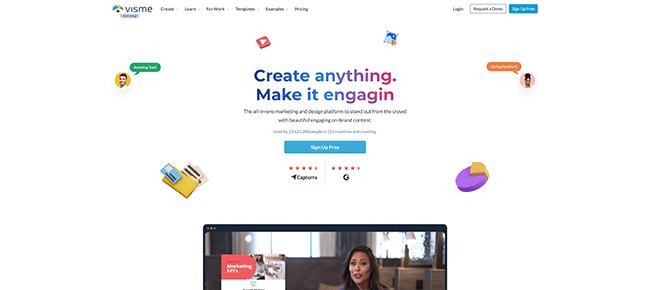
Visme is a graphic design tool that allows even the most novice designer the ability to get creative and produce high-quality imagery for personal or business use.
Even if you have no experience, they have a wide collection of templates for every need including infographics, presentations, social media, and ebooks.
Visme’s editor is simple to use, it has a drag and drop panel on the left with every element you’d need to craft the perfect image.
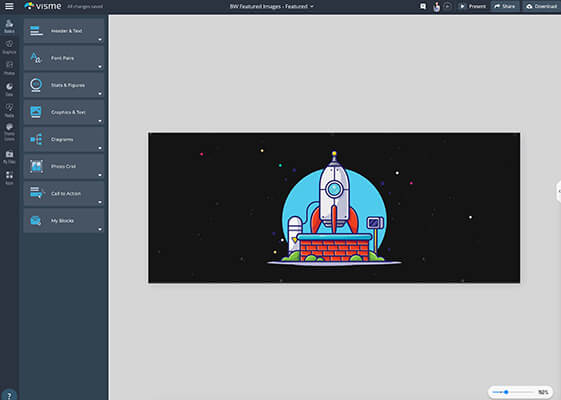
An additional feature is that you can create Content Blocks, which saves a group of elements as a block which you can reuse. Perfect for branded templates or designs.
With a vast library of free photos, graphics and animations you can easily create and download an image for your business.
On higher plans you get access to features such as tracking analytics for your content, creating brand palettes and team collaboration.
Visme has a free plan where you can create unlimited projects with limited templates. Their paid plans start from $29/month with 6 months free if purchased annually.
Learn more in our Visme review.
2. Canva
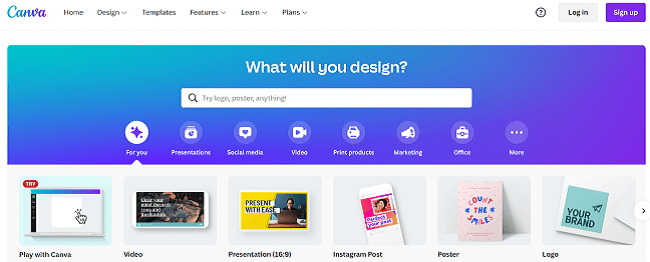
Canva is by far the most popular free online design tool specifically made for bloggers.
You can produce professional looking Photoshop-quality graphic images, all with their free basic version.
Canva works with drag-and-drop functionality, making it easy to size and move images, add fonts, shapes and text boxes.
They have over 1 million preexisting images and graphics you can choose from, or you can upload your own images to use. With thousands of templates to start from and elements to use like free icons and fonts, it’s a blogger’s playground.
While Canva is often used for creating graphics to be shared on social media, you can customize your own dimensions if they don’t have a template in your preferred size.
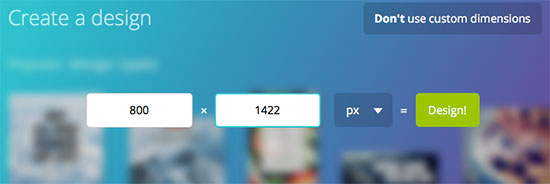
From here you can choose a layout and start to build your graphic. You can also save your work to the cloud, which comes in handy if you’re working on a big graphic like an infographic or an incentive image for your content upgrade.
If you’re not familiar with using Canva, they offer a design school, which is a library of tutorials to help you master the features Canva has to offer.
If you want to choose from premium images, illustrations or charts, there is a small charge of $1 per item. You can also upgrade to Canva for Work, which is a subscription service, starting at $12.99/month. Save 16% by paying annually. Start with a 30-day free trial.
3. Piktochart
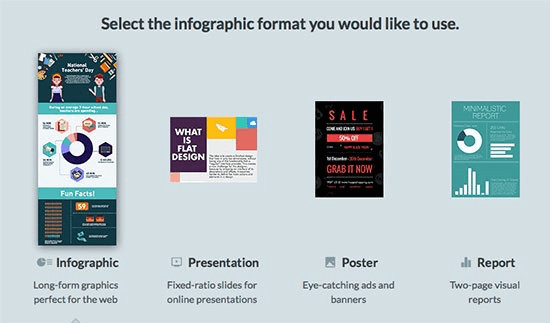
Piktochart allows you to easily make infographics, reports and presentations. Infographics are still a powerful way to present large amounts of information in an easy to digest way.
Visual marketing just makes sense and Piktochart can help you with that. Piktochart is easy to use, creates graphics that look professionally made, and even a non-designer can use it.
You can choose a template or create your own – psst…pick a template. Piktochart does all the work for you with laying out where the information and visual charts go.
All the tools you need are laid out on the side, making it easy to customize and change things around.
What’s nice about the simple intuitive interface Piktochart has, is how easy it is to create graphs or charts with your own data. Pick what type of graph or chart you want and double-click to enter your data.
Other highlights include the ability to add video to your infographic and upload your own images like a logo for branding purposes.
If you want more features like more templates to choose from, paid plans are from $29/month, you can save 52% by subscribing to annual billing.
4. PicMonkey
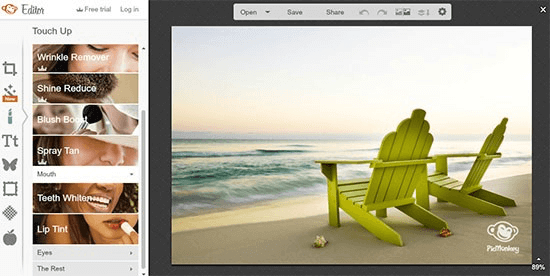
PicMonkey is another highly popular photo editing tool available online. The free Basic version offers plenty of editing options that can really make your image pop.
Some key differences that PicMonkey offers over Canva are:
- Image adjusting – sharpen an image or fix the exposure
- Custom effects – give your image a boost of color or soften your image
- Image touch ups – whiten teeth, fix blemishes or remove red eye
While PicMonkey also has “fun” filters such as whisker grow or spray tan available in the premium plan, the basic version has more than enough to touch up your photo and add text to it.
It’s easy to use, just upload your image and get to work. While there aren’t any social media templates you can use for your images, PicMonkey makes it incredibly easy to crop your photos to a specific size.
One thing that PicMonkey doesn’t have, that Canva does, is the option to save your work to the cloud. With PickMonkey you have to do your touch up and edits all at once, and then download the final image to your computer.
PicMonkey offers free tutorials on their blog to help you master all the features available.
Prices start at $7.99/month. Higher plans offer more features. Discounts available for yearly subscription.
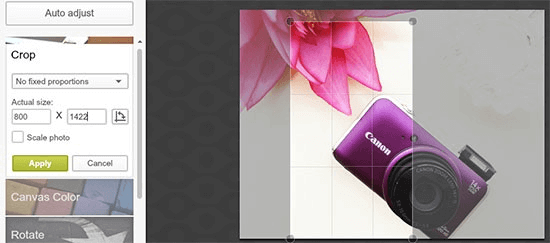
5. Pixlr
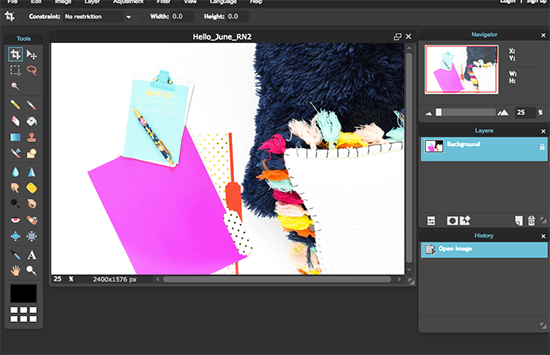
Many people aren’t in a position to buy expensive photo editing software, but Pixlr is a great Photoshop alternative.
It’s a free, robust online photo editing tool intended for non-designers, and has a lot of the same tools and features you would find in Photoshop.
Pixlr Editor offers:
- A series of selection tools like the marquee tool, lasso tool, and wand tool
- Photo editing tools like the paint bucket, clone stamp tool, and gradient tool
- Blending tools like the sharpen tool, blur tool or smudge tool
- And many more. If you’ve ever used Photoshop before, you’ll feel right at home.
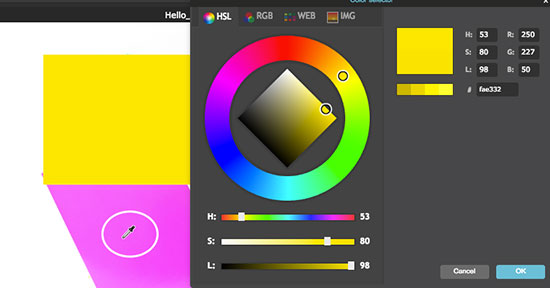
One useful feature that’s available with Pixlr is the eyedropper tool. If you are creating text over your image, you can use the eyedropper tool to sample a color in your image to use for your text color, giving it a more consistent look.
If you find Pixlr Editor too advanced for you, they also offer Pixlr Express with fewer options to choose from.
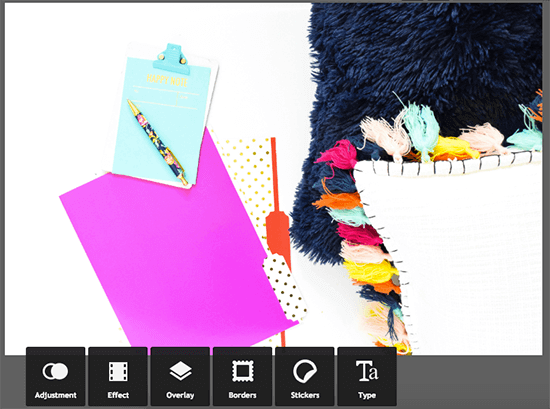
Each tab opens up a series of editing tasks you can perform such as adding text to your image, a border around your image, or adding a vintage filter over your image.
For ad-free access with unlimited saves it’s $1.99/month. To get access to the full Pixlr Suite and features it’s $7.99/month. Subscribing annual gives you additional discounts.
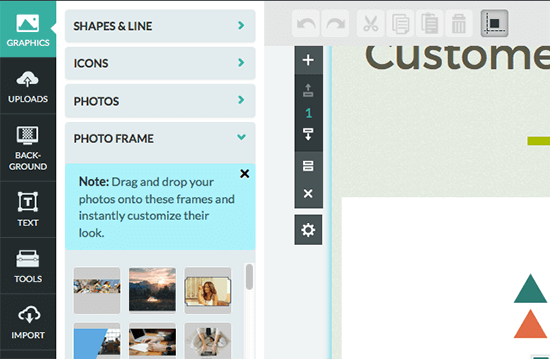
6. Venngage
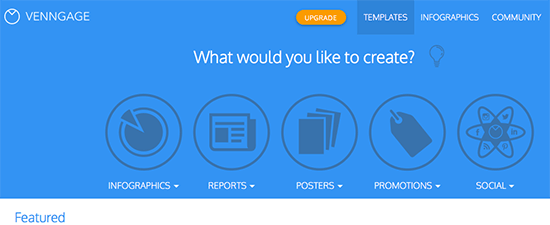
Venngage is a photo editing tool that allows you to create infographics, reports, flyers and even social media postings. It’s an easy-to-use online data visualization tool that businesses and bloggers can use.
While it’s intended for businesses as a way to save costs on outsourcing graphic designers, it’s easy enough for bloggers and solopreneurs to pick up and use.
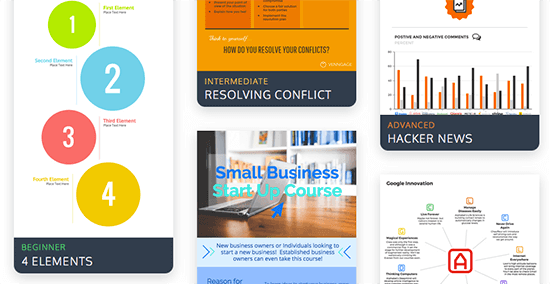
To start, Venngage categorizes their infographics as beginner, intermediate and advanced, depending on the complexity of the infographic.
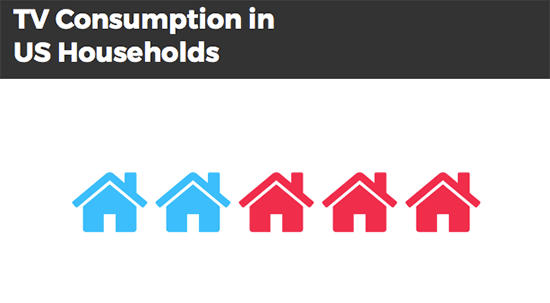
Venngage uses a drag-and-drop toolbar to make it easy to swap icons or add new ones. A neat feature Venngage offers is pictograms.
These are icons that duplicate with different colors. You can then represent a fraction like, 2 out of 5 households don’t have TV’s, for example.
Venngage also makes it easy for you to organize your icons and text with a grid style background to help you align your icons and charts. It also auto saves your work while you’re designing which comes in handy when you’re working on in-depth projects.
With hundreds of professional looking templates, a huge collection of icons and pictograms, and a library of data-driven maps, graphs and charts, Venngage makes it easy to create a report or infographic in minutes.
To get complete access to all of their features, you can upgrade to a monthly plan of only $19 or, pay yearly and save 52%.
7. Adobe Photoshop
Photoshop is probably the most popular photo editing software on the market.
For as little as $20.99/month you can have access to the latest full version of Photoshop CC for your desktop. Made for professional graphic designers, Photoshop is your complete package for editing, sizing, optimizing, enhancing and designing nearly any graphic imaginable for your site and blog.
In Photoshop, you work in layers, making it easy to make changes quickly to only one aspect of your image – for example, a filter layer or text layer.
One new feature that the latest version of Photoshop offers is the ability to create artboards so you can work on multiple images at a time. This ensures all your images or image variations are contained in one file.
For example, when I branded my Pinterest board covers, I created an artboard for my Pinterest board cover template with guides for my text.
I then duplicated my artboard to make the rest of my Pinterest board covers, making it incredibly easy to copy and transfer text and images from one cover to the next.

If you don’t know how to use Photoshop, Adobe offers tutorials that walk you through learning the essentials to editing your first photo, and more.
If you’ve been using Photoshop for a bit and want to learn more features, check out their tutorial library where you can learn how to create a product mockup box or create fiery text.
Streamline photo editing with these stock photo resources
Whether you’re a content creator or experienced graphic designer, finding the perfect image to edit can be a challenge. You can’t just copy an image you see on Google, or on someone else’s site. Most likely it’s copyrighted and you can’t use that image unless you have permission from the person who took the photo.
So, where can you find sharable images that are free to use? The best places are sites that have Creative Commons licensed images. These images are free to share and – depending on the specific Creative Commons license – you can often freely modify them for personal or commercial use.
The Creative Commons Zero license requires no attribution. Check out these sites for plenty of amazing free images:
Want more stock photo sites? Check out our article on the best stock photo websites.
Features to look for in an image editing tool
Everyone’s needs are different. So, it’s important to consider what features are most important for the photo editing work you’ll be doing.
Here are a number of popular features worth looking out for:
- Streamlined user interface – Image editing has to be simple and easy, good enough for a novice.
- Stock photos and other graphics – Having a library of stock images such as photos and icons means you won’t have to pay for an external stock library.
- Text editing features – Font styles, text animation, text effects are all essential for creating images.
- Image templates – Whether you’re designing content for social media, or creating an infographic for a blog post, a library of templates can help you create great images fast.
- Team collaboration – If you’ve got a team you need to have the ability to add team accounts or share links to your designs.
- Online based tool – While desktop-based software allows you to create more complex designs and typically offers more features, online based tools are a lot easier to use. Particularly across multiple devices. After all, there’s no software to install.
- GIFs / motion design – All image editing tools deal with static images, but it’s worth considering whether you’ll need a design tool that supports motion graphics such as GIFs.
- A wide range of file formats – You may need the option to export more than PNG and JPG file types. So, consider additional file formats such as PDF, SVG, GIF, and MP4.
Wrapping it up
Having the perfect image not only means finding it, but also editing it and designing it so that it gets shared on social media, or so that it reflects your brand image.
Editing apps like Canva, PicMonkey and Pixlr offer a host of features, fonts, and image editing tools to make any novice look like a pro.
If you’re in need of an infographic, report or presentation for your business or blog, Piktochart and Venngage have got you covered. With hundreds of templates and icons to choose from, you’ll have no problem entering your data and creating a professional looking presentation or infographic.
But before you upload your amazing new images to your site, there is one last crucial step.
You must optimize your images for the web, otherwise all your efforts will be laid to waste when your readers have to wait for your images to load. Don’t worry, it’s easy – click here to read my image optimization guide.
Finally, if you want to use what the pros are using, consider Photoshop. With plenty of free guides and video tutorials online, you’ll be able to quickly pick up the steps it takes to edit your images.
Related reading:
Disclosure: Our content is reader-supported. If you click on certain links we may make a commission.