How To Collect Testimonials From A WordPress Contact Form

Do you want to learn how to collect testimonials from a WordPress contact form?
Testimonials are a great way to demonstrate your expertise but they can be tedious to collect. There are dedicated testimonial plugins that allow you to collect testimonials from customers, but you can just as easily use the tried and true contact form.
In this tutorial, we’re going to use Kali Forms Pro to create a testimonials contact form and walk you through every step of the process.
Before we get started, you’ll need to make sure you have installed and activated Kali Forms in your WordPress dashboard.
Now, let’s jump straight into the tutorial:
Step 1: Create a base form
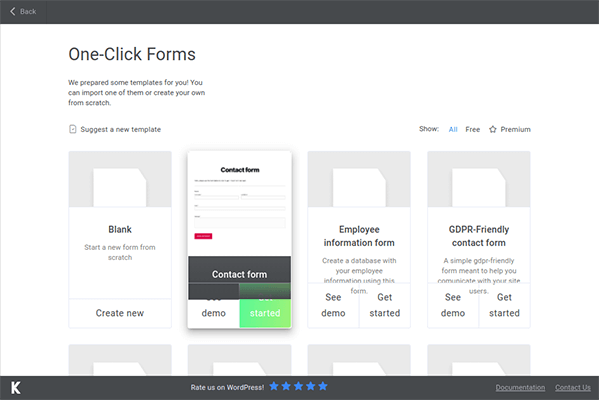
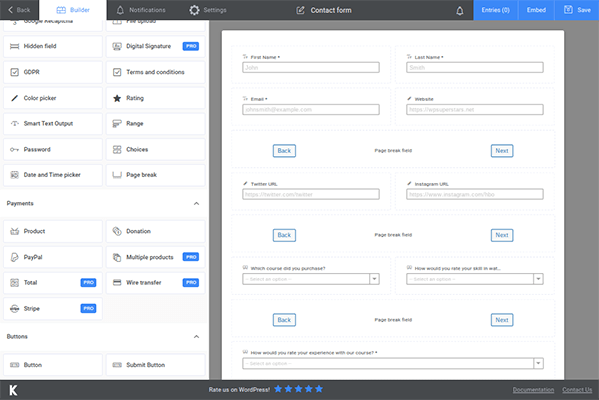
Kali Forms’ premade Contact Form template will work just fine for this purpose. Go to Kali Forms → Add New, and click Get Started on the template.
You can choose whichever theme you like, but make sure all options are checked before continuing, especially Conditional Logic. We’ll go over why later.
Clean up your form
Right off the bat, you can delete the first two elements, the ones labeled:
- “Hello, please use the form below in order to get in touch with our team.”
- “Name”
Use whichever page builder or WordPress editor you prefer to promote your form on the page you wish to insert it on instead. The “Name” element is also unnecessary as the name fields are descriptive enough on their own.
Click the Save button right away as well, and be sure to save often throughout this tutorial as Kali Forms does not autosave.
Step 2: Consider the information you’d like to collect
There’s a lot you can display on a testimonial depending on your industry and the nature of your customer base.
For instance, if you have prolific customers whose testimony would carry a lot of weight, you’ll want to collect the following information alongside their names and email addresses:
- Website or blog URL
- Links to social media profiles
Regular customers don’t carry the same weight, so you don’t necessarily need their website or blog names unless your work would be featured there. You also won’t need their social media profiles unless you think they may have promoted your business in a tweet or Instagram pic.
If you’re unsure of who in your customer base will be filling out your form, include all fields anyway, but make them not required.
Here are two additional pieces of information you may want to uncover from all customers:
- The product or service they used
- The way they used your product or service
Additional fields may be added depending on your niche. For instance, if you sell gaming keyboards, you could ask customers to list specifications for their gaming rigs.
If you sell courses on how to paint watercolor, ask customers how they’d rate their skill level (beginner, intermediate, advanced, etc.).
Determine which pieces of information you’d like to include in your testimonials as is relevant to your niche before continuing so you know which fields you need to create.
Step 3: Add fields to your form
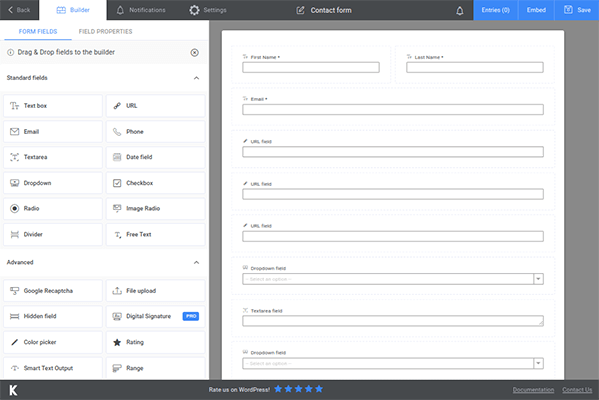
Drag and drop the following fields to your form as needed:
- Website or blog name – URL field.
- Social media profiles – One URL field for every platform you want to display.
- Products or services your customer purchased – Use the checkbox field if customers may have purchased more than one. Use the dropdown field if customers would only purchase one in your business model.
- How they implemented your product or service – Textarea field.
- Gaming rig example: Textarea field.
- Skill level example: Dropdown field.
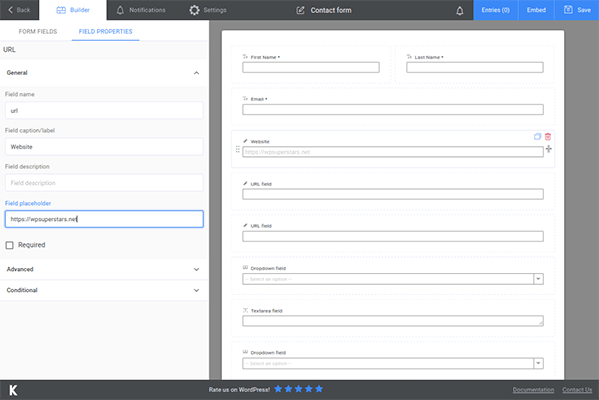
Configure your fields
Click on the first URL field you added to edit it. Add “Website” or “Blog” to the label field. Input your own site’s URL or a popular site like Google in the form you want users to use as a placeholder.
Determine if you need this field to be required or not before moving on.
Do the same with the URL fields you added to collect social media profiles. You can also add placeholder text to the default fields while you’re at it, and change the “Message” label to “Testimonial”.
Fill out the remaining fields as needed.
Step 4: Set up the testimonial path
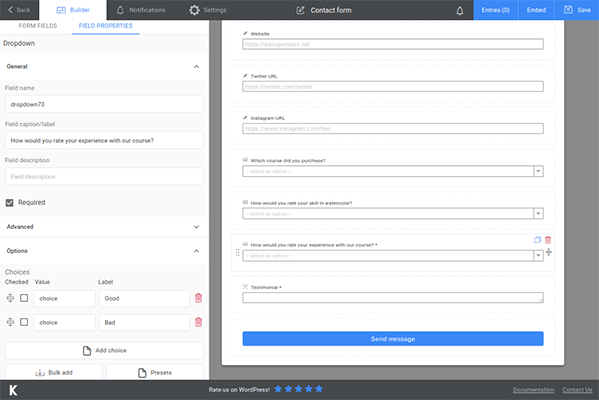
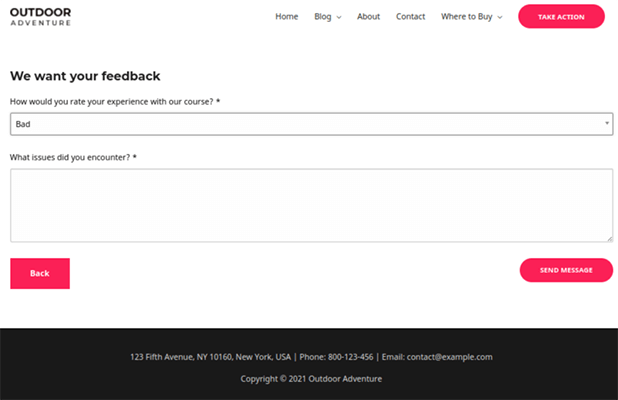
Add another dropdown field before the Testimonial field, and make it required. Set the label to “How would you rate your experience with our product?” or something similar.
Add “Good” and “Bad” as options or similar choices.
Add another textarea labeled “What issues did you experience?” before the submit button, and make it required.
Open the Settings page, click over to the Conditional Logic tab, and create a new tree called “Testimonial – Bad”.
Set up your tree in this way:
- Testimonial
- Hide
- How would you rate your experience with…
- Equal to
- Bad

Save it, and create another tree called “Testimonial – Good” with the following parameters:
- Testimonial
- Show
- How would you rate your experience with…
- Equal to
- Good
Create another conditional logic named “Experience – Bad” with the following parameters:
- What issues did you experience?
- Show
- How would you rate your experience with…
- Equal to
- Bad
Finally, create a final logic tree named “Experience – Good” with the following parameters:
- What issues did you experience?
- Hide
- How would you rate your experience with…
- Equal to
- Good
Basically, you want the “Testimonial” textarea to appear if customers rate their experiences as good and the “What issues did you experience” textarea if they rate their experiences as bad.
Step 5: Finalizing your form
Take the time to format your form by making your fields smaller and placing them side by side.
You should also insert the page break field in a few different places to break up your form into multiple “pages.” Don’t worry, the form itself will still display on the same webpage, but only one section will display at a time.
Set up your thank you message, spam protection and final styles in the Settings section.
Kali Forms doesn’t integrate with Zapier, project management tools or most helpdesk software at the moment.
It does, however, integrate with HubSpot and Slack, so you can use conditional logic to automate the responses you receive from this form. Use this to send testimonials to your marketing team and complaints to customer service.
Lastly, click the Embed button to copy your form’s shortcode so you can paste it on the page you want to display it on. This is the page you’ll link to your call to action in the email and marketing messages you send to customers requesting feedback.
Final thoughts
And that’s all there is to it. Now you know how to collect testimonials with a WordPress contact form.
Ready to get started yourself? Go ahead and grab your copy of Kali Forms Pro – it’s a fantastic form plugin that you can use for general contact forms and plenty more.
Disclosure: Our content is reader-supported. If you click on certain links we may make a commission.