Schema Pro Review & Tutorial 2024: Adding Rich Snippets To Your WordPress Site On Autopilot


Welcome to our Schema Pro review & tutorial.
Rich snippets and schema markup are a great way to improve how your WordPress site looks in Google’s search results pages.
But they can also be a bit confusing!
Especially when it comes to adding the right schema markup to get Google to give you those rich snippets.
Schema markup and rich snippets don’t have to be confusing or time-consuming, though. And with the right tool – that I’m going to show you in this post – you can apply proper, Google-approved schema markup to your WordPress site on autopilot.
Yup – you set it up one time. Then, the plugin that I’m going to show you handles everything for you going forward.
Ready to get started? I’ll begin with a quick discussion about schema markup and rich snippets, in case you’re feeling a little bit lost by these terms. Then, I’ll show you how to add rich snippets to WordPress using a plugin called Schema Pro.
Finally, I’ll wrap up with some thoughts on Schema Pro and rich snippets.
Schema markup and rich snippets make you stand out in search results
If you don’t feel 100% confident about what the terms “schema markup” and “rich snippets” actually mean, let’s go over a brief primer before we get into the actual how-to section.
Schema markup and rich snippets tightly connected concepts, but refer to different parts of the pie.
Let’s start with rich snippets (also called “rich results” nowadays).
Rich snippets are Google’s (and other search engines’) way of displaying extra information on the search results pages.
I can pretty much guarantee that you’ve seen rich snippets – you just might not know them by that name.
Rich snippets can be something simple like a star rating:

Or rich snippets could be extra information about a recipe, like an image of the food and details on how long it takes to cook and how many calories it contains:

In fact, there are a ton of different possibilities for how Google applies rich snippets, and the exact information that Google “adds” depends on the type of content that a person is searching for.
Why should you care about rich snippets?
Let’s get one thing out of the way:
Rich snippets are not a positive ranking factor by themselves. That is, getting rich snippets for your site won’t magically make it rank higher in Google.
However, that certainly doesn’t mean there are no benefits to adding rich snippets…
See, rich snippets make your website stand out in the search results. And that can increase the chances that people see your listing in Google and (hopefully!) click on it to visit your site.
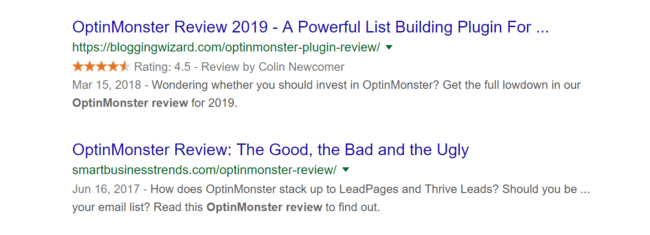
For example, look at the search results page for our OptinMonster review above – the stars immediately draw your attention to the Blogging Wizard listing, right?
So even if rich snippets don’t make you rank higher, they can help you get more clicks from the ranking positions that you already have, which is valuable by itself!
Beyond that, schema markup (we’ll talk about that next) can also help you with some other search visibility features like:
- SiteLinks – these provide extra links when someone searches for your site (example below).
- Breadcrumbs – this helps Google display breadcrumbs in the search results instead of your raw URL.
- SiteLinks Search Box – this lets people search your site right from the Google search results page.
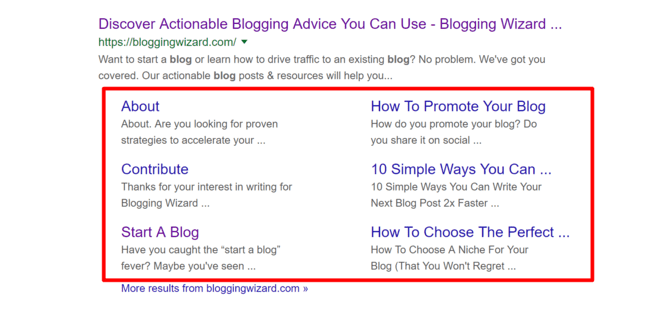
Those are SiteLinks.
What’s schema markup, then? How does schema markup connect to rich snippets?
Don’t worry, I didn’t forget about schema markup!
Schema markup is the behind-the-scenes code that helps Google create those rich results on its search pages.
By adding schema markup to your site, you provide valuable context to Google about the content on your site. For example, schema markup lets you tell Google – “hey, see that number 4.5? That’s the review rating for this product”.
Your human visitors won’t ever see the schema markup on your site (unless they look at the raw source code), but Google will find it and factor your schema markup into Google’s search results.
In the next section, I’m going to show you exactly how you can add that behind-the-scenes schema markup to your site without the need for any special technical knowledge.
A quick recap…
So, here’s the takeaway:
- Rich snippets – these are the extra information that shows up in Google to human visitors.
- Schema markup – this is behind-the-scenes code that you add to your website to help Google create those rich snippets.
How to add schema markup to WordPress with Schema Pro
Now that you know the “what” and the “why”, let’s get into how you can actually add schema markup to your WordPress site.
There are a few different plugins that can help you add schema markup to WordPress, but we’re going to single out one called Schema Pro.
Schema Pro is a premium plugin from $67/year with a lifetime plan available, but there are several reasons why it’s better than most of the free plugins you’ll find at WordPress.org:
- Automatic – rather than needing to set up schema for each individual post/page, you can create schema markup configurations one time and then have Schema Pro automatically apply them to the relevant posts/pages.
- Behind-the-scenes – whereas some free schema plugins at WordPress.org force you to add a new content box to the front-end of your site (that your visitors can see), Schema Pro works behind the scenes and uses the Google-recommend JSON-LD format to add schema.
- Flexible – if you’re using custom fields, Schema Pro makes it really easy to map schema markup to those fields (this is kind of advanced, but really helpful if you are using custom fields).
Ready to get started? Here’s how to use the plugin…
Use setup wizard to configure sitewide schema markup basics
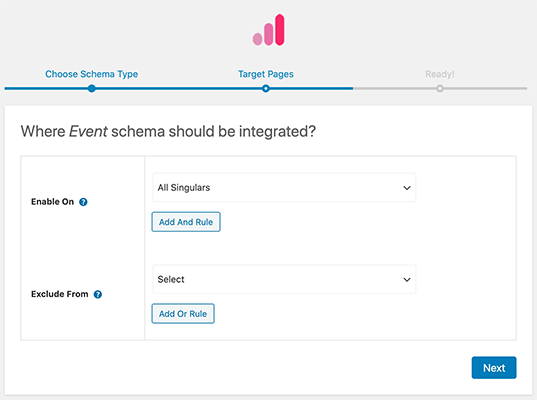
Once you’ve installed and activated the Schema Pro plugin, head to Settings → Schema Pro to run the setup wizard:
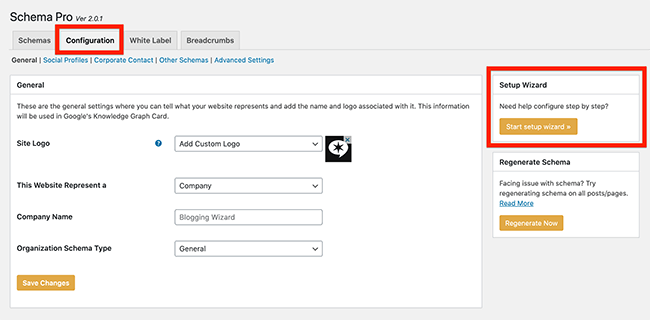
There’s also a permanent link to the setup wizard in the Configuration tab if you don’t see the notification for some reason.
In the setup wizard, you’ll configure some basic sitewide settings, like SiteLinks and breadcrumbs.
If you’re using a WordPress SEO plugin like Yoast SEO, your site might already have some of this basic sitewide schema markup. If that’s the case, Schema Pro will automatically detect the conflict and give you an option to disable any duplicated functionality to avoid conflicts.
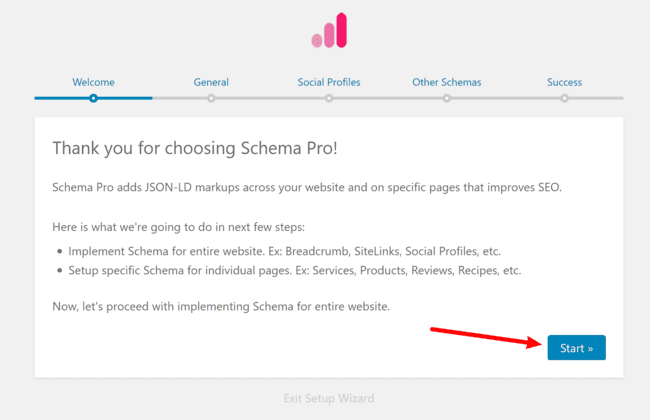
To get started with the wizard, go ahead and click that Start button:
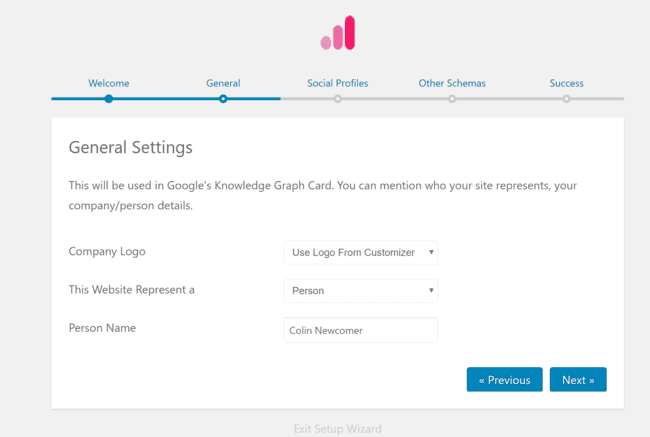
On the next age, you can choose your logo and select whether your website represents a person or a company. This helps supply information to Google’s Knowledge Graph Card:
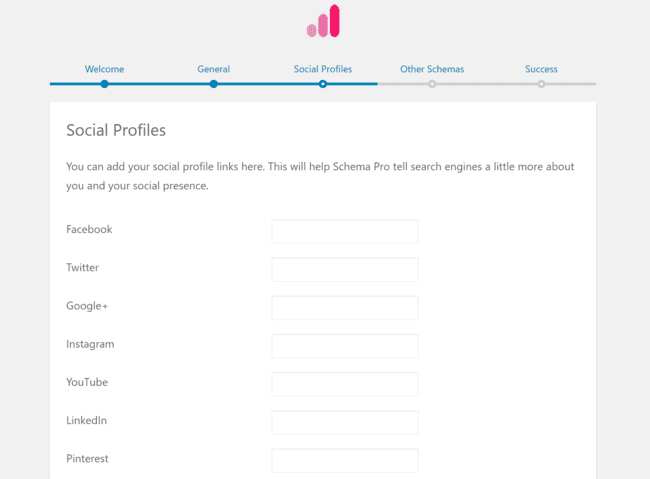
Next, you can add any relevant social media profiles that you want to connect to your website:
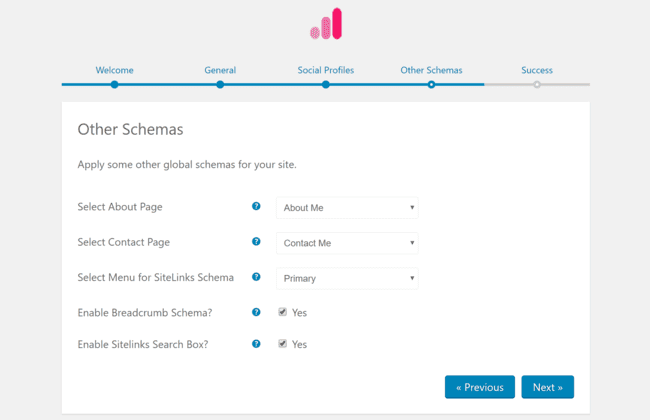
And on the final page, you can configure some important settings for SiteLinks, breadcrumbs, and whether or not to enable the Sitelinks Search Box.
I recommend filling out/enabling all of these features:
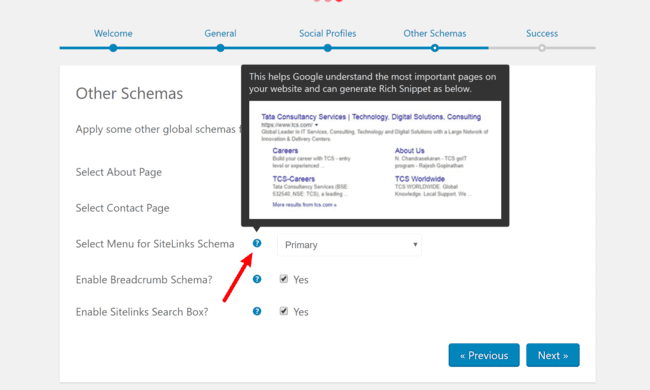
If you’re not sure what a specific feature does, you can click on the question mark to see an image of how it affects your search results:
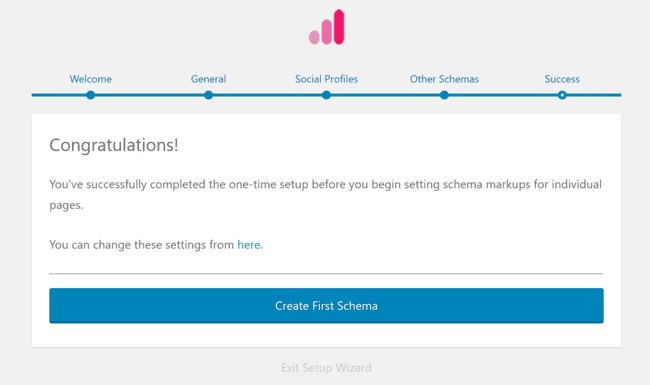
And that finishes up the basic sitewide settings! Now, you’re ready to create the first schema for your content:
Create a schema for specific content
Now that you’ve configured the sitewide settings, you’re ready to start adding schema markup to individual pieces of content.
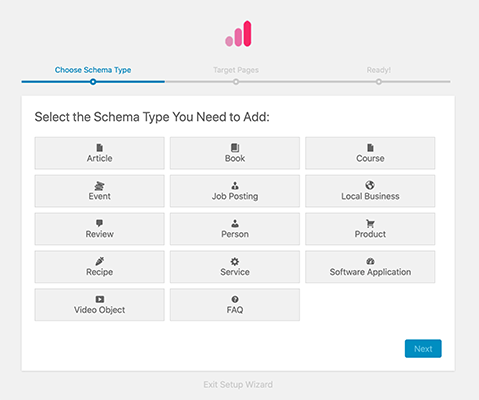
Schema Pro supports 13 different schema types:
- Article
- Book
- Course
- Event
- Job Posting
- Local Business
- Review
- Person
- Product
- Recipe
- Service
- Software
- Application
The schema type that you choose affects what schema information you can add. For example, if you choose the Recipe schema type, you’ll be able to add information for:
- Calories
- Cook time
- Etc.
On the other hand, if you choose the Product schema type, you’ll add information for:
- Price
- Stock status
- Etc.
If you’re running a blog, most of your content will probably use the Article schema type.
However, you might use multiple schema types. For example, if you also publish reviews, you’ll want most of your blog posts to use the Article schema type, but you might want your reviews to also use the Review schema type.
The nice thing about Schema Pro is that it makes that pretty easy to do. But for now, let’s just start by applying the Article schema type to your blog posts.
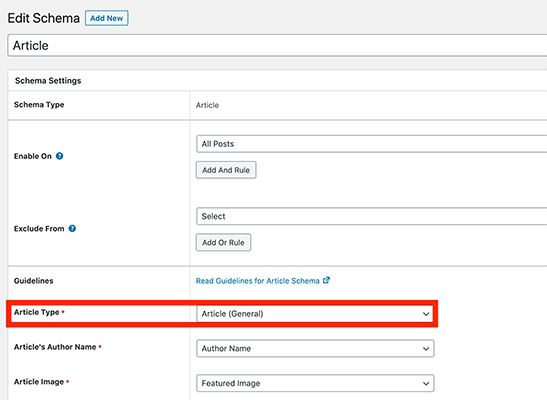
To do that, go to Settings → Schema Pro and click Add New:

Then, you can choose your Schema Type. Again, for most blogs, you should choose Article. However, if you have a niche blog – like a food blog that only posts recipes – you might want to choose a different type:
Next, you can choose where to apply that schema type. You can use include/exclude rules to target specific content. But for the Article schema type, you’ll probably want to use the drop-down to enable it on All Posts:
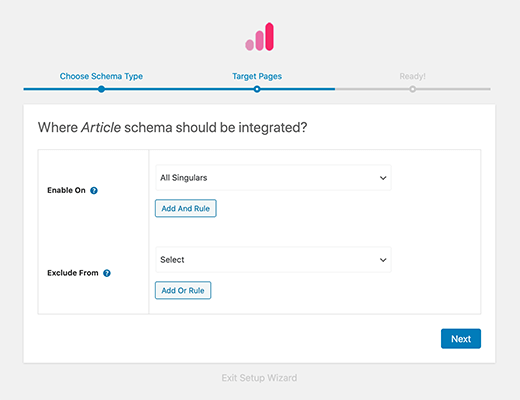
This tells Schema Pro you want to automatically apply the Article schema to all your current and future posts.
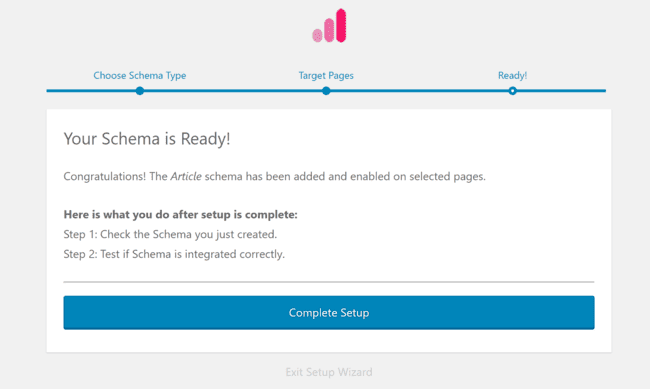
Once you’ve done that, you’ll see a prompt to Complete Setup:
Manually adjust schema data if necessary (you don’t have to do this)
By default, Schema Pro automatically maps your WordPress site’s information with the relevant schema markup.
For example, Schema Pro sets the Author Name in your schema markup equal to the name of the WordPress author, and the Published Date in your schema markup equal to the publish date in WordPress.
You can see what it looks like below – the schema markup data is on the left, and the dropdown on the right tells Schema Pro what WordPress information to associate with that schema markup data:
If you’re not sure what’s happening, just leave things as the default. Schema Pro has already set it up to work for 99% of WordPress sites.
If you’d like, however, you can use these dropdowns to manually adjust things. For example, if you’re using custom fields at your site, you can associate that custom field information with schema markup. Again, this is totally optional.
One more twist – “New Custom Field”
For some information, Schema Pro cannot automatically associate schema data with WordPress information because that information doesn’t normally exist in WordPress.
For the Review schema type, there are several unassociated pieces of information:
- Review Item
- Review Item Image
- Review Rating
If you look at the dropdown for this schema data, you’ll see the New Custom Field value:
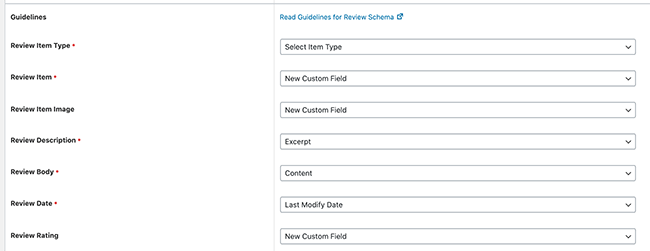
What this means is that Schema Pro will add a new custom field to the WordPress editor that you can manually fill out on a post-by-post basis (you can also just leave it blank – that’s fine too).
Putting it all together
Ok, so here’s how all this works in practice.
By using existing information in WordPress, Schema Pro will automatically add the relevant schema markup to 99% of your content – you don’t need to think about it. It’s all on autopilot at this point.
For the other stuff – anything with a New Custom Field value – you have the option to enter that on a post-by-post basis.
You don’t have to enter it – you’re totally fine to leave the fields blank. But if you do want to add it for certain posts, all you need to do is enter the information in the custom fields and Schema Pro will add the proper schema markup to your site.
Adding different schema markup types for different posts
The Article schema type is a good baseline to apply to most blogs. However, you might have certain posts where you want to use a different schema type.
For example, if you publish reviews, you might want to add the Review schema type for review posts, but only use the Article schema type for everything else.
To do that, go back into the Schema setup wizard (Settings → Schema Pro → Add New) and choose your desired schema type – Review for this example.
Only now, instead of choosing All Posts, you can use the Specific Pages / Posts / Archives etc. option to target the Review schema type to:
- Specific posts by searching for the post name (if you opt for this route, you’ll need to manually add new posts in the future)
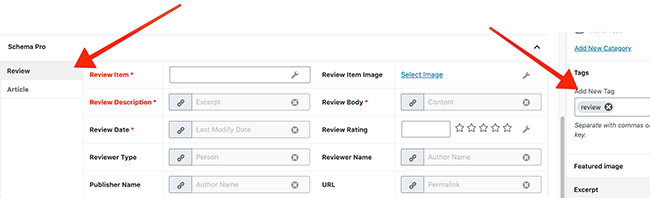
- Categories or tags. For example, you can tag every review with a “Review” tag and use that to have Schema Pro automatically apply the Review schema type (this is convenient and saves you time)
Now, if you create a post with the “Review” tag, you’ll get a new option to add review schema data:
You can use a similar approach for recipes, products, you name it!
How to test your schema markup to make sure it’s working properly
At this point, you know how to add schema markup to your WordPress content to get rich snippets.
However, because schema markup happens entirely behind the scenes, it can be hard to know whether you’ve actually set things up properly.
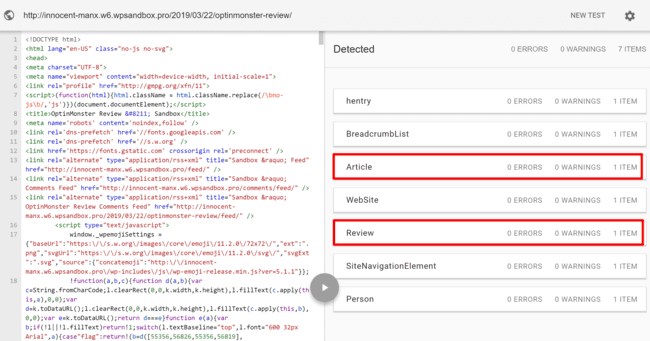
To help, Google created its Structured Data Testing Tool. FYI – for our purposes “structured data” and “schema markup” are pretty much the same thing.
With this tool, all you do is plug in a URL on your site. Then, Google will tell you whether or not:
- It detects schema markup
- It finds any errors in how you’ve implemented schema markup
For example, you can see that, for the example “OptinMonster review”, Google detects schema markup for both the Article and Review schema types (as well as all the other general sitewide schema markup):
Clicking on a schema type will let you see more information. For example, you can see that Google knows:
- We’re reviewing “OptinMonster”
- The review rating is “4.5”
- The reviewer is “Colin Newcomer”
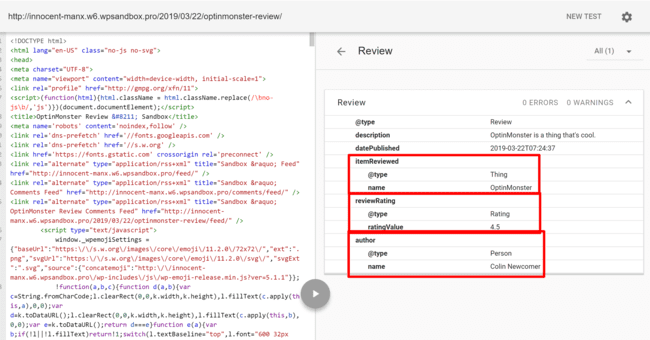
And that means you’ve got working schema markup/rich snippets on autopilot!
Schema Pro review: final thoughts
While I know that Schema Pro can get a little technical when it comes to things like mapping custom fields to schema data, Schema Pro really is the most flexible, lowest maintenance way to add schema markup to WordPress and get rich snippets.
Most other popular plugins require you to add a new front-end content box to your site, which doesn’t always fit with your site’s design. Schema Pro, on the other hand, eliminates that by using its JSON-LD approach which, again, is the schema format that Google recommends.
Beyond that, Schema Pro works pretty much on autopilot.
While there are some fields you might want to manually enter on a per-post basis (like a review rating), Schema Pro is able to automatically apply most of the markup for you on autopilot. Additionally, the include/exclude rules let you use multiple schema types and target them to the proper content (this becomes really helpful if you’re using custom post types).
All in all, if you’re looking for a lightweight, low-effort way to add schema markup to all of your WordPress site’s content, Schema Pro is a great tool to have in your arsenal.
Disclosure: Our content is reader-supported. If you click on certain links we may make a commission.