What Are Rich Snippets? A Beginner’s Guide To Schema


The Google search results page used to be quite dull. It was like the web equivalent of the Yellow Pages directory – line after line of text.
But nowadays, it’s quite snazzy.
Depending on what you’re searching for, it can look more like a glossy magazine. That’s because Google uses different media including images, videos, carousels and other non-textual elements to enhance the search results.
But it can only display these rich results when a page contains structured data.
So, if you fancy highlighting your website content in the SERPs with a rich snippet, stay tuned.
In this article, you’ll learn what rich snippets are and how you can add them to your pages.
What are rich snippets?
Rich snippets are the ‘special’ results you may have seen when searching Google:

A ‘typical snippet’ includes the title, URL, and description:

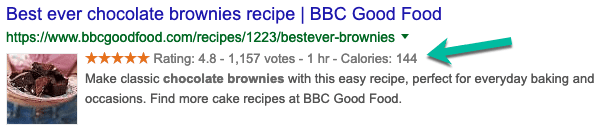
But a ‘rich snippet’ shows extra information between the URL and the description, and can include images, ratings, authors, votes, cooking time, calories, and more:
Note: According to Google, we’re supposed to call them ‘rich results’. But everyone refers to them as ‘rich snippets’, so we’ll stick to that.
Why do you need rich snippets?
I’m sure you’ll agree that search results with a rich snippet look more appealing than your typical listing, as you can see with the brownie recipes above.
Not only do they look better, but they also convey more information.
These two factors increase the chances of a user clicking the rich snippet. And because they’ve seen a snippet of the information contained in the article, users are less likely to be disappointed with the search result and stay longer on your site.
So, while rich snippets won’t help you rank higher in the SERPs, they’ll increase your CTR and reduce your bounce rate.
Which begs the question:
How do you get rich snippets?
If you want to highlight your website content in the SERPs with a rich snippet, then you need to use what’s called ‘structured data’.
Google describes structured data as: “a standardized format for providing information about a page and classifying the page content.”
When Google crawls the web and finds a page that contains structured data, it’s able to use that data to create the rich snippets that you see in the search results.
For example, on the chocolate brownie recipe page, Google interpreted the structured data, that looks like this:
<span itemprop="aggregateRating" itemscope="" itemtype="http://schema.org/AggregateRating"><meta itemprop="ratingValue" content="4.82368" /><meta itemprop="bestRating" content="5" /><meta itemprop="worstRating" content="1" /><meta itemprop="ratingCount" content="1157" /> </span> <span class="nutrition__value" itemprop="calories">144</span>
To show the star rating (4.8), the number of votes (1157), the cooking time (1 hr), and the calories (144) in the rich snippet:
Don’t panic!
We’ll show you how to add structured data to your pages later…
But first, we need to mention schema.
What is schema and structured data?
The terms ‘schema’ and ‘structured data’ often get interchanged.
Schema comes from Schema.org, which is a collaboration project between Google, Bing, Yandex, and Yahoo. It includes “a set of schemas for structured data on web pages and in email messages.”
In short: schema is the agreed markup vocabulary for structured data that helps all search engines understand the context of web page content.
For example, by applying some schema to the heading ‘Avatar’, you can tell the search engines if the content relates to a movie or profile picture. In turn, this helps search engines match search intent and display relevant content to a user.
Let’s take a look.
The types of items described by schema
There are many different types of schema markup including:
- Creative works (books, movies, music, etc.)
- Event (concerts, lectures, festivals, etc.)
- Organization
- Person
- Place (local businesses, restaurants, etc.)
- Product (offers, reviews, ratings, etc.)
Each type of schema has different properties or tags available.
For example, for Event, you can add tags for the event name, location, dates, prices, performers, speakers, schedule, etc.
Why is structured data important for SEO?
Using schema markup to add structured data to your pages helps to make your search results more relevant.
As long as you add the information correctly, it helps Google and the other search engines understand precisely what your content is about. And once they know that, they can present various forms of rich snippets in the search results.
For example, schema markup can produce rich snippets like:
- Breadcrumb – The navigation ‘arrows’ that indicates the page’s position in the site hierarchy:

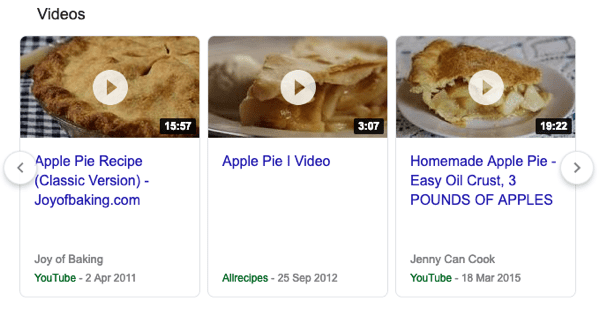
- Carousel – The rich results that display in a gallery. Most often, the carousel features articles or videos from a single site (known as a host carousel), but can also feature a variety of publishers, like these Apple Pie recipes:
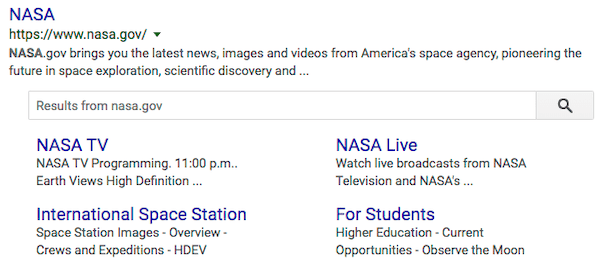
- Sitelinks Search Box – Adds a site search box below your website listing:
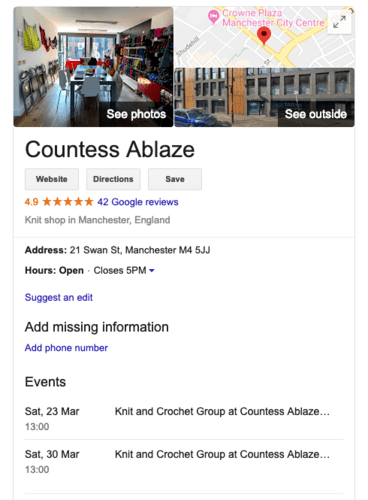
- Local Business – The details displayed in the Knowledge Graph – the big block of information on the right-hand side of search results – including opening hours, ratings, directions, and actions to book appointments or order items, which is especially important for local SEO:
You can see the complete list of rich snippets in Google’s Search Gallery.
How to add schema to your pages
By now, you’re probably itching to add schema to your content and start producing some rich snippets.
Depending on what platform you’re using there are a couple of ways to add the schema markup to your pages.
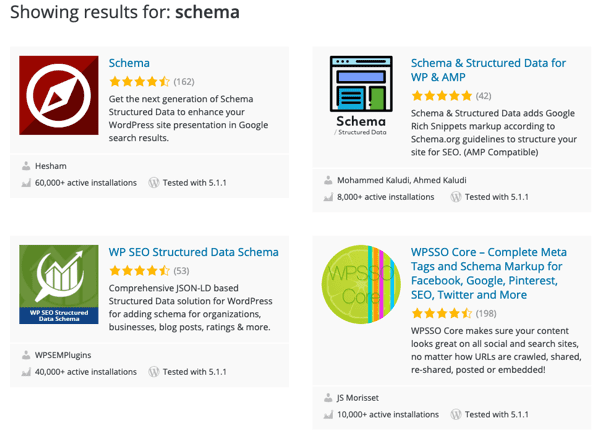
How to add schema markup using a WordPress plugin
If you’re using WordPress, then you can use a plugin to add the schema markup. Like most WordPress plugins, there are plenty to choose from:
But I’d recommend you start by reading Colin’s tutorial where he compares adding schema to WordPress using Schema Pro (premium) and All in One Schema.org Rich Snippets (free).
For instance, most plugins force you to add a review type box to your page summarizing the schema details:

But you might not want that – certainly not on every page you publish – so one advantage of using a premium plugin like Schema Pro is that you choose what to display.
Note: If you’d like to check out more schema plugins, head over to our post on The Best WordPress Schema Plugins.
How to add schema markup using Google’s Structured Data Markup Helper
If you’re not using WordPress (or you prefer not to use a plugin), then you can add schema markup manually using Google’s Structured Data Markup Helper:

The tool lets you mark up elements in either an HTML web page or an HTML email. But we’ll focus on adding schema markup to a web page:
- Choose the type of page that you wish to mark up; e.g. ‘Articles’
- Enter the URL of the page; e.g. https://azaharmedia.com/content-marketing-examples/
- Click ‘Start Tagging’:

The Markup Helper opens your selected page with a ‘My Data Items’ menu on the right-hand side:
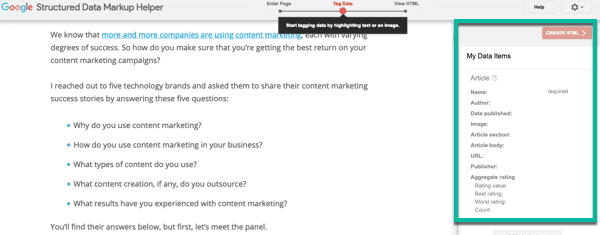
In the ‘My Data Items’ panel, you’ll see a list of all possible values for each item, with the required values labeled. For example, for an ‘Article’ you must provide an ‘Article Name’.
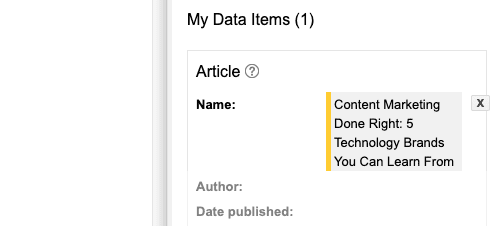
Next step is to highlight the parts of your page that have the information for the data items. For example, highlight the title of the article and click the ‘Name’ tag:

Now the information is displayed in the ‘My Data Items’ panel on the right:
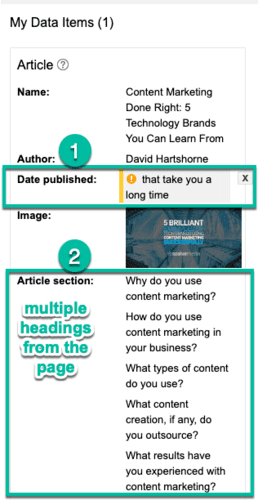
Repeat this process for each value:
- If you add data that looks wrong, then the Markup Helper flags it.
- You can highlight multiple parts of the page for the same tag; e.g. I’ve added each (H2) heading for the ‘Article Section’.
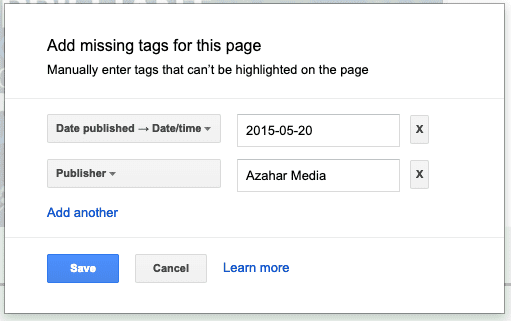
If you can’t find the information on your page to highlight, then click on ‘Add missing tags’ to add it manually:
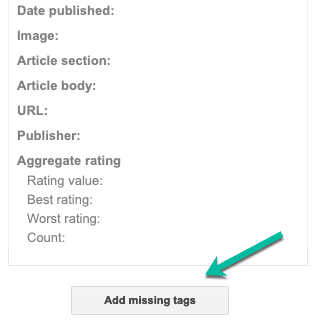
For example, you can add the ‘Date published’ and ‘Publisher’ details:
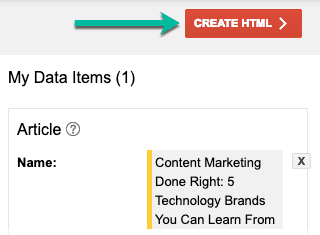
When you’ve finished tagging all the applicable data on the page, click ‘Create HTML’ to generate the page code:
Next, you have to choose an output format:
- JSON-LD – the new format preferred by Google
- Microdata – the older format
Each markup code differs slightly in appearance and where you apply it on your page.
For JSON-LD: You add the generated markup code to the head section of your page:
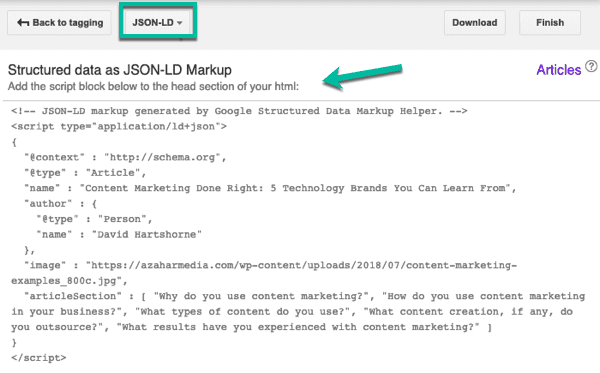
For example, this is how the JSON-LD markup code looks when applied to the head section of my webpage:
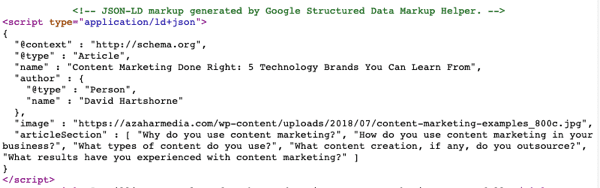
Note: The advantage of JSON-LD is that you only have to add one script block to your page.
For Microdata: You add the highlighted pieces of HTML code at various points on your page:
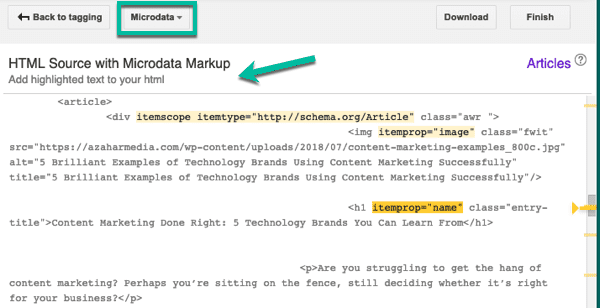
Note: Microdata Markup is a little more tricky as you have to edit your page in several places rather than just adding one script block at the beginning of the page.
Also, you may want to try Google’s Codelab where you can download a sample piece of HTML and learn how to code and test schema markup using JSON-LD.
How to test schema on your pages
Google provides another tool so you can check your schema markup code before applying it to your web page.
Copy and paste the generated code from the Markup Helper into the Structured Data Testing Tool.
The results show any missing fields that you must provide to help Google understand the page. For example, there are 3 errors and 3 warnings with this code:
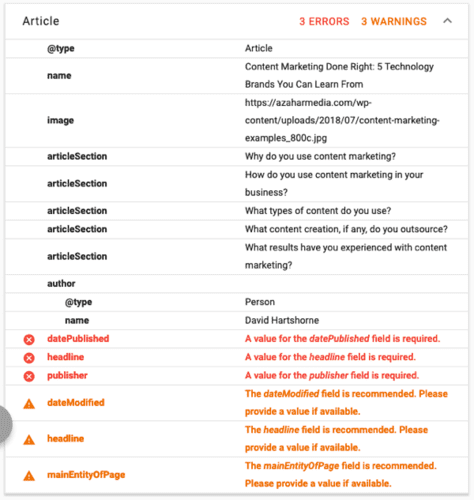
(Which is a bit misleading because they weren’t listed as required in the Markup Helper!)
If you need to amend the schema markup, you can go back to the tagging screen in the Markup Helper to add the required information and then test again.
Changes to review schema markup
Schema markup continues to develop and Google occasionally changes how that markup is displayed.
In September 2019, Google changed the way review snippets were displayed in an effort to improve user experience.
In a nutshell, they stopped showing review stars if the review appeared on the companies website. It appears this was an effort to improve trust worthiness in SERPs which is unsurprising given how some websites have used review schema in the past.
And while you could add review schema for any page before this, we now have to specify the type of review schema. For example, Product/Recipe/LocalBusiness, etc.
So, if you find that your review stars aren’t appearing – it’s likely due to the type of schema not being specified.
Wrapping up
Adding schema markup to your webpages does not guarantee you’ll get a rich snippet in the search results. But it definitely gives you a chance.
However, one thing for sure is that schema structured data is not going away. It’s only going to grow because Google and the other search engines want to show the best possible media rich results to their users.
So, what are you waiting for? Start adding and testing schema markup to your pages and get a slice of the rich snippet pie!
Finally, if you’re new to SEO in general, be sure to check out our detailed SEO guide.