How To Save Images From Google Docs (3 Methods)

Are you looking for a way to save images from Google Docs?
If you have ever tried to save an image from a Google Doc, surely you know how frustrating it can be. Google’s products, as great as they may, do not come without their flaws. And being able to save images straight from Google Docs is one of them.
In this post, we’re going to share with you 3 surefire workarounds for saving images from Google Docs, so you don’t have to be frustrated any longer.
3 ways to save images from Google Docs
Method 1: Publish to the web
The first way to save images from Google Docs is to publish your document to the web.
To do this, start by going to the top left hand corner of your Google Doc and click File. Next, scroll down to the option labeled Publish to the web.
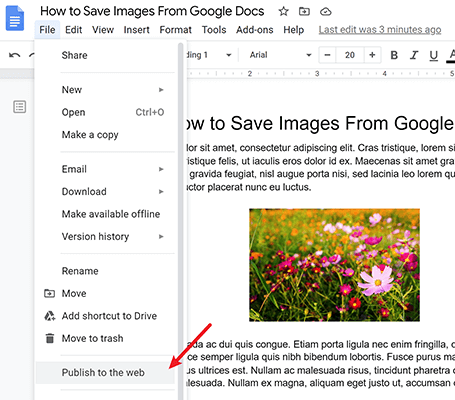
When you do this, a modal window will pop up. Make sure to click on the Link tab and then Publish.
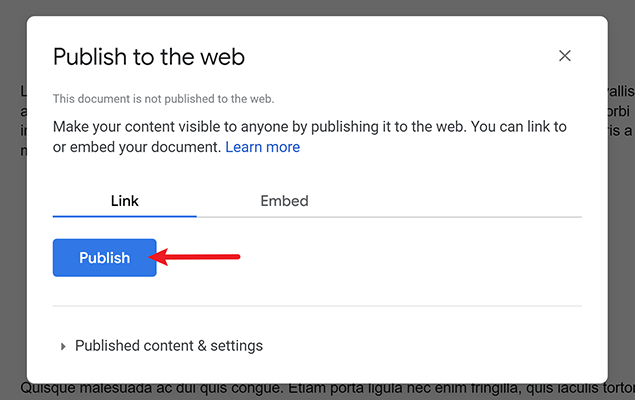
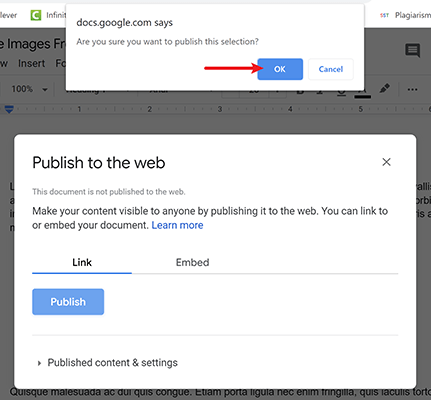
You’ll be asked to verify that you want to publish to the web. Click OK.
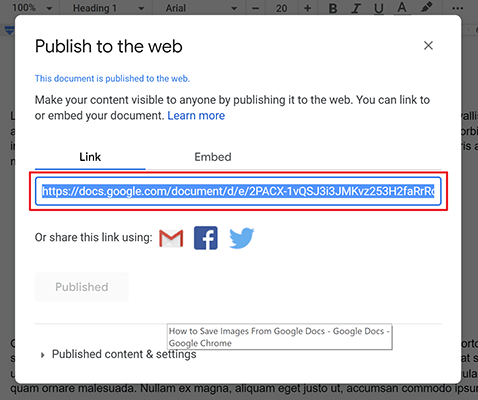
When you verify that you want to publish to the web, you’ll see a URL link appear. You’ll want to copy that link. The easiest way to do this is to click ctrl + C.
From there, you’ll want to open the copied link in a new page. When you do, you’ll see your document. To save the image, simply right click on the image and select Save image as….
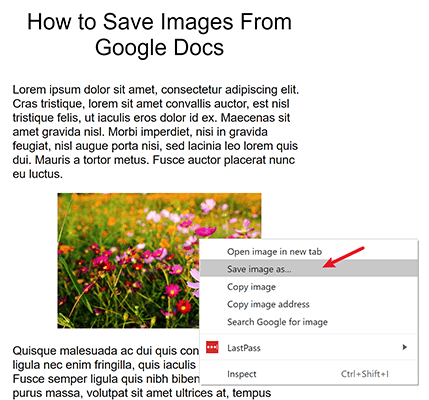
Lastly, save the image to a folder on your computer or on an external device, whichever you prefer.
Method 2: Download the document as HTML
Another common way to save images from Google Docs is to download your document as an HTML. When you do this, you’ll be able to access the images in the downloaded file.
The first thing you’ll need to do is go to the top left hand corner of your Google Doc and click File. From there, select Download > Web page (.html, zipped).
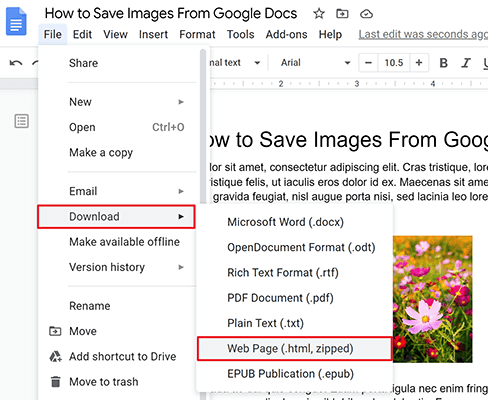
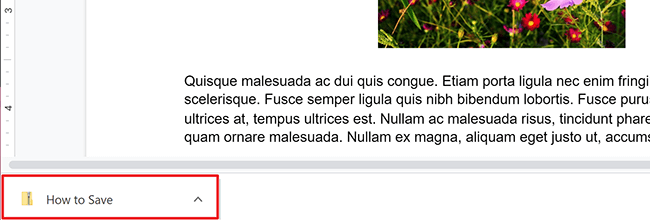
The next thing you’ll notice is that a zip file of your Google Doc will have been created. How this looks for you will depend on the computer and the browser you use. For my example, the zip file is automatically created and ready for download.
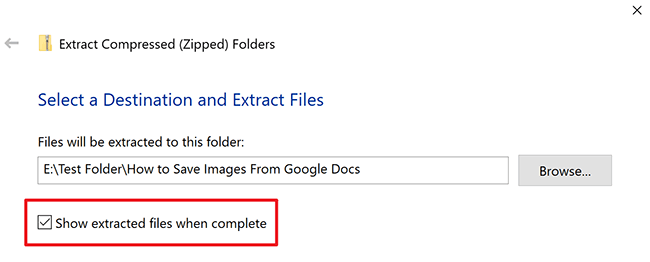
Make sure to save your newly created zip file somewhere safe and easily accessible. Then, unzip the file with your document by right clicking and selecting Extract All….
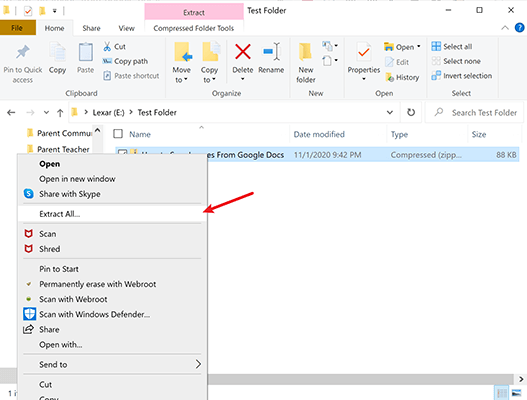
Make sure to click the Show extracted files when complete checkbox when the window pops up. Then click Extract.
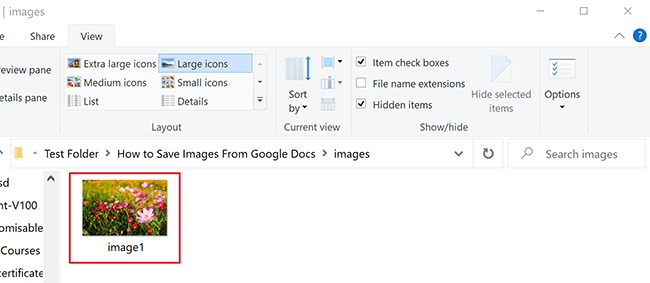
You’ll now see a new, unzipped folder has been created, complete with a folder called images. Here, you’ll find all your Google Doc images.
Method 3: Download the document as a Microsoft Word document
The last method we’ll show you for saving images from Google Docs is downloading your document as a Microsoft Word document.
To start, click File in the upper right hand corner of your document and go to Download > Microsoft Word (.docx).
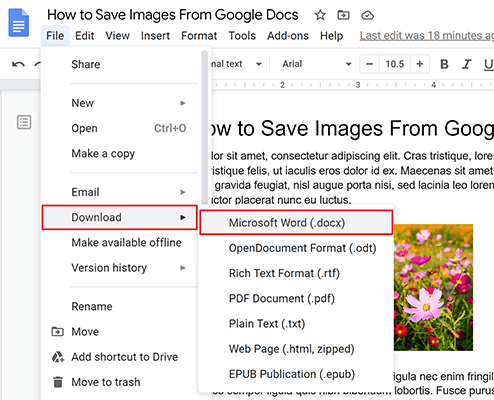
When you do, your document will automatically convert into a Microsoft Word document. In my example, my document appears at the bottom of my screen ready to be downloaded. However, your computer or browser might display this slightly differently.
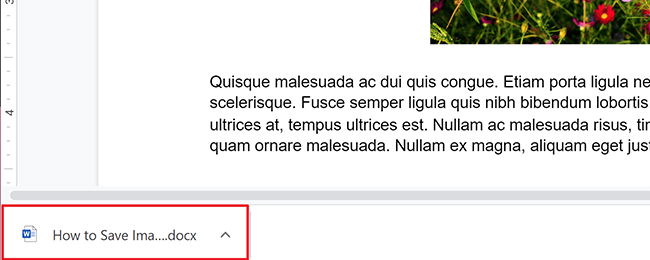
To save your images from the newly created Microsoft Word document, just open the document and right click on the image you want to save. Then, click Save as Picture.
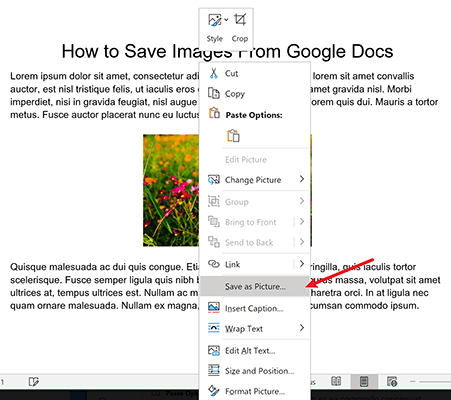
Then, name your image and save it in a safe and easily accessible place for later use.
Wrapping up
And there you have it! Three simple and easy to follow ways to save images from Google Docs.
If you love working with Google Docs, but find yourself frustrated with being able to save your document’s images, just follow one of the above-mentioned methods and watch your life become instantly easier. No one method is better than the other, it’s all a matter of preference. So, choose the one you like the best and start saving images from your Google Docs right away.
