Using The Gutenberg Block Editor: Gutenberg For Beginners

Do you want to use the Gutenberg block editor (also called the WordPress editor) but aren’t quite sure of how to add or use blocks?
In this post, you will learn how to use the new WordPress editor as well as how to extend its capabilities.
Ready? Let’s get started:
How to use the Gutenberg block editor
You’ll use the block editor when you create posts and pages in WordPress. It’s an intuitive tool that enables you to add content to your website without having to write HTML yourself, though you can switch between the visual (block) and code (HTML) editors freely.
Pages and posts are called “post types” in WordPress. The block editor is more or less the same for each with a few differences here and there depending on the post type.
We’re going to stick with posts, a post type you can create by hovering over Posts in the admin menu on the left side of the dashboard and selecting Add New.
We’ll also be using the Kadence WordPress theme, so our editor may have a few different settings than yours and our post may look a little different on the frontend. We also have the SEOPress SEO plugin installed, so you’ll see a few SEO-related panels in our screenshots.
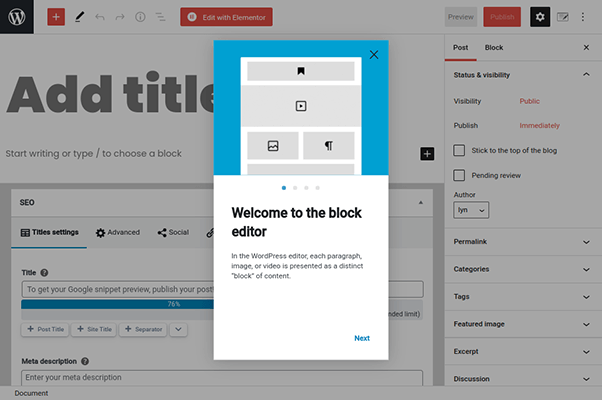
The block editor greets you with a welcome tour when you open it for the first time (and when you clear your browser’s cache, unfortunately). Feel free to take a second to browse through it.
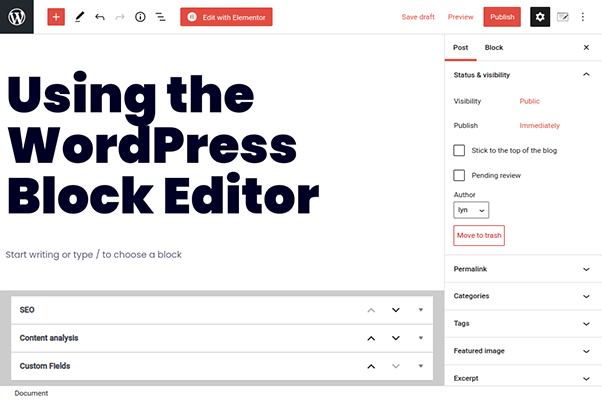
Start by inserting a title into the field labelled “Add Title.” This doesn’t need to be the actual title you want to use, yet. You can use a working title until you’re ready to publish the post. Adding a title now will simply help you recognize the draft when you view your All Posts list.
Just know that the title you put here will represent the title your post has on your website and when it gets shared on social media.
Click Save Draft next. This is a link located in the top-right menu of the editor. Alternatively, hit Ctrl/Cmd+S on your keyboard. The WordPress editor has an autosave functionality built in, but saving manually every now and then eliminates the risk of losing your draft if you suddenly lose power or your connection to the internet.
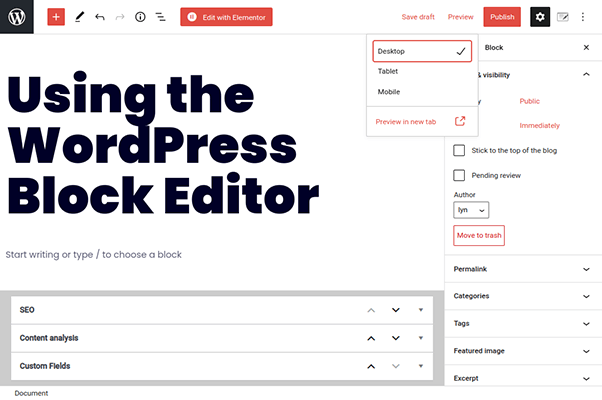
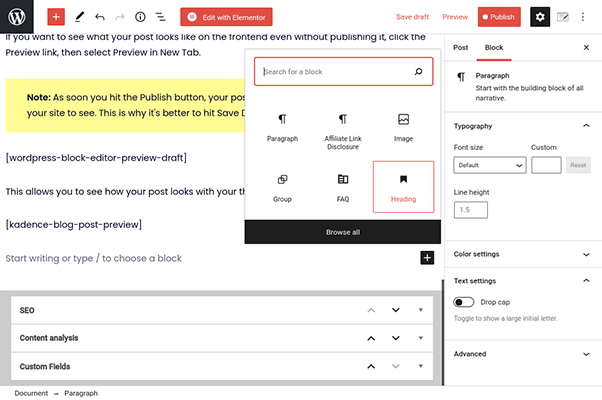
If you want to see what your post looks like on the frontend even without publishing it, click the Preview link, then select Preview in New Tab.
Note: As soon you hit the Publish button, your post will be live for everyone who visits your site to see. This is why it’s better to hit Save Draft to keep it offline for now.
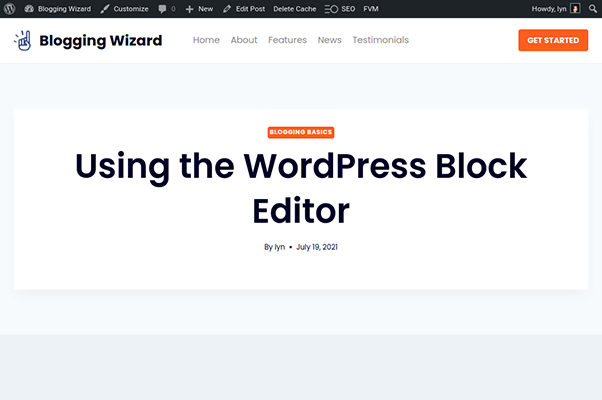
This allows you to see how your post looks with your theme’s style.
Using the Gutenberg block library
Any post or page you create with WordPress’ block editor is made up of content blocks. This means if your post has two paragraphs, then a heading and finally an image, you actually have two Paragraph blocks, a Heading block and an Image block.
WordPress has a few dozen blocks by default, but you can expand your library with plugins. Some third-party themes and plugins even come with their own blocks.
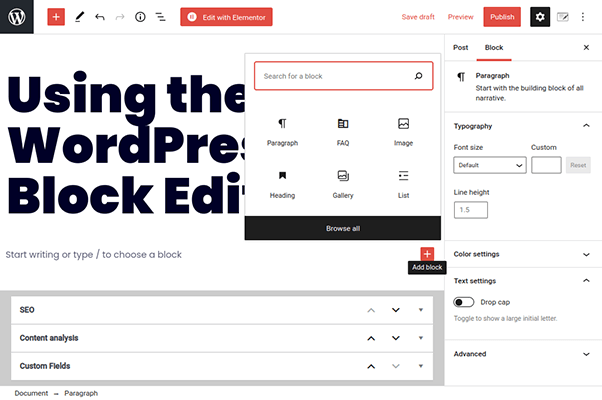
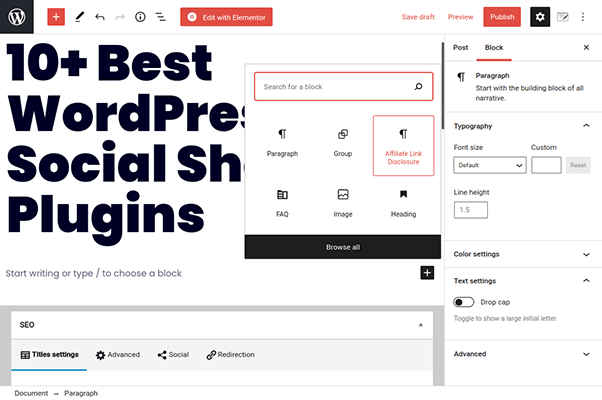
Let’s stick with WordPress’ default blocks for now. Start by clicking where it says Start Writing. This creates a Paragraph block automatically, and you can start typing if you want to add a paragraph.
Click the plus + button instead if you want to use a different block.
The Gutenberg block editor inherits your theme’s font styles by default so that your post looks as it’ll appear on the frontend while you create it. This is why the text in our screenshots likely look a little different from yours.
When you place your cursor within a Paragraph block, a floating toolbar appears. It allows you to transform the paragraph’s text in many ways, such as by adding bold or italicized styles or even including a link. It’s not too different from Microsoft Word or Google Docs.

Let’s talk about block settings, starting with the Paragraph block. If you look at the sidebar on the right side of the editor, you’ll notice there are two tabs: one for the entire post’s settings (Post) and one for the individual block’s settings (Block).
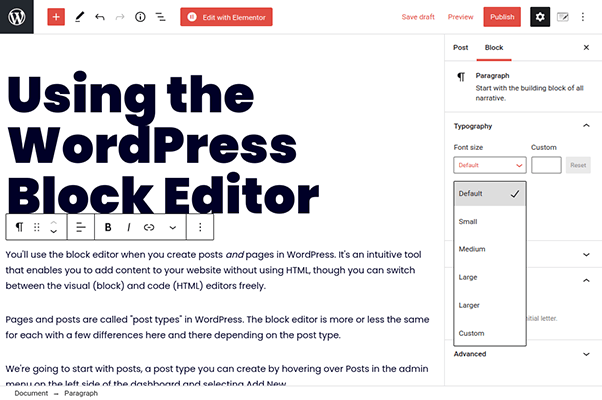
Click over to the Block tab if you aren’t there already. The Paragraph block has typography settings you can use to customize the font size this particular paragraph uses as well as the height each line within the paragraph should be.
Your theme already uses a global font size and line height, so we recommend leaving these settings alone unless you want this particular paragraph to have different settings. Customize your theme’s default typography settings instead by going to Appearance → Customizer.
The Color panel is closed by default. Click on it to open it, but keep in mind that text color is another global setting you can configure in the Customizer. Even so, this panel allows you to customize colors for a specific paragraph and even add a background to it.
The latter setting can be useful when you want to draw attention to a special note or warning.

Every new paragraph you create is a different Paragraph block and, therefore, has different settings. If you want to control the settings of multiple Paragraph blocks at once, you need to group them.
Highlight multiple paragraphs with your cursor, then click the three-dots menu hovering over them, and select Group.
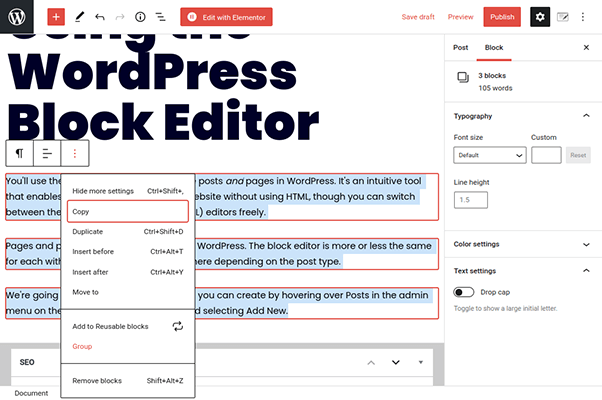
Now, you can edit color settings for multiple Paragraph blocks. Unfortunately, text settings still need to be configured individually as the group functionality is meant to be used to create multiple reusable blocks at once.
Speaking of which, when you click that three-dot menu for group and individual blocks, you’ll also notice an option called Add to Reusable Blocks.
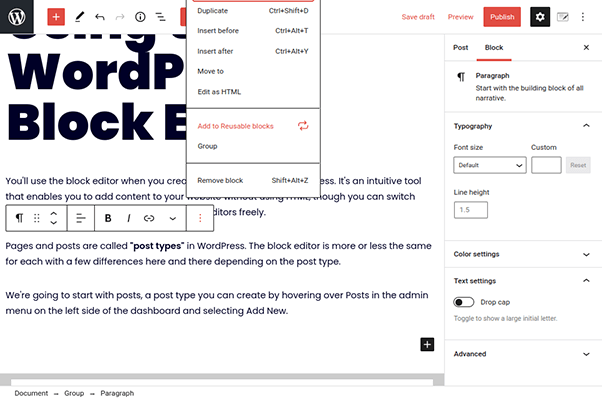
This allows you to save blocks you’ve created to your own personal library. It’ll save its content and settings. You can even give them unique names, such as “Social Media Call to Action.” When you want to use the block on another page, all you need to do is search for it when you add a new block.
In regards to Paragraph blocks, reusable blocks are great for information you often repeat in multiple posts. This includes disclosures for affiliate links and calls to action you use frequently, such as “follow me on Twitter and Instagram” with links to both profiles included.
Reusable blocks operate as global blocks. This means if you insert a reusable block in Post A, Post B and Post C, then add it to Post D with edited settings, those settings will also change in Posts A, B and C.
If you only want to change the block for Post D, you’ll need to click that three-dot menu again, and select Convert to Regular Block.
Heading block
Headings help us break blog posts up into sections and those sections down into subsections. It’s not unlike the way newspaper and magazine articles have been broken down into different sections for ages.
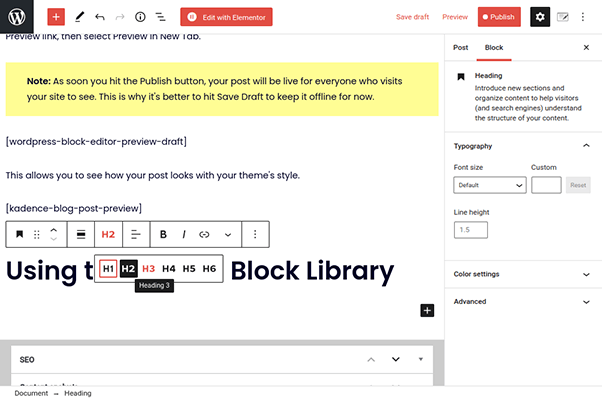
Web pages contain up to six headings: H1 through H6 or Heading 1 through Heading 6. The H1-H6 labels are HTML tags that represents a heading’s size and importance in SEO.
Your theme uses H1, the largest and most important heading, for post titles, so you should use H2 for primary headings throughout your post and H3 for secondary headings. H4-H6 are less common, but you can use them when needed.
If you’re having trouble finding the plus button again, place your cursor at the end of your last paragraph, and hit Enter. Then, use the button to add a Heading block to your post.
The H2 tag is selected by default. Click on it to select a different tag when you need to.
The settings are the same for Paragraph tags, so we won’t bother going over them. Just know that your theme’s typography settings in the Customizer should also have global settings for headings.
Image block
Follow the same steps to add an Image block, but select Image this time.
WordPress gives you three ways to upload images:
- Upload – Choose a file from your device to upload to WordPress. The file will be stored on your hosting server by default unless you set up an offload functionality for media files.
- Media Library – Choose an image from the WordPress media library. This library allows you to manage media files in WordPress. Choosing this option also allows you to upload multiple images at once but still choose to only assign one to this particular block.
- Insert from URL – Add a URL that contains your image, then choose which image to insert into your post. This option is ill-advised for many reasons. First, the image may get removed from the URL you insert, which will cause it to break on your site. Second, you may wind up committing copyright infringement if the image you insert is not attribution free. Finally, it’s best if you create your own original images so your blog comes off as more professional.
When you have an image selected, a floating toolbar will appear just as it did for the Paragraph and Heading blocks. It allows you to change the image’s alignment to left, right or center, add a link to the image, add text over it, and even crop it.
You can even add a caption to it underneath the image.
For settings, you can add a style to your image and alternative text. Use a short yet descriptive title as your alt text that represents what the image is. This is for SEO purposes.
You should also choose “Full Size” as an image size in most cases. WordPress will shrink your image down to your blog’s content width automatically.
Be sure to check out our guide on optimizing images for the web for more help in this area.
Other blocks and third-party blocks
Like we said, WordPress has a whole library filled with dozens of content blocks arranged in different sections. When you go to add a new block, click the Browse All button to view them all.
Here are a few common ones you may find yourself using:
- List
- Quote
- Pullquote
- Table
- Gallery
- Cover
- Media & Text
- Video
- Buttons
- Columns
- Social Icons
- Social Media Embeds
- FAQ
If you want access to more blocks, use a third-party block plugin. This gives you access to more content blocks, some of which are improvements on WordPress’ default blocks.
Ultimate Blocks is one of the most popular options out there. This free plugin gives you access to 20 additional blocks for the Gutenberg editor. These include Testimonial, Call to Action, Content Toggle, Tabbed Content, Table of Contents and more.
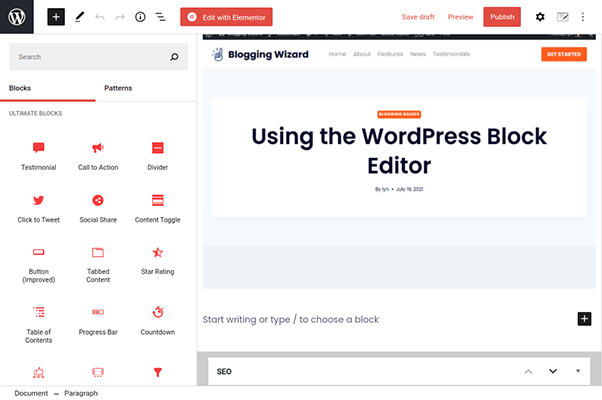
Another great option is Kadence Blocks, and a great pairing with the Kadence WordPress theme. The Kadence theme has site demos for the Gutenberg editor and Elementor, so the extra Gutenberg blocks are fantastic if you’d rather use the more lightweight Gutenberg editor to build your site over Elementor.
The plugin adds 15 blocks to your collection that offer better versions of Gutenberg’s default blocks as well as a few extras. These include Testimonial, Info Box, Accordion, Table of Contents, Countdown and more.
You can use Ultimate Blocks and Kadence Blocks alongside each other if you want to add both sets of blocks to your collection.
Kadence Blocks also has the Design Library, a button you’ll find in the top menu of the block editor. This library has three new categories of design elements for you to use. First, it has Sections, which are predesigned page sections, such as a pricing table, a contact form or a row to showcase team members, ready for you to import and use.
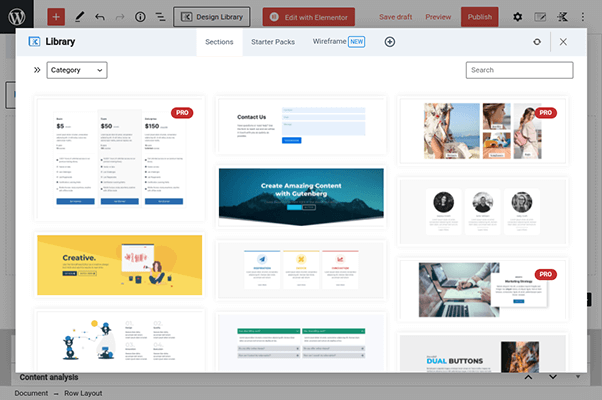
Starter Packs contain fully-designed pages. The Wireframe category contains design elements similar to the Sections category, except the wireframe elements do not have demo content.
Some plugins aren’t dedicated Gutenberg plugins, but they do have blocks you can use to add their functionalities to the block editor with ease. This is the case with WP Table Builder, a table plugin developed by the same team behind Ultimate Blocks.
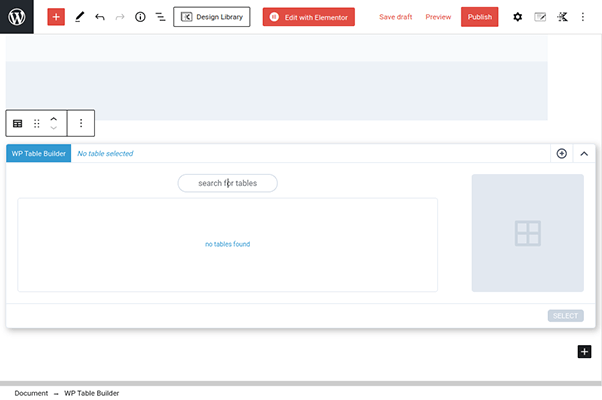
Now, you can insert well-designed pricing, data and comparison tables in the block editor without having to rely on a page builder.
Final thoughts
The Gutenberg block editor has a bit of a learning curve when you compare it to WYSIWYG editors like WordPress’ classic editor, but it’s incredibly easy to use once you get past those hurdles. Plus, it enables you to use more design elements in your blog posts without having to resort to a page builder plugin.
It also allows you to be more efficient if you write your drafts outside of WordPress in applications like Google Docs or Microsoft Word. These apps allow you to copy your posts from them and paste them into the Gutenberg block editor all while importing your links, headings and text styles from those apps. Google Docs will even export your images.
Related Reading:
- How To Add Pages In WordPress
- How To Add A Contact Form To WordPress
- How To Fix 500 Internal Server Errors In WordPress
- How To Add Google Analytics In WordPress
- How To Send SMS Messages With WordPress
Disclosure: Our content is reader-supported. If you click on certain links we may make a commission.