6 Types of Social Media Sites (And How To Use Them)

Social media is an integral part of our lives, so much so that it’s hard to imagine a world without it.
However, with so many social media platforms available, choosing which ones to use and how to utilize them for your business is overwhelming.
To help simplify things, we’re cutting through the noise by exploring various social media types, platforms, their unique features, and their pros and cons.
There’s lots to cover, so let’s dive in!
1. Traditional social networking sites
Examples: Meta (Facebook), Twitter, and LinkedIn
Traditional social networking platforms allow users to connect based on personal or professional relationships. Typically, users can create a profile, share content, connect with friends, family, and colleagues, and engage with others via commenting and reacting to posts, tagging users, sending direct messages, etc.
Let’s look at Facebook. Individuals can post ‘statuses’ and ‘Facebook stories’ sharing their experiences, thoughts, questions, and feelings with their network.
Facebook has the most social media users worldwide as of 2023 (2.9 billion), representing more than half of social media users worldwide (a total of 4.89 billion people). Where businesses are concerned, over 200 million companies use the platform’s tools in some guise or another, with 3 million actively advertising on Facebook.
Interestingly, Linkedin has been around longer than Facebook, marking its 20th anniversary this year. The platform has over 900 million members across 200 countries and regions. LinkedIn has cornered the careers and business networking market in a way that Facebook has yet to do. In fact, LinkedIn has a total of 58.4 million companies listed on the platform.
Our last flyby, Twitter, differs from these two social media platforms. While it has similar characteristics, I.e., you can create a profile, comment on posts, share content within your network, etc., it adopts more of a microblogging style. Twitter has around 368 million monthly active users, approximately 118 million of which are businesses.
For the uninitiated, you can publish short snippets or ‘Tweets.’ So it’s ideal for providing real-time updates and breaking news coverage.
As such, it’s unsurprising that Pew Research Center notes that Twitter users are more likely to say the platform has impacted their lives in various ways, namely helping them understand current events, learn about celebrities, and engage in political discussions.
Pros
- Traditional social media networks boast some of the largest audiences for businesses to tap into.
- You can use targeted paid-for advertising to fuel your social media marketing campaigns. This comes in handy for honing in on user interests and trends.
- There are a few reputation management features you can utilize. For example, on Facebook, you can hide or delete comments. On LinkedIn, you can disable, re-enable and limit comments on posts. Lastly, on Twitter, you can modify who can reply to tweets, disable comments, and turn off retweets.
Cons
- You must adapt to the platform’s algorithm to keep up.
- For Facebook, 41% of its users are 45 or over (This isn’t necessarily a drawback, it’s just worth highlighting there are better platforms than this if you’re targeting a younger cohort).
- On Twitter, user growth has stalled in comparison to other platforms.
How to use them
Posting consistent, high-quality content is also essential for bolstering engagement.
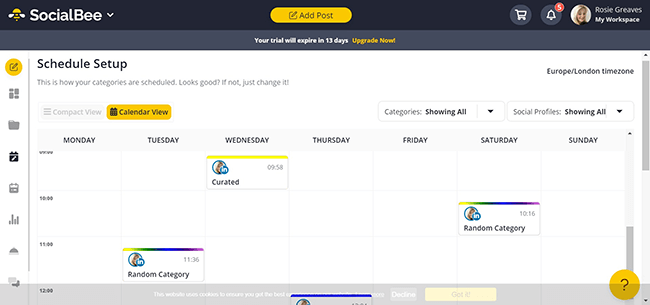
Fortunately, social media planning tools can help with this. For example, platforms like SocialBee make automating content across different socials easy. But you don’t need to rely solely on these tools for insights into the effectiveness of your social media strategy. Most traditional social networks come with built-in analytics.
For example, on Facebook, head to Facebook Page Insights to analyze your page’s performance, demographics data, and insights into how your audience responds to posts. With this data, you’ll be better positioned to optimize your efforts.
2. Image sharing
Examples: Instagram, Snapchat, and Pinterest
Photo-sharing platforms, yes, you guessed it, focus on users sharing photos and video content with their followers.
Instagram has 2 billion active users and is the world’s fourth most popular social media platform. You can upload photos and videos to your grid or story and interact with others through likes, comments, tagging, direct messages, etc.
This platform is handy for building relationships with influencers to expand your reach. In fact, Instagram influencers with 5,000 to 20,000 followers account for 44.13% of all influencer social accounts.
While Snapchat users can share photos, text, drawings, and videos with their friends and followers via its stories function, it’s used more for personal communication than public sharing, with the messages/content you send disappearing after 24 hours.
Users can also add filters and lenses to their photos and videos, making it a fun platform. Businesses can use it to publish ‘behind the scenes’ content, add branded filters and lenses (i.e., send snaps from specific locations, like different branches of your business), and advertise on the platform via Snap Ads.
These are full-screen vertical videos up to three minutes long.
Again, Pinterest’s focus somewhat differs from Instagram and Snapchat. Users can discover, gain inspiration from, and save ‘pins’ for projects, recipes, fashion, weddings, etc., onto ‘boards’ and follow other users.
Although Pinterest has a smaller user base of 445 million and Snapchat with 635 million, both networks cater to specific audiences, which is essential when considering how to make the most of these platforms.
For example, most of Pinterest’s audience is women (76.2%), so if your core audience is female, this is the place to be. Businesses also use Pinterest to display visual aspects of their brand, and it’s currently the only social platform to support visual searches. So, if your company sells aesthetically pleasing products, Pinterest is excellent.
Where Snapchat’s concerned, a 2020 report found that its largest advertising audience was females aged 25-34. So be sure to bear that in mind when creating your advertising strategy.
Pros
- Photo-sharing social networks champion visual storytelling, making showcasing your business’s ideas and products easier – especially if they’re aesthetically pleasing.
- Photo-sharing socials tend to be more community-based, better positioning businesses to foster brand loyalty.
Cons
- Since photo-sharing socials prioritize visual content, everything you publish must be pristine to stay competitive. This takes time and effort.
- It’s often harder to communicate complex information due to textual limitations.
How to use them
As we’ve already said, first-rate visuals are crucial for success on these platforms. Branding is everything, so with each post, consider the message you’re conveying and to whom. This extends to using the right hashtags (you can use tools like Sendible to help with this).
You’ll also want to utilize each platform’s in-built analytics tools to better understand your customer demographic so that you can tailor your content accordingly.
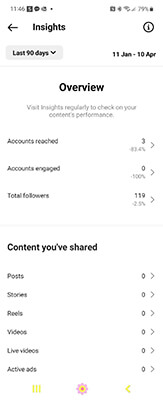
For example, on Instagram, you can view data on posts, stories, videos, live videos, reels, and more. As shown in the screenshot below:
On Pinterest, you can use Pinterest analytics to view organic, paid, and earned engagement on your pins, view how people interact with your content, see your most popular pins, and more. As for Snapchat, you can oversee insights into snap engagement over 7-28 days and subscriber numbers by age, gender, location, etc.
Photo-sharing socials are also great for engaging with customers in a way that’s ‘fun.’ For example, running a caption contest, lucky dip style competitions, lives, etc.
They’re also ideal if you want to forge user-generated content. For instance, you could ask customers to post images of themselves using/wearing your product and tag you. You could incentivize your following by offering freebies to the best ones.
3. Community blogging
Examples: Medium and Tumblr
Community blogging platforms enable users to create and share longer-from content such as blog posts.
Depending on the platform, you can interact with other users’ content through comments, likes, and reblogs.
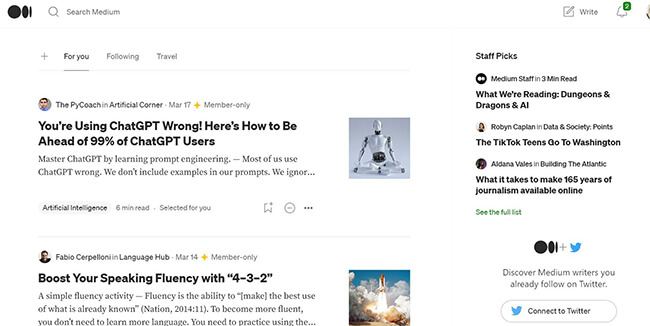
Let’s start with Medium. This is ideal for writers looking to publish and share articles with a broader audience. Medium attracts over 100 million readers each month! Established by Twitter Co-Founder Ev Williams, Medium’s unique algorithm promotes high-quality long-form educational and intellectual content.
Conversely, Tumblr is a microblogging platform that allows users to publish short-form content comprising text, images, gifs, and videos. In addition, users can customize their blog’s theme using Tumblr’s Customizer tool. Over 496 million blogs have been created using Tumblr.
It’s worth noting that Tumblr’s more popular among younger audiences; 10% of 15-25-year-olds and 11% of 26-35-year-old internet users use it. So if that’s your target audience, Tumblr might be worth considering.
Pros
- Community blogging platforms allow you to express ideas and share opinions more deeply.
- Brands can use their blogs to discover what matters to their target audience.
- You can create a sense of community based on shared interests.
Cons
- Content can quickly become old news, so it’s important to keep giving your audience fresh scoops to engage.
- Negative comments or criticism can impact a user’s brand image. In Medium’s case, you can’t stop people from commenting, but you can manage responses by hiding individual comments. On Tumblr, you decide who replies to posts, i.e., everyone or Tumblrs you follow and Tumblrs following you, or just Tumblrs you follow. You can also delete replies to your posts or block someone.
- Creating high-quality long-form posts requires time-consuming research.
How to use them
Businesses can use community blogging platforms to position themselves as industry leaders and create lasting connections with their audience.
On all the platforms mentioned above, businesses can repost blogs from their website with links redirecting readers to their sites/online stores. However, with Medium, brands can also create Publications. These are content hubs with posts published by different authors that live in one place.
Where Tumblr is concerned, businesses can engage with people via ads. Tumblr can also be used as a website (as mentioned above). So if a business’s demographic fits with Tumblr users, that may be an option.
4. Social messaging apps
Examples: Whatsapp and Facebook Messenger
Social messaging apps empower businesses to communicate with customers more directly, allowing them to exchange text, images, audio, and video messages in real-time.
WhatsApp has 2 billion monthly active users, and Facebook Messenger has 1.3 billion. While WhatsApp was previously geared toward personal communication, the company has since expanded to cater to business comms, allowing companies to connect with customers in real time.
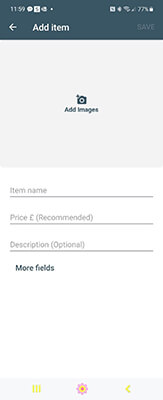
Businesses dealing with large volumes of queries can set up chatbots. They can also send marketing messages, for example, by distributing digital catalogs for customers to browse within the app.
Below is what it looks like to add an item to your digital catalog:
A lot of the above is also true of Facebook Messenger. Businesses can also set up chatbots to answer frequently asked questions. Plus, you can use stickers and GIFs to inject some of your brand’s personality into live chats. Plus, you can host video calls and send out marketing messages.
Pros
- You can instantly answer customer queries.
- Businesses can use the social media apps’ automation tools to respond to large volumes of questions.
- In addition to text, you can host voice and video chats and send images – all of which are great for getting to the bottom of customer queries.
Cons
- Some customers may find comms via messaging apps intrusive.
- As these are business conversations, customers must understand their rights concerning GDPR and your business’s terms and conditions. You don’t want to accidentally get yourself into legal bother!
How to use them
Messaging apps are great for connecting with customers through direct messaging, group chats, chatbots, and sharing links. This is especially true when quick-fire communication is necessary.
You can use WhatsApp and Facebook Messenger to provide customer support, order tracking, and send surveys.
However, businesses need the capacity and capability to manage such communications. You must also have your customer’s consent to communicate this way and comply with privacy and data-related regulations.
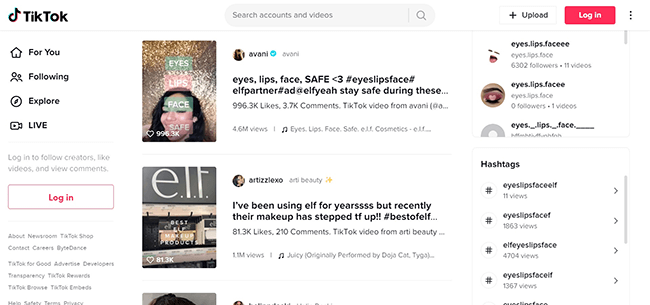
5. Video-sharing social networks
Examples: TikTok and YouTube
As you may have guessed, video-sharing social networks are online platforms that focus on users uploading, sharing, and/or streaming videos to their followers and/or the general public.
YouTube and TikTok are two of the most famous video-sharing social networks. YouTube boasts a whopping 2.1 billion users worldwide. In contrast, TikTok rakes in around one billion monthly active users!
With such massive numbers of active users, it’s no wonder that more and more businesses are turning to video-centric platforms to extend their brand’s reach. In fact, as many as 86% of marketers have used video at some point!
What’s pretty cool about YouTube is that everyone uses it – so you’re bound to find your target demographic here. In fact, 92% of all US internet users access YouTube weekly.
In contrast, TikTok’s favored by younger cohorts. For instance, in the US, 25% of TikTok users are aged 10-19, 22.4% are 20-29, and 21.7% are 30-39, respectively. So, if Gen Z and Millenials are your target audience and your content lends itself to videos, TikTok is worth considering.
Pros
- Video content is ideal if you need to explain something in more detail. For instance, does your product or software have a set-up process? If so, a how-to video could be beneficial.
- Video is a great way to inject some personality into your brand, which makes video-sharing sites great for brands selling a specific lifestyle.
- There’s the potential for your video to go viral or to kickstart the latest video craze. For example, Elf Cosmetics. Their ‘Eyes Lips Face’ challenge generated four billion views and three million user-generated videos!
Cons
- You’ll need to familiarize yourself with YouTube and TikTok’s algorithms to optimize your videos for SEO. For beginners, this might be a bit daunting and time-consuming.
- There are literally millions of videos on YouTube and TikTok, so standing out against competitors can be tricky.
- YouTube and TikTok videos are notorious for attracting spam and troll comments, so you might have to dedicate more time than you’d like moderating said comments.
How to use them
Businesses can create their own YouTube channel and TikTok profiles to provide a centralized place to access their videos. Either way, you’ll want to optimize this page by adding links to your website/eCommerce store/landing page (whatever best aligns with your business goals). You should also add a high-quality profile picture that reflects your brand.
Add calls to action within your video, whether that’s clicking a link in the description, signing up for your newsletter, or following/subscribing to your account, be sure to tell your audience exactly what you want from them.
Pro tip: One study suggests conversions are higher when you post a CTA midway through the video.
TikTok video creators like to follow the latest ‘TikTok trends,’ whether this is the newest dance challenge, a day in the life video, or a “Karen” skit, keep an eye on what’s trending.
The easiest way to do this is to follow competitors and influencers in your niche and regularly look at your discovery page. Then, when a new trend that is relevant to your brand drops, jump on the bandwagon!
6. Forum-style social media networks
Examples: Reddit and Quora
Forum-style social media networks like Reddit and Quora work much like online message boards, providing the ideal space for people to talk with one another, share opinions, and find information.
Reddit is a news aggregator and discussion forum where users can create their own “subreddits” covering any topic they choose. When people post to said subreddit, users can rate the post with a thumbs up or down. The more popular comments appear at the top of the subreddit.
For businesses, Reddit is an excellent way to stay ahead of what’s happening in your niche, build community, participate in lively discussions around shared interests, and receive insights from engaged users.
In contrast, Quora is a user-generated question-and-answer platform where people go to find information. Unlike Reddit, Quora is only for questions. Another key difference is that user profiles on Quora are often more transparent.
Users frequently display their name, credentials, where they studied, location, etc. As a result, people tend to be more professional. In contrast, Reddit profiles are often anonymous, so people are more likely to crack jokes and make sarcastic comments.
Pros
- Forum-style social media networks are great for engaging with people in your niche.
- These platforms are excellent for monitoring the latest trends and receiving feedback.
Cons
- Often, these kinds of social media sites elicit their own jargon – especially Reddit. So, you’ll need to familiarize yourself with this terminology to make the most out of the platform.
- Although fostering open discussion is a good thing, it can often lead to confrontations, sometimes resulting in bullying.
How to use them
Online etiquette is integral when using forum-style social media channels. So, before diving in, read the platform’s guidelines and acquaint yourself with how people behave so you can follow suit.
But generally speaking, you need to consider the community first when you contribute on a platform like Reddit or Quora. Be sure you’re posting something original (i.e., you’re not repeating what someone else has already said) and offering genuine value.
On top of that, businesses can bolster visibility by launching sponsored ads on Reddit and Quora.

Moreover, Quora allows you to hyperlink text to provide extra information where necessary. So, let’s say, for example, you’ve written a helpful blog post about the question someone’s asked; you could hyperlink your blog post and drive traffic organically to your website while providing value to the community – win-win!
Takeaways
That’s all we have time for today. But to sum up:
- Traditional social networking sites are best for: Businesses looking to connect with larger online audiences, dabble with targeted paid-for advertising, and post different types of shareable content.
- Photo-sharing platforms are best for: Brands looking to prioritize image-led storytelling that users can engage with.
- Community blogging platforms are best for: Providing long-form educational content to establish yourself as an authority in your industry and build a community around shared interests.
- Social messaging apps are best for: Situations where customers expect and want fast responses from your business.
- Video-sharing social networks are best for: Businesses looking to convey more complex information quickly, jump on viral video trends, and showcase their brand’s personality.
- Forum-style social networks are best for: Companies wanting honest insights from people within their niche and to stay ahead of trends.
Relating reading:
- How To Choose A Niche For Your Blog [+ 100 Niche Ideas]
- How To Build A Social Media Marketing Strategy
- The Best Times To Post On Social Media: The Definitive Guide
- 5 Inspiring Social Media Marketing Examples
Disclosure: Our content is reader-supported. If you click on certain links we may make a commission.