How To Add Testimonials To Any WordPress Page

Do you want a simple way to collect and add testimonials to any page on your WordPress site so you can utilize the power of social proof?
In this post, we’re going to use the Strong Testimonials WordPress plugin to demonstrate an easy way to add testimonials to WordPress.
Ready? Let’s get started:
Step 1: Install Strong Testimonials
Strong Testimonials is a WordPress plugin that makes it easy to display testimonials on your website.
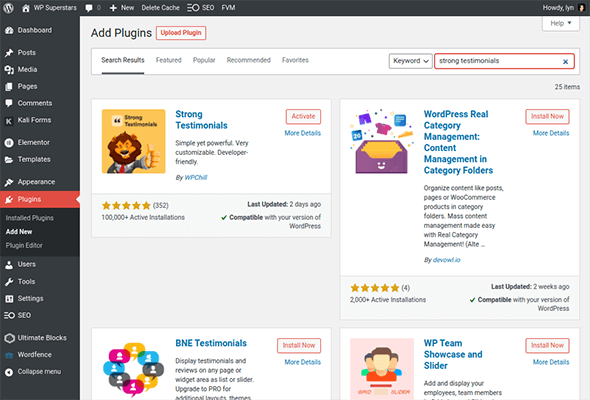
Since the plugin is freemium, you’ll find a free version on the plugin repository. Or you can opt for the premium version to unlock more features.
I’d recommend checking out the comparison on their website so you can get an idea of the differences between the free and premium versions.
For most sites, the free version might be enough but the premium version is pretty affordable. Plans start at $49/year but there’s also a $99/year plan that’d give you all the features you could possibly need from a testimonial plugin.
You can get started just fine with the free version, but we’ll reference the premium plugin throughout this tutorial when relevant.
Step 2: Edit your testimonial form
Strong Testimonials works in this way: you insert the plugin’s form on your site, and the plugin generates testimonials from the information collected from this form.
There are other ways to collect testimonials with this plugin, but we’ll get to that later.
The plugin will then generate a shortcode to display your testimonials, which you can insert anywhere shortcodes are accepted in WordPress.
Naturally, we’ll start by editing the plugin’s default form. Go to Testimonials → Form.
You’ll find the form editor on the left side and a preview on the right. The editor works in the same way menus and widgets work in WordPress, so the interface should be familiar.
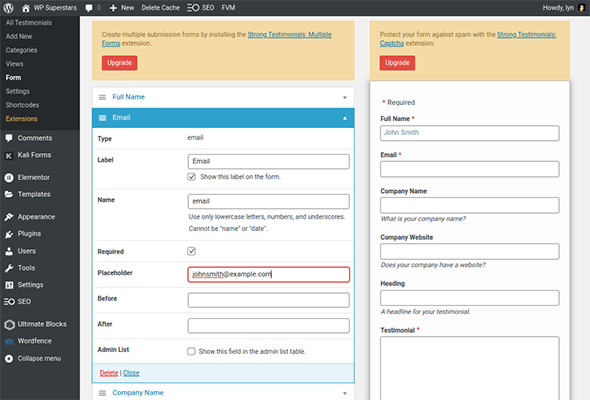
Determine what information you’d like to display in testimonials, then add and remove fields accordingly. You can also edit pre-existing fields, such as by assigning placeholder text to each one.
If you upgrade to the Business tier of Strong Testimonials, you’ll have access to multiple forms and advanced custom fields.
Take a moment to switch over to the Settings tab for your form to customize the submit button and thank you message.
Be sure to save your changes before continuing.
Step 3: Add your form to your website
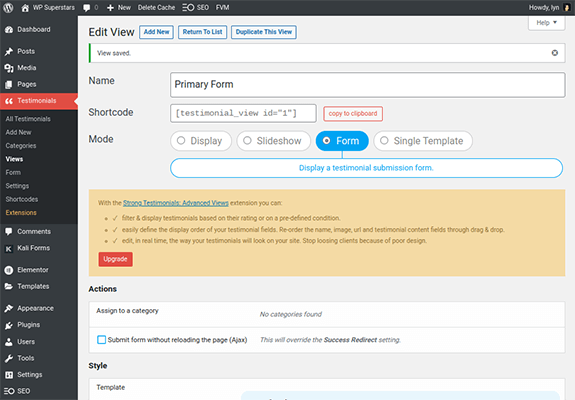
Next, you need to generate a shortcode to display your form. Go to Testimonials → Views → Add New.
Give your view a descriptive name, such as “Primary Form,” and select Form as a mode.
Next, configure your form’s styles to your liking, then save your changes to generate your shortcode:
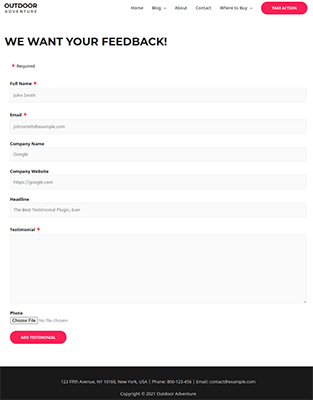
All you need to do now is add the shortcode wherever you want to collect testimonials from customers:
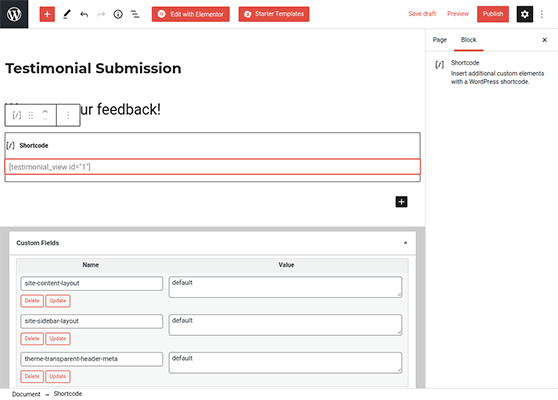
This will display the form on the frontend of your site:
Step 4: Add existing testimonials to your site
The testimonial submission form is an effective way to collect testimonials from customers through marketing campaigns. However, what if you already have “testimonials” in the form of reviews on platforms like Google, Facebook and Yelp?
Plus, what if you want to gather testimonials by contacting customers directly and having them provide their testimonials via email or word of mouth? What if you want to gather them by citing quotes from blog and YouTube reviews?
Strong Testimonials offers two ways for you to add testimonials to your site without a form. First, you can navigate to Testimonials → Add New to add testimonials manually.

Here, you can use the classic editor to input your testimonial, the Client Details section to add your customer’s personal information and the featured image uploader to assign an image.
You can also set up an excerpt to use in the next step.
If you purchase the second-tier premium plan or higher, you can also use the External Platform Importer extension to import reviews from Google, Facebook, Yelp, WooCommerce and Zomato.
Step 5: Create a view for your testimonials
Head back to the Views page to generate a shortcode for your testimonials. This time, leave the default Display mode selected, and give your view a descriptive name, such as “Most Recent Testimonials.”
Most of the settings are self-explanatory. Choose between displaying multiple testimonials or one, the order in which to display multiple testimonials (newest first, oldest first, etc.), and the total number of testimonials to display.

If you purchase the second-tier premium plan or higher, you can even filter testimonials by star rating and other predefined conditions.
In the Fields section, choose whether or not to display a title for each testimonial and whether or not the plugin should locate your customer’s Gravatar image if they choose not to upload one.
You can select the excerpt you created here as well by selecting “Manual Excerpt” for the Content setting.
You’ll notice only the Full Name and Company Name fields are selected to display by default. Add additional fields as needed.
Configure the pagination, styles and layout features to your liking, then save your changes and copy your shortcode before continuing.
Step 6: Add your testimonials to a WordPress page
With your shortcode ready to go, you can now add the testimonials you’ve collected to any WordPress page.
All you need to do is the paste the shortcode wherever you’d like to display them.

What’s next?
That’s it! Now, all that is left is to play around with the settings until the content and styles have the appearance you’re looking for.
Related Reading:
- How To Send SMS Messages With WordPress
- How To Add Opt-In Forms In WordPress
- How To Add Google Analytics In WordPress
- The Best WordPress Testimonial Plugins Compared
Disclosure: Our content is reader-supported. If you click on certain links we may make a commission.